

Last week I posted that my BT3000 had been making an unusual noise for the previous several days and actually seized up last Saturday. Shortly after it first started, I checked the belts, they were not broken, I also removed the brushes, they were ok and after cleaning those as well as the brushholders re-installed them. Doing that did not resolve the problem and I was starting to suspect bearings.
Earlier this week I took the saw apart to get at the bearings.
I needed to determine if it was a bearing and if so which one. There are a total of 5 bearings in the drive system of the saw; two on the motor armature assembly and three on the arbor assembly.
My manual does not have a complete exploded view of the drive assembly, only of the motor assembly. Here is a link to that drawing on the Ryobi website:
Sorry, that link does not seem to work, so here it is a better way.
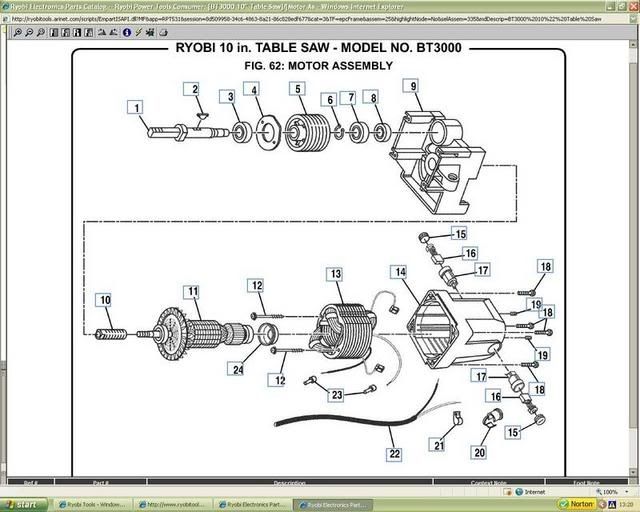
When you see a number in my narrative in brackets behind the name of a part, it refers to the item number of that part as shown in the appropriate exploded view drawing, either of the complete saw or of the motor assembly.
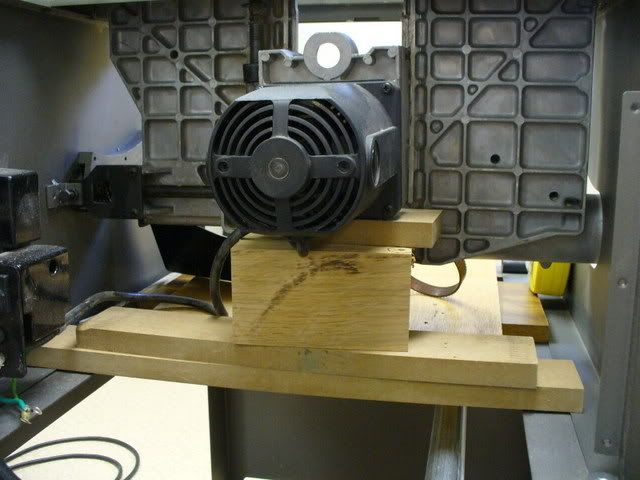
I started by removing both side panels(8 & 9) of the saw as well as the dust cover(12)
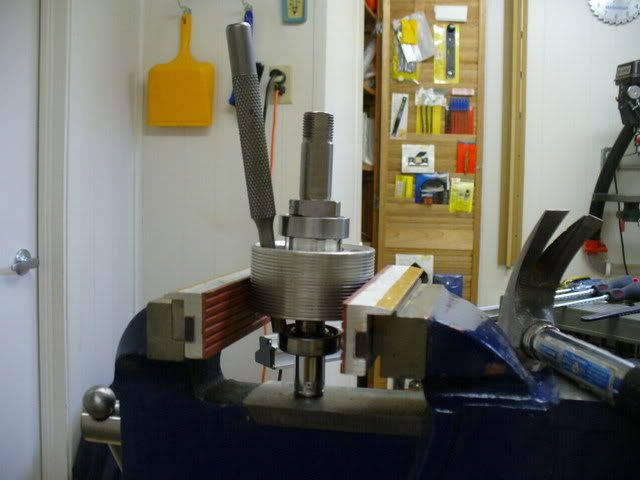
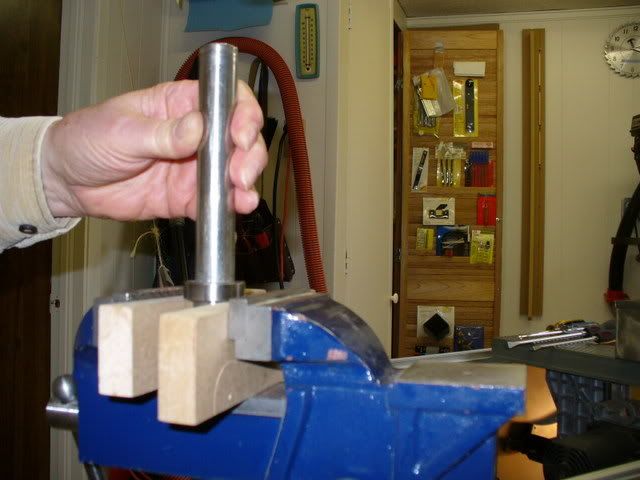
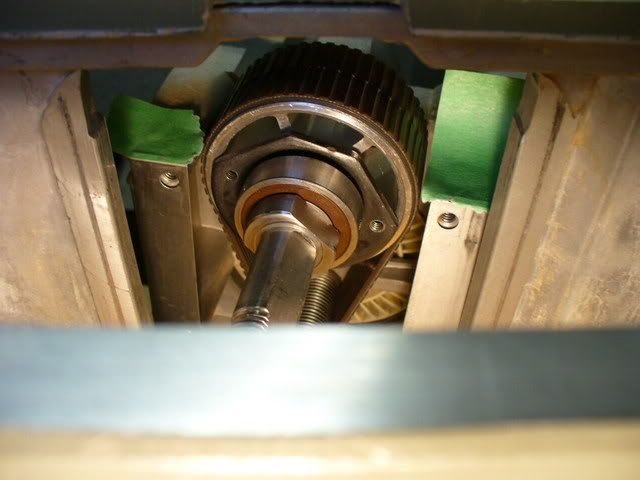
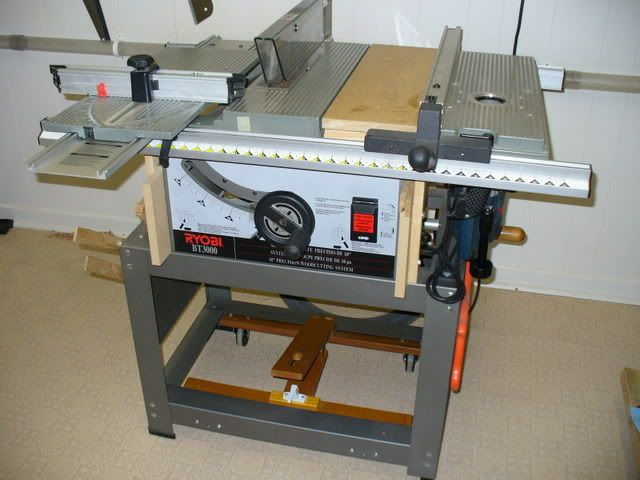
I won�t go into the details of removing the guideholder(80). Mark Stripes aka �Black Walnut� has an excellent article on doing that in the articles section of the forum. The picture below shows how I supported the motor while doing the rest of the job.
The next job was the removal of the belts. In order to determine whether is was an arbor or motor bearing, I needed to be able to independently rotate either unit. While the saw was seized up in the regular direction of rotation, fortunately for some reason or other as was able to rotate the drive system in the opposite direction, this allowed me to �walk� the belts off by pulling the right side of the belt towards me and rotating the arbor pulley counterclockwise at the same time, it�s a heck of a job, there is little space to do this but eventually I got them of the pulleys. The grooves on the pulleys and on the back of the belts make it very difficult.
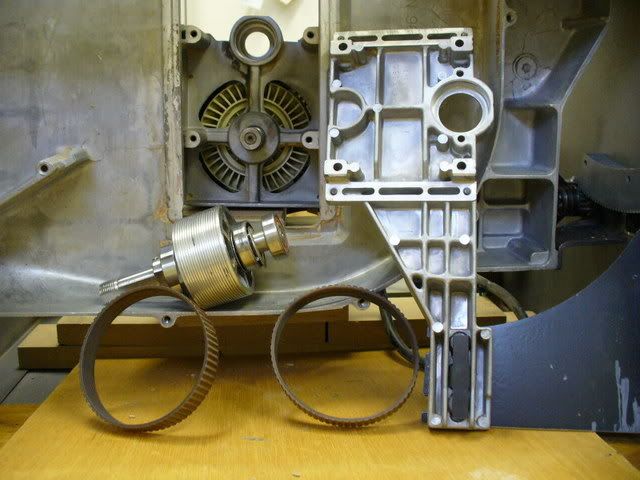
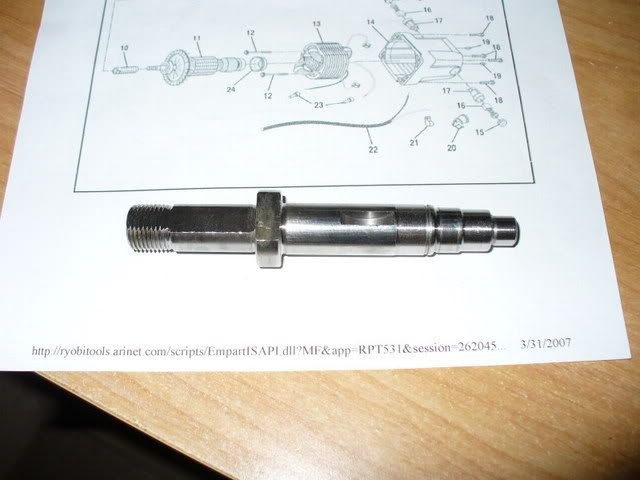
Once the belts were removed from the pulleys, I could determine that is was the arbor that was seized up and not the motor. The motor turned freely. I pulled the arbor assy. from the motor bracket(9). Fortunately that was fairly easy. You�ll see the disassembled parts in the next picture.
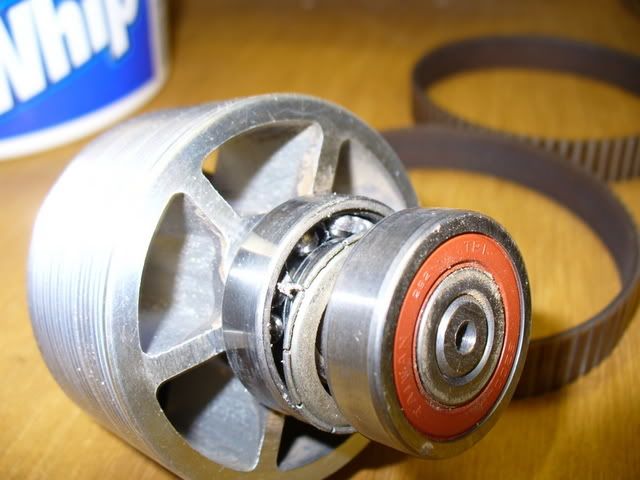
When I took a closer look at the arbor assemble it was obvious which bearing was given me the problem.
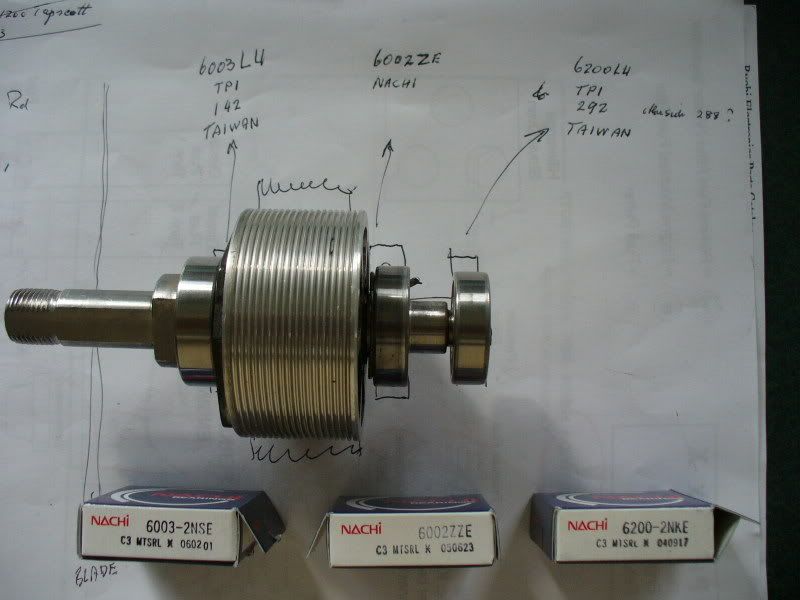
You can see that bearing(7) was the culprit. In the next picture it clearly shows that the shield has broken loose and that the ball cage has disintegrated. It�s interesting to note that the bad bearing has a metal shield or seal, the other two bearings had plastic seals.
Significant? .... I don�t know.
To make sure that the motor was OK, I ran it by holding the motor while someone else briefly switch it on and then off again. It ran fine.
I went to the yellow pages and selected a bearing supplier, called them and gave them the part numbers I found on the bearings, a magnifying glass helps to read them. They had no problems coming up with replacements. They were in stock, total cost about $17.00Can. See next picture.
While the other two bearings(3 & 8) appeared to be OK, it made sense to replace them as well, besides pulling off bearing(8) in order to remove the bad bearing(7) would most likely damage that bearing(8).
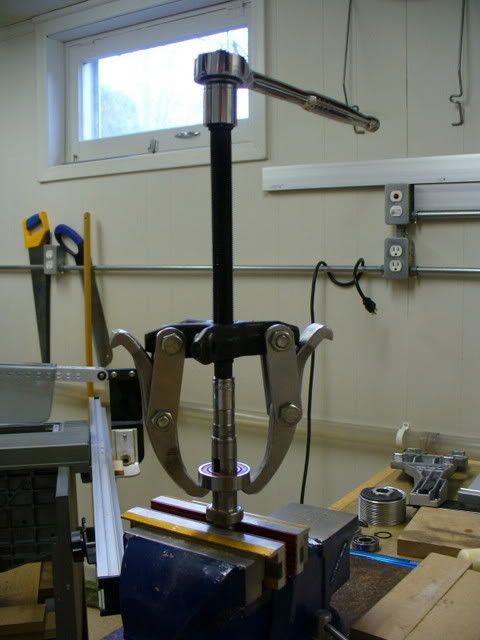
I am fortunate that I have access to a bearing/pulley puller. I used the smaller of the two bearing pullers to remove the first bearing(8) No picture of that.
The most difficult bearing to remove was the bad bearing(7). Because of the close proximity of the belt pulley(5) I couldn�t get the pullerclaws behind the bearing(7).
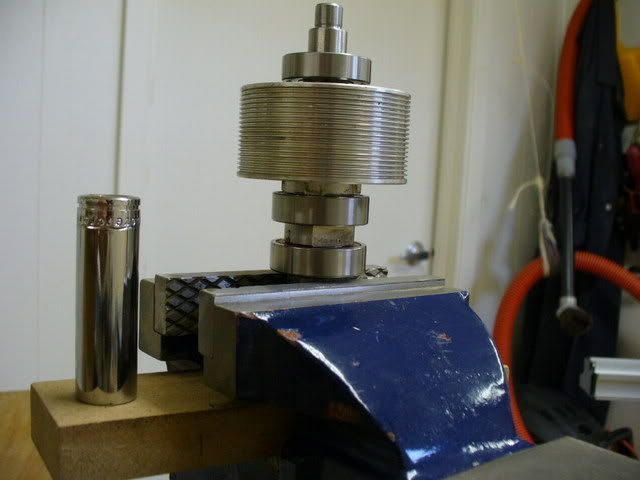
I had to use a pin punch and hammer to drive the bearing(7) off the shaft. That took a while because you have to keep shifting the pin punch through different spokes of the pulley in order to get the bearing to move. The arbor shaft(1) has a smaller diameter at the end to accept bearing(8). This forms a shoulder in the shaft. Using a socket of the correct diameter I supported the shaft that way so as not to damage the end of the shaft, you�ll see the setup in the next picture.
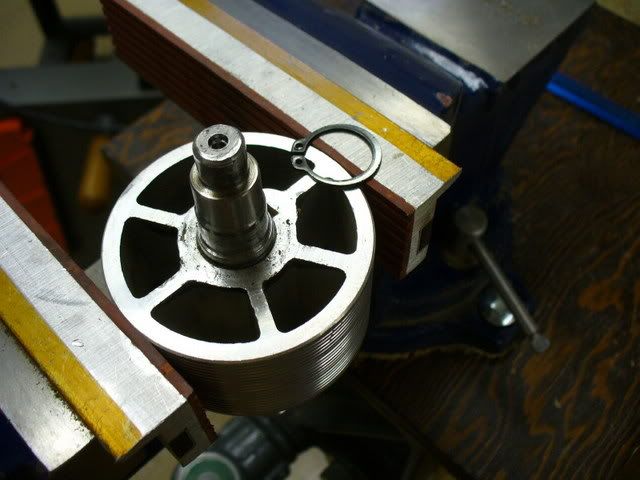
Next I removed the circlip(6).
The pulley(5) is made of aluminum and I did not want to take a chance using the puller claws to remove the pulley, so I used a different setup, again notice the socket to protect the end of the arbor shaft(1). Pulling the pulley off required a lot of force.

Don�t loose the woodruff key(2). The bearing plate(4) can now be removed.

Next came the last bearing(3) to be pulled off.
Bearing(3) removed, notice the woodruff key(2)

The next picture is a close-up of part of the shaft which shows that 2 areas have grooves machined into them, why I don�t know, the lower of the two grooved areas is covered by part of the pulley(5). The picture also shows a deep groove for the circlip(6).
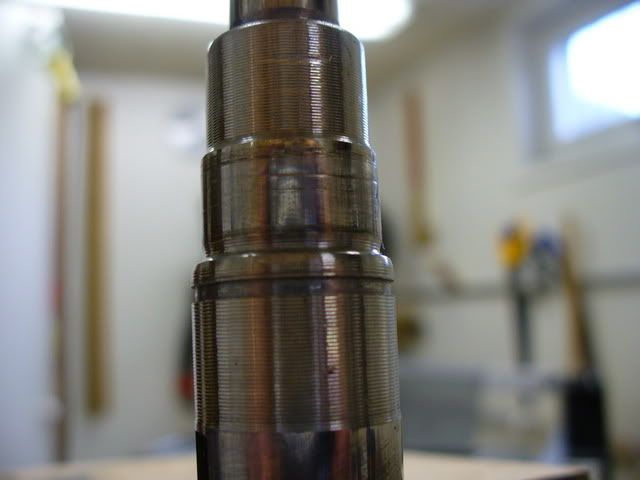
Below is a picture of the barenaked shaft, cleaned up, ready for the new bearings, etc.
To install the first new bearing, I used a piece of tubing against the inner bearing sleeve to drive the bearing(3) home.
After this is done and before installing the pulley(5) DO NOT FORGET TO PUT THE BEARING PLATE(4) BACK. I did forget and didn�t realize that, until after I had installed everything on the shaft.
That meant having to remove two bearings(7 & 8) the circlip(6) and the pulley(5), as well as having to get two new bearings. I don�t trust a bearing that has been pulled once.
I should have known though, things were going too smooth.
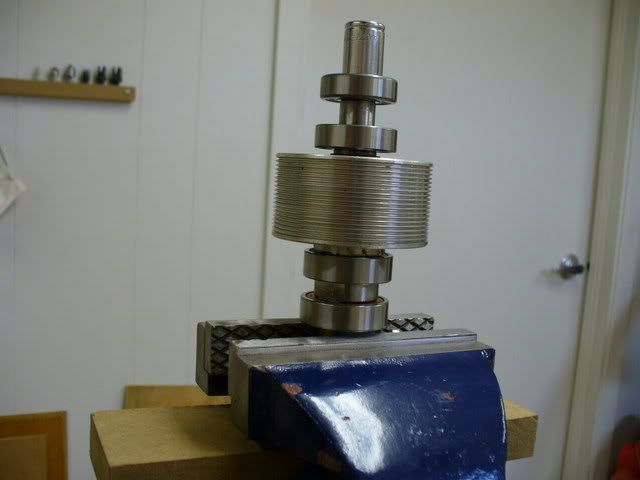
Next the pulley(5). I used essentially the same set up as the one I used for removing the pulley(5). This time I used an old bearing to protect the shaft(1) DON�T FORGET THE WOODRUFF KEY(2) After pushing the shaft(1) through the pulley(5) INSTALL THE CIRCLIP(6).

Next came bearing(7), I used a long socket of the correct diameter against the inner sleeve of the bearing(7) tapping the bearing down till it seated against the shoulder on the shaft. The old bearing at the bottom is there to protect the arbor shaft, I had forgotten to take a picture earlier but when I actually did install that bearing(7) I also had some protection in place to protect the shaft from being marred by the vise jaws.
Next came the last bearing(8). Again I used a socket against the bearings' inner sleeve.
Hallelujah!!!! The arbor assembly back in place, the belts walked onto the pulleys
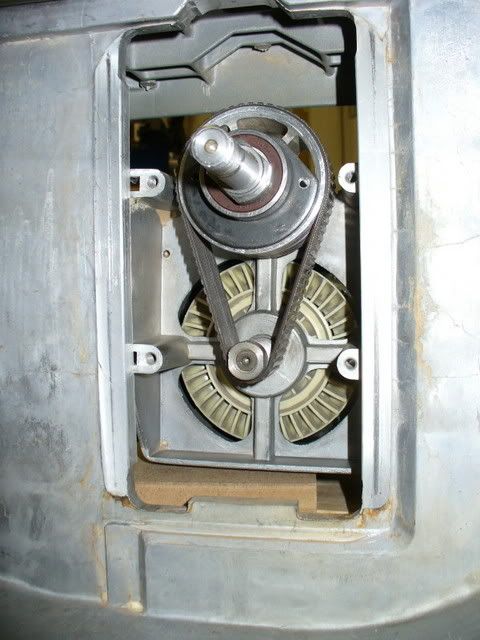
Putting the arbor assy. back in was easy, walking the belts back on was tough, not much room for your fingers as you push against a belt and try to turn the pulley at the same time. Those belts are very tight. I tried putting at least one belt on before sliding the arbor assy. into the motor bracket(9) but that wouldn�t work.
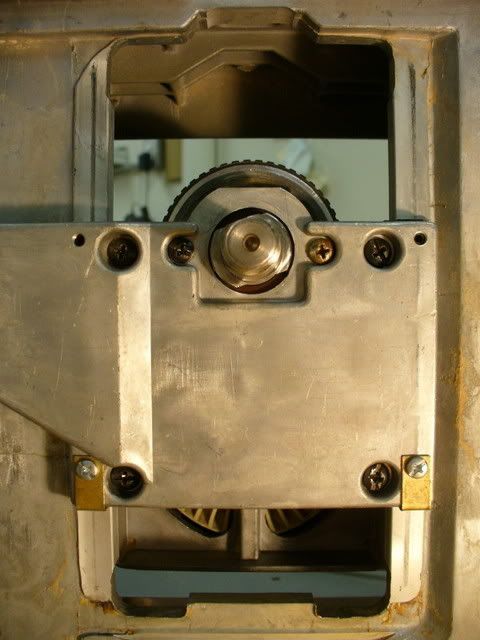
Next came the job of re-installing the guide holder(80) I used some tape to hold the rear shims(86) in place as per Mark Stripes suggestion in his article on shim replacement.
Many years ago I had a problem with a shim tab breaking off and the shim sliding down. Since that time, if I notice raising or lowering the blade is getting just a little more difficult, I lubricate everything using a dry spray lubricant and have had no problems since, however since I had things apart anyway, I installed some angle brackets to prevent the shims from sliding down. The link below leads you to an article with detailed instructions on how to do that.
http://www2.gol.com/users/nhavens/ht.../shims1-e.html
(In case the above link does not work, in Marks Stripes article, near the bottom is a link to �Norm in Fujino�s Shim Support", it has detailed instructions on how to make and install those little brackets)
And Humpty Dumpty is back together again
Running just fine, no more funny noise,......so far.
Tim
 LCHIEN
 twistsol
 ]). Remove blade and spacers.
John
Look forward to reading your belt replacement procedure. I found it to be quite a struggle.
Happy Canada day(1st. of July) I'm a Canuck. No offence taken, I know you meant well.
And a Happy Independence Day to all you citizens of the USA.(I know it was yesterday)
Tim.