-
I noticed that Loring's table dimensions include 38" high. I am 5'10" and made mine 41" high. For routing and good control, elbow height are the best. There are three heights that are ideal for different kinds of work:
1. lower for power use of legs for heavy things such as thickness planing.
2. mid level such as table saw: a mix of power and control. Some bandsaw re-saw would be in this category.
3. elbow level for precision control such as router, scroll saw, some band saw in delicate cuttings. (Note: some people use their scroll saw at a level close to a TS height - 35"- 38", (corrected) but since scroll sawing is often time consuming, many scrollers sit while cutting, and the need for higher is negated.
I made the one below when I was working in Japan. Too big to bring back home but I did bring all of the innards and tools; Made another router table almost identical once back home. Only exception is that I made two equal compartments for each router. The reason I wanted 2 routers installed is that I often got into a situation with rail and stile (and other situation) in which I needed one router to be at a set height and then need to make a different cut and back to the original cut. It sure helps to have one dedicated to a set height throughout a project and another to use as needed in the middle of the project.
In the table below, I had the vac sucking the sawdust out through a chamber that can be seen in the middle compartment on the bottom in the back, AND through the fence most of the time. On my new one, I eliminated the bottom and just use a vac sucking through the fence. It works well enough.
Attached FilesLast edited by leehljp; 04-16-2023, 04:33 PM. -
-
-
2x what LCHIEN says! If it’s for a seldom used hobby tool thats one thing, but if you intend on using it more than occasionally that’s different. It follows the old wise man’s statement about table saws…. Buy your last tablesaw first! You can fill up a small shop with all the router table upgrades discussed in this forum and spend more money than it would cost to buy a good router table.
When I upgraded my Powermatic 64 contractor saw that had a router table and Jessum lift in the extension to a SawStop CTS with all cast iron tops I went ahead and bit the bullet and added the cast iron router table to the end with a sawstop Router lift and SawStop router fence. I was fed up with pieced together router tables, cheaply made router lifts and woefully inadequate fences.Leave a comment:
-
I must be getting old because it seems that I'm about fifteen years further down this exact path. I started with a bench top Craftsman router table very similar to your Ryobi setup but with a tiny table top and a fence that was a joke, then a saw mounted router table with a crappy fence, but it was large enough that I could do raised panels without abject terror, upgraded the fence on that and it was pretty nice. except dust collection wasn't great.
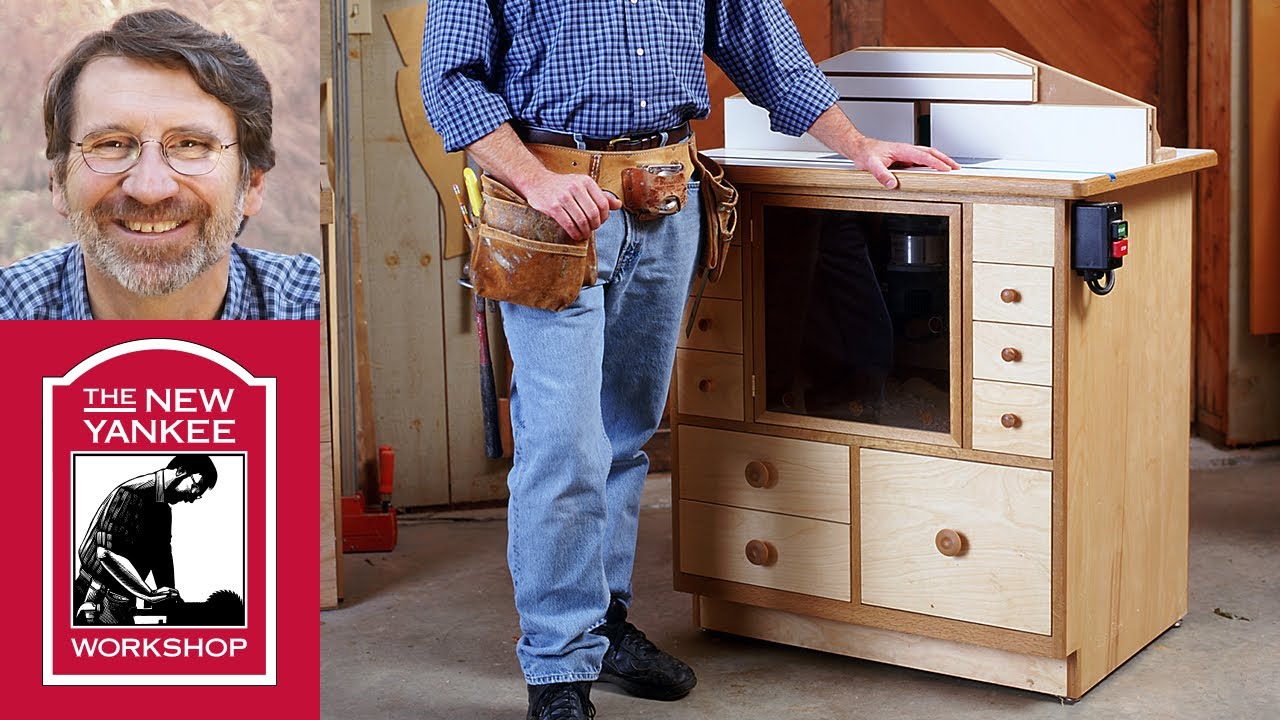
My current router table I've had since 2007 and built the cabinet for it years later Here is my review of the table and the cabinet photos can be seen here and the video of build idea can be seen below.
The width of your table top on the router table at 32" is definitely sufficient. Mine is 39" x 27" and I've never been wanting for space. The only time clearance at the rear comes in to play, for me at least is when I'm fluting wide pilasters but I do most of those with a handheld router now anyway.
Drawers for storage are essential. The top right drawer in mine has all the wrenches, hex driver, depth gauge, and rings and collets. the other 5 smaller drawers are dedicated to router bits, 12" on the left and 14" inch on the right. The drawers on the bottom hold my dovetail jig, and feather boards and other router related stuff like edge guides that don't get used at the router table, but are there to help my feeble mind find them.
Figure out what a comfortable height is for you to work the way you work. My router table is at 920mm (~36.25") high, 20mm higher than every other work surface height in my shop.
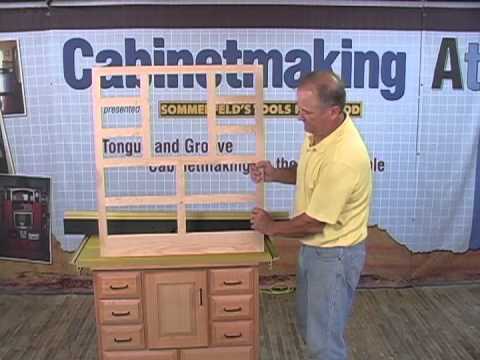
Sommerfeld Router Tables Made Easy (Note that this is as much a sales video as a how to video the cabinet build starts about 16 minutes in to the video)
It bears a striking resemblance to Norm Abrams router table design from a ~2004 episode.
Norm Abrams Router Table
 Last edited by twistsol; 04-16-2023, 07:13 AM.
Leave a comment:
-
So the Ryobi table will be the whole table top. Does the Ryobi router mount directly to the table or to an insert that mounts to the table?
Are you planning to put the Bosch 1617 into this table?
I made my router table 38" high similar to my BT3000, I find that a good detail working height for me at 5' 6".
One comment I have is that is this a hobby to save money or is it a hobby to get maximum enjoyment out of working with tools and making stuff? One can be too thrifty and then (A) put up with sub optimal equipment and then (B) spend more money the second time around buying or building stuff that should have been built the first time, or continue putting up with what you have and regretting it every time its used. I am guilty of that.Last edited by LCHIEN; 04-16-2023, 05:09 PM.Leave a comment:
-
Hi Loring,
My plan is to use that top as the whole top of the rolling cabinet underneath. The top is 32"x16". Are you recommending a working area even larger than that?
Here is how I arrived at current situation -
I was using my, then only router Ryobi R165U mounted to BT3 aux table using a homemade plywood mounting plate. I didn't have any router mounting kit for my saw. I also made a simple fence - a single piece with slot cut out for bits & attached to the saw rip fence using two HF clamps. The whole setup was crude, but it was way better than handling the router handheld. Admittedly, it had a lot of shortcomings. First changing bits or adjusting the height was a big PITA. I didn't have any throat plates so was using some homemade throat inserts - again far from ideal or convenient. Last but not least, the plywood mount (1/2") and the way the BT3 aux table hole is, that whole setup was eating a lot of the height budget of the bits. Many times I couldn't do cuts I would want to.
So early last year I bought this Ryobi table. It comes with a much nicer fence, a better dust collection (yeah, I forgot to mention that my BT3 mounted setup was spewing sawdust everywhere as I never got down to building any dust collection contraptions). Also equally importantly, better than the plywood mount, if not the best mount in the world. It also came with various sizes of throat inserts, a miter slot in the fence and table (although I haven't used either yet), a starting pin etc. I used it a couple of times before realizing that adjusting the bit height and changing the bits is still some PITA.
So a few months later (middle of the last year) I bought the Bosch 1617EVSPK kit - remember our discussion buying an anniversary gift for oneself . And then the back injury hit me so never got down to using it yet. Among many upgrades this kit will provide me (eventually when I get to use it), one that is sought after the most, from a table mounted perspective, is an ability to adjust height from the top of the table. I will still need to drill a hole in the plate, but the router came with a hex T wrench that allows this operation. Also, on this router the motor comes off easily without struggling to remove the whole assembly in case I need to change the bit.
Anyways, bottom line is most of this is what I am looking forward to and haven't had a chance to use the table. However, as I recover and start going back in the shop/garage, I find the table is quite heavy for me to lift around. It is also bulky, and I don't have nice way to store it. Even when I used the table a couple times early last year, one more thing I had noticed was the height isn't something that suited me. If I kept it on my workbench the height was too high and if I used the table placing on ground, it was killing my back and knees.
So here I am trying to rectify the situation. My current thinking behind building a rolling cabinet with this top is -- Get the table maneuverable around the shop - avoid lifting things as much possible.
- Get the operating surface at a comfortable height.
- In general, try to increase storage space in a more manageable format.
BTW I am planning the height of the total assembly to equal 38" which is what my BT3100 is at. So I can use this table as an infeed or use the table saw surface as an extension for any longer routing jobs.
Sorry for a long winded reply but just wanted to share my rationale. Please feel free to comment &/or criticize. I learn a lot from you all wise and generous people here.
- nicerLast edited by nicer20; 04-15-2023, 09:54 AM.Leave a comment:
-
Are you planning for the whole table to the that top or are you planning to set that top into a larger table top for more working area?
What is the dimension for that top now?
My initial thought is that it looks too small and if you are building stuff, using a real router mounting plate will be more satisfactory and flexible down the road.
I'm also wanting to know if this is a on the cheap project or are you willing to spend money and or effort to do it right.
I find it is satisfying to use my router on projects and its so much easier to use with a proper table and fence setup.
I went thru three table-setups. One was a stamped benchtop craftsman table that was kind of small, it had extension wings but I could never get them completely flat and flush with the table.
Next I built a fold up stand under a woodpeckers top with a woodpeckers plate. In 20-some years I never folded the stand up to put away. I mounted my Bosch with the Bosch table mount base which allowed fine height adjustment from above, but coarse adjustment, changing bits, and locking height required reaching under the table a lot... I then used my 1/4" collet craftsman mounted in the BT3 aux table for bevels and roundovers (all using the bearing bit, no fence) but then I got a router raiser from Jessem that I can do everything from above and now I am happy doing all the chamfer/bevel and roundover on the table. So I no longer use the BT3 to mount the a router.
Last edited by LCHIEN; 04-15-2023, 01:33 AM.Leave a comment:
-
Building a cabinet for my router table
Hello Friends,
I'm thinking of building a cabinet for my Ryobi router table. Right now it is quite heavy for me to move around. So putting it on my workbench is almost impossible. Additionally, it raises the height too much.
My idea is to build a cabinet and mount the top from the Ryobi table directly after removing the stock legs. I will also be adding casters to the cabinet so it can roll around easily.
Can you please share any ideas/pictures for your router cabinet builds (Ryobi or not) and any tips/suggestions you may have.
Thanks in advance.
- NGAttached Files -

 LCHIEN
 twistsol
Leave a comment: