router bit question...

Collapse
This topic is closed.
X
X
 
  • Time
  • Show
Clear All
new posts
  • steveg
    Forum Newbie
    • May 2010
    • 71
    • Norman, OK
    • Craftsman 315.228110 (Ryobi BT3000)

    router bit question...

    Hi all...

    Since high school shop class, I have not used a router much. However, I do have one -- an older Craftsman model that was my dad's.

    I am finishing out a theater room project, and I built a 12" high platform in the back of the room, for my second row of seating. I built a step up to this platform with a 6" riser, and so it's now two steps up onto the platform, instead of the one large 12" step-up.

    I had originally planned to just carpet these stairs (along with the rest of the room). However, I decided I wanted to do the step tread and risers in wood.

    SO -- the step is already "built," with the tread currently being a piece of 1" thick plywood (which again, I had intended to carpet) Now, I intend to install a 3/4" thick x 12" wide piece of red oak as "flooring" on this step (instead of the carpet). I intend for this oak tread to have a 1 inch "lip" or "overhang" extending beyond the riser beneath, and I then would like to put a "half bullnose" edge on it, if that's the right word; in other words, a 180 degree rounded edge.

    My question is, what is the right type of router bit to use for this application? I'm pretty sure what I need is a "round over" bit, but I am confused as to exactly which one. Looking at a chart like the one on this page... http://www.mlcswoodworking.com/shops...tana_bits2.htm ...I realize that I am not knowledgeable enough regarding terms like "large diameter" and "cut height" to know how to pick the right bit. I assume the thickness of the lumber would require a certain radius, and such, but can someone "educate" me a bit on how to choose the right bit for this application (two passes with the 1/4" router, one on each side, such that I end up with a fully rounded edge on a 3/4" thick oak board).

    Finally, I know that with some bits, you need to make the cut with the router mounted to a table with a fence (i.e. you can't "free-hand" it with the router -- no way to keep a straight edge); other bits, however, will not "cut into" the face of the board, but will stay "fixed" along the edge of the board as you run the router along it. I THINK that little "wheel" on the bit is what allows you "free-hand" the edge of a board -- removing only edge material with no risk of "running off line" into the face of the board, but not sure. Can anyone help me out here with my understanding (and my terminology, because I know I'm not using correct terms here! )

    Thanks!

    (P.S. the only reason I felt comfortable even asking this question, is because it states in the description of this forum that there are no dumb questions! )

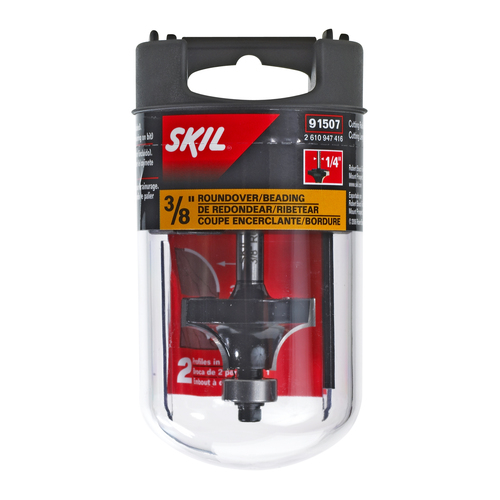
    (P.P.S. I'm guessing this is what I need...3/8" radius? http://www.woodcraft.com/product/208...-38r-14sh.aspx)

    Steve
    Last edited by steveg; 09-01-2012, 12:56 AM.
  • LCHIEN
    Internet Fact Checker
    • Dec 2002
    • 21045
    • Katy, TX, USA.
    • BT3000 vintage 1999

    #2
    There are multiple measures of such a bit and yes the roundover is what you want, make two passes top and bottom. A table is much better for large pieces like a step than using the router handheld, its not likely to tip. My rule of thumb is to use the router table for small, medium and large items. Use the handheld router only for items that are so lareg you can't move them and its easier to get the router to it. And for work that the router must be on top where you can see whats being cut (lettering templates etc), or freehanding.

    As for the measures, the roundover (cutter) radius "R" you need is 3/8" (half of 3/4 thickness of the wood). The large diameter "D" refers to the size of the hole you can drop the bit through... note that a larger bearing but the same size cutter radius would give you a larger large diameter.

    The cutter height is the distance from the cutter bottom (assuming a handheld position with the bit down) just above the bearing to the top of the cutter; "H" in the picture. In this case Katana#15354 its 5/8" which says that it will make the beaded roundover (the second of the three profiles shown) with as much as a 2/8" bead.


    Finally the shank diameter is the diameter of the shank. If Its available, I always get 1/2" shanks (assuming your old router takes 1/2" shanks, those older Sears routers mostly took 1/4" only). Only narrow straight bits and stuff do i get 1/4" shanks. 1/2" shanks have four times the strength and with a bit spinning at up to 23,000 RPM, that helps.

    Large diameter bits need slower RPMs, because the tips move much faster. Look up router speed chart on the web for advice. (or on this forum).


    P.S. nothing against Woodcraft, but for router bits I usually go with MLCS. Don't need the Katana premium line, just their ordinary stuff. What I like about MLCS: fast free shipping, low prices, good quality, great customer service, and helpful catalogs and instruction guides for free. Most particularly their customer service is quick to offer advice or help and replace anything that you have a problems with. And being a smaller, primarily router bit house, they have experts that can answer your router questions quickly and correctly. The MLCS #6354/#8654 should do what you need and is only $13 or 14 shipped.
    Last edited by LCHIEN; 09-02-2012, 01:48 AM.
    Loring in Katy, TX USA
    If your only tool is a hammer, you tend to treat all problems as if they were nails.
    BT3 FAQ - https://www.sawdustzone.org/forum/di...sked-questions

    Comment

    • steveg
      Forum Newbie
      • May 2010
      • 71
      • Norman, OK
      • Craftsman 315.228110 (Ryobi BT3000)

      #3
      LCHIEN --

      Thanks much for the info. Thanks for the feedback on MLCS as well. I'll also see if I happen to have the right bit at home -- my dad gave me some bits, with the router, and there's at least one round over bit in there that I know of, though not sure what the radius on it is. I assume the radius should be marked on the bit?

      Yes, my router only accepts 1/4" shank bits...so I'm limited there. As for speed, I don't know if it's a variable speed or not, can't remember, but if it's not, I guess I don't have the choice to reduce RPM, correct?

      Finally, I only have a very small router table, not sure I could run a 12" wide piece of oak stock through such a small table, and keep the piece (and table) steady...hmm...

      I just noticed today, though, that my saw has an opening on one side of the table for a router...wonder if mine will fit the saw table -- in which case, I could attach it there, and use the saw table/rip fence?

      Steve

      Comment

      • cabinetman
        Gone but not Forgotten RIP
        • Jun 2006
        • 15216
        • So. Florida
        • Delta

        #4
        Roundover bits are actually a ¼ radius cut of an edge. For example, a 3/8" radius cut will start at the center of a ¾" edge, and round it over to 3/8" on the face. This happens when the bearing is flush with the ending of the curve (SEE A in the picture below). The large diameter measurement is the dimension of the total width of the bit at its widest point. Adding a larger bearing will only reduce the depth of cut.

        Just as a general note, most roundover bits are machined to cut at the outside of the top of the wings (SEE B in the picture below). This would allow the bit to be lowered into the stock which would cut a step, or also called a reveal.

        Originally posted by steveg
        I'll also see if I happen to have the right bit at home -- my dad gave me some bits, with the router, and there's at least one round over bit in there that I know of, though not sure what the radius on it is. I assume the radius should be marked on the bit?
        Most bits aren't marked with their size, but usually have a product number on them. The bits you have may not be carbide tipped, but rather just steel, which don't stay as sharp or will perform as well as a carbide tipped.

        Originally posted by steveg
        Yes, my router only accepts 1/4" shank bits...so I'm limited there. As for speed, I don't know if it's a variable speed or not, can't remember, but if it's not, I guess I don't have the choice to reduce RPM, correct?
        For radius cutters, with the sizes you would use for stair nosing, full speed is what you would use, You may want to take two passes. You could do that with a spacer between the bearing and the stock, or do it with changing the depth of cut.

        Originally posted by steveg
        Finally, I only have a very small router table, not sure I could run a 12" wide piece of oak stock through such a small table, and keep the piece (and table) steady...hmm...
        If you do this on a table, and using a bit with a bearing, it's only a matter of keeping the stock flat to the table and running the edge against the bearing. If you do this with a handheld router, you can clamp the stock to the table enabling you to hold the router with both hands.

        Originally posted by steveg
        I just noticed today, though, that my saw has an opening on one side of the table for a router...wonder if mine will fit the saw table -- in which case, I could attach it there, and use the saw table/rip fence?

        Steve
        If the table has an opening for router mounting, the base of the router fastens to the underside of the table. If that's the case, changing bits may require you to pull the router out of the base. If it's your only router, you may want to pick up another base to use when a handheld use is needed.

        You may want to consider installing a router plate where the opening is. If the opening is already set up with a removable plate (from the top), the router would lift out while attached to that plate. That makes changing bits and adjustments much easier.
        .
        Click image for larger version

Name:	roundover bit mod.jpg
Views:	1
Size:	29.9 KB
ID:	786192

        .

        Comment

        • woodturner
          Veteran Member
          • Jun 2008
          • 2047
          • Western Pennsylvania
          • General, Sears 21829, BT3100

          #5
          LCHIEN's response is spot on, as always, can't really add much to that.

          A couple of comments, though:

          1. Oak stair tread, with the "roundover" already cut, is available commercially - $18 for three feet in red oak at my local HD, for example.

          2. The bits from your dad could be either steel or carbide tipped. Steel bits can be sharpened more easily at home and can be sharpened "sharper" - so they give a better, cleaner cut - but the edge won't last as long. Carbide bits cannot be sharpened to quite the same level of sharpness (the carbide is too brittle to hold a fine edge, it fractures), but last much longer. For most people, the finish left by the carbide bit is sufficient, and many people prefer carbide bits because they last longer between sharpenings. As a reference, if you are doing "hobby woodworking" and use carbide bits, you may never have to sharpen a bit, while steel bits you will need to hone every few projects.
          --------------------------------------------------
          Electrical Engineer by day, Woodworker by night

          Comment

          • chris64
            Forum Newbie
            • Jun 2008
            • 61

            #6
            As mentioned on a recent post Home depot has quite a few router bits on clearance. I think they were Freud brand but I could be wrong. I picked up 4 of em yesterday. I cannot speak of the quality of these bits. Maybe someone else has used these and could
            Comment.

            Comment

            • cabinetman
              Gone but not Forgotten RIP
              • Jun 2006
              • 15216
              • So. Florida
              • Delta

              #7
              Originally posted by chris64
              As mentioned on a recent post Home depot has quite a few router bits on clearance. I think they were Freud brand but I could be wrong. I picked up 4 of em yesterday. I cannot speak of the quality of these bits. Maybe someone else has used these and could
              Comment.
              It's been a while since I have bought a bit at a box store. My local HD carries Diablo (which is made by Freud) and Lowes has CMT and Bosch. I have bought Bosch and Freud when in a jam, and they work just fine.

              .

              Comment

              • jdon
                Established Member
                • Feb 2010
                • 401
                • Snoqualmie, Wash.
                • BT3100

                #8
                A couple of random add-ons to the thread:

                I bought a Diablo straight bit last year- sharp, and worked very well for me. The ones I've seen at HD are almost, if not all, 1/2" shanks.

                You can get a router speed control at Harbor Freight for ~$20. But if you're thinking about doing more woodworking, I'd think about investing that in a new router. I just got a Sears 2 HP variable speed combo kit (#27683) as a second router a couple of weeks ago for $85, and I've been very pleased.

                Comment

                • LCHIEN
                  Internet Fact Checker
                  • Dec 2002
                  • 21045
                  • Katy, TX, USA.
                  • BT3000 vintage 1999

                  #9
                  here's some more free advice.
                  Here's a router bit speed chart, basically pick a speed based on large diameter of the bit. for a 1.25" large diameter, this guy recommends 18,000 RPM, not 24,000. But, its not that far off. Not everybody's recommendations are the same so use it with a grain of salt. http://www.newwoodworker.com/rtrbitspds.html

                  OTOH those older 1/4" shank-only sears routers don't have variable speed so you may have to use the fixed speed to start.

                  The BT3000 has a router/auxiliary table. A router mounting kit is usually required to use it - the kit has some inserts to fill up the hole around the bit so there's not a big gap, a clamp to hold the back end of the table to the back rail, and some parts to make the table saw rip fence work as a router fence. The important part of the kit is the plate that you mount the router to and then mount the plate with the router to the aux table. The hole pattern in the plate matched Craftsman routers (which were made by Ryobi for a very long time) and its a unique pattern. (but the plate is easily drillable for other routers.) My FAQ has an extensive section on mounting routers to the BT3 saws.

                  Using a router is a very feely operation. you have to use the right bit RPM as well as manage the feed rate. Feed speed - too slow and you burn the wood. Too fast and it chatters like I said you have to feel this. Cut depth is very important, too. Usually full depth cuts can't be made at the optimal speed. usually several shallow passes at higher feed speeds take off the bulk, then a final two passes with the workpiece firmly against the fence or the bearing will make the final cut nice and straight and smooth. On the partial passes, no need for perfectly straight, just limit the depth of cut to around 1/8th inch or so.

                  Feed direction is also very important as well as don't trap the wood between the bit and the fence or it will shoot out. A good router book or even web site can tell you these things.

                  Old router bits from the 70's and 80's are likely to be HSS and not carbide. In general I'd just forget about those and get a good carbide bit because they are cheap and readily available. The HSS you don't know how much its been used and how sharp it is - they dull quickly (50 times faster than carbide) so you're better off learning with a sharp new bit. It's easy to tell the difference if you know what to look for.
                  Last edited by LCHIEN; 09-01-2012, 02:46 PM.
                  Loring in Katy, TX USA
                  If your only tool is a hammer, you tend to treat all problems as if they were nails.
                  BT3 FAQ - https://www.sawdustzone.org/forum/di...sked-questions

                  Comment

                  • cabinetman
                    Gone but not Forgotten RIP
                    • Jun 2006
                    • 15216
                    • So. Florida
                    • Delta

                    #10
                    When I started out there were no variable or multi speed routers, and all routing was done with a single speed, and fixed bases. If you only have a single speed router, with an understanding of depth of cut, and feed speed, any routing operations can be accomplished. Granted, having a choice of speeds, along with plunging capabilities, can make procedures simpler.

                    Here is a simple diagram showing the direction of travel either for the stock being routed on a table or in using a handheld router.
                    .
                    Click image for larger version

Name:	router%20cut.jpg
Views:	1
Size:	16.8 KB
ID:	786193
                    http://www.geoffswoodwork.co.uk/conversations01.htm

                    .

                    Comment

                    • mpc
                      Senior Member
                      • Feb 2005
                      • 981
                      • Cypress, CA, USA.
                      • BT3000 orig 13amp model

                      #11
                      cabinetman beat me to the big concern I had... feed direction for the stock. With a router you want the workpiece feeding into the spinning bit tooth - never in the same direction as the bit tooth you are about to hit. Your push direction on the workpiece, and the spinning bit tooth, should be going in opposite directions. If you get this wrong... the router bit will grab your workpiece and shoot it across the room with CONSIDERABLE energy. Print & paste Cabinetman's diagrams near your router work area as a reminder if you didn't already know/remember this. Before any router cuts I always stop and think "which way is the correct feed direction for this cut again?" just to be sure.

                      If you can use a router table I'd recommend that over hand holding the router. It's so much easier. Router tables don't have to be fancy or complex either; for what you need to do you could just get a couple square foot section of 1/4 or 3/8ths plywood. About 7 or 8 inches from what will be the "back" edge drill a hold just larger than your router bit, then use the router's plastic base plate to mark where to drill holes for router mounting screws around this hole. Draw a circle around the mounting plate - just a little larger than the plate - to mark where the router will be. Then stiffen the plywood outside this circle by gluing on a few 1x2s or thicker plywood pieces to the underside (router side) of the table. While the glue dries, make a quickie fence for your job. Router fences come in all kinds of styles but for what you want to do the most simple fence is about the best option. One of Cabinetman's pictures shows what looks like a board with a half-circle ("mouse hole") around the bit as the fence - that's all you need. A straight edged 2x4 or a stack of plywood cutoffs work fine. Make the fence longer than your table is wide by about 2 to 4 inches for clamping room. If you don't have a large drill bit to make the "mouse hole" as shown... just stand the fence on edge and run it across the table saw blade (or dado stack if you have one) using the miter fence for support and cut a square notch for the mouse hole. Lightly sand bevels/roundovers into the mouse hole corners so they don't snag/catch your workpiece. To use this fence, just use plain old clamps to lock it to your tabletop - no need to get T-tracks or other fancy stuff for this one job. For the first pass, mount the fence such that the mouse hole actually sticks past the router bit's bearing a little bit - so that the router bit is only making 1/3rd to 1/2 the cut at a time. For the final pass of the workpiece, line the edge of the fence with the guide bearing of your router bit if it has one (again, as Cabinetman's drawing shows) or with the tip of the cutting edge on your bit.

                      If you try to hand-hold the router, using the bearing to guide the bit (the job of the bearing), you may find it works fine when cutting the top of the step but not the bottom. Once you make one cut and flip the workpiece over... there isn't enough material left for the bearing to ride on - when it's riding on the just-cut roundover. That's where a router table + fence really shines for this job.

                      Doing the corners of your step will be the hardest part - it's easy for the bearing to ride around the corner, turning a 90 degree angle into a rounded corner when hand-holding the router. Unfortunately it's not easy to be consistent doing that! On a table with a fence this is a non-issue - the fence will prevent you from buggering the corner. If you want rounded corners jigsaw/sand/bandsaw them before using the router to roundover the edges. Also, when using the router, there will be a tendency for the bit to want to tear the workpiece a little at the ends of the cut. Reducing the depth of cut (so you have to make more passes with the workpiece past the router bit) helps a lot. When you are routing the end-grain is when the risk is highest: as you get near the end of the panel (probably when cutting the side of your stair tread and getting near the front edge) the long wood fibers are not supported and may be busted out by the bit. Holding a sacrificial piece - the same thickness as your stair tread - against that edge to support it helps. Do the end grain cuts first... if any tear-out occurs on the front it may be small enough that it is just material that was going to be removed anyway by the bit... so when you do roundover the front it'll clean up perfectly.

                      Since you said it's been a while since you used a router... and that you hadn't used one all that much even then... just a few basic reminders.

                      mpc

                      Comment

                      • steveg
                        Forum Newbie
                        • May 2010
                        • 71
                        • Norman, OK
                        • Craftsman 315.228110 (Ryobi BT3000)

                        #12
                        WOW, guys, this is great stuff here. I'm getting some great info. You all are clearly very passionate about woodworking, and also very willing to giving with your knowledge and expertise, for which I am very grateful!

                        cabinetman, you said this:

                        If the table has an opening for router mounting, the base of the router fastens to the underside of the table. If that's the case, changing bits may require you to pull the router out of the base. If it's your only router, you may want to pick up another base to use when a handheld use is needed.

                        You may want to consider installing a router plate where the opening is. If the opening is already set up with a removable plate (from the top), the router would lift out while attached to that plate. That makes changing bits and adjustments much easier.
                        ...and then Loring, you said this:

                        The BT3000 has a router/auxiliary table. A router mounting kit is usually required to use it - the kit has some inserts to fill up the hole around the bit so there's not a big gap, a clamp to hold the back end of the table to the back rail, and some parts to make the table saw rip fence work as a router fence. The important part of the kit is the plate that you mount the router to and then mount the plate with the router to the aux table. The hole pattern in the plate matched Craftsman routers (which were made by Ryobi for a very long time) and its a unique pattern. (but the plate is easily drillable for other routers.) My FAQ has an extensive section on mounting routers to the BT3 saws.
                        So, it sounds like what I need MOST to mount the router to my saw is the "plate" which I would attach to the router to mount it to the saw. I will check the FAQ for more info; I wonder if I already have this plate (as my router is mounted to a Craftsman router table -- would the same plate be required for it to have been mounted to that table?) If I don't, could I buy one from Sears, or would it be better to get the whole kit somewhere? (Again, I will check the FAQ also -- I'm sure most of these answers are in there).

                        Also, I assume your FAQ has info on how to get that "kit," if I end up needing to get all the pieces and not just the plate?

                        Thanks to everyone, with respect to info on carbide vs. hss bits, and places to get them locally. Great info.

                        jdon -- that Sears variable-speed router for $85 sounds intriguing...do you know if it has the ability to accept both 1/4" and 1/2" bits?

                        woodturner -- thanks much for the info on the "pre-rounded-off" red oak stair material...not a bad price at all. However, I recently got a bunch of red oak lumber from a guy here locally, for cheap -- which included a couple of 8' 1"x12" pieces (for $25 apiece!) So, all I need to do now is dress up the edge -- hence my attempts here to get quickly re-acquainted with using a router!

                        Thanks so much to everyone,

                        Steve

                        Comment

                        • steveg
                          Forum Newbie
                          • May 2010
                          • 71
                          • Norman, OK
                          • Craftsman 315.228110 (Ryobi BT3000)

                          #13
                          mpc --

                          WOW -- what a great "primer" on router use. You must have sent your reply when I was typing my above response, because it wasn't there when I started typing the reply. In any case, yes, it's been quite awhile since I've done much routering, and in that write-up are some GREAT tips. I need to re-read that a couple of times to cement it all in my brain; your ideas regarding tear-out issues, using the sacrificial piece, and starting on the end grain side of the wood is GREAT.

                          I see what you mean about free-handing, and the second cut, on the other side of the wood, being the tougher one (since you don't have a flat edge to let the bearing roll along, but instead a newly-rounded edge...makes sense).

                          Also, your advice about making a table is outstanding. Really, as I read what you wrote and think about it, since I already have a small table, all I might need to do is build something to extend it larger (that, or use the saw table and mount the router there).

                          Anyway, your advice is much appreciated. It's amazing the amount of knowledge shared on this forum!

                          By the way, your "feed direction" points, stressing the importance, is great. I have never had an issue with that, I guess it's always been intuitive or something to my brain, but you are right that I need to make it a conscious thought every time I go to make a cut...

                          Thanks much,

                          Steve
                          Last edited by steveg; 09-01-2012, 11:01 PM.

                          Comment

                          • steveg
                            Forum Newbie
                            • May 2010
                            • 71
                            • Norman, OK
                            • Craftsman 315.228110 (Ryobi BT3000)

                            #14
                            Well, I was at Lowe's today picking up a few things...needed to replace a toilet handle that broke on our MB toilet. Probably TMI, but...

                            ANYWAY, while there, I was walking by the router bit section and decided to check it out, and was surprised to find a roundover bit that I think will work. It may be a piece of junk, don't know, but it is carbide, of the right dimensions, and hopefully will accomplish the task for me...

                            http://www.lowes.com/pd_204617-353-9...ductId=1058337

                            Anyway, again, I appreciate the help on the routering issues. I'll give it a go, and see what happens. I'll practice on some scrap first, and hopefully will get the feel for doing it, without causing tearout and such...

                            Steve
                            Last edited by steveg; 09-01-2012, 11:03 PM.

                            Comment

                            • LCHIEN
                              Internet Fact Checker
                              • Dec 2002
                              • 21045
                              • Katy, TX, USA.
                              • BT3000 vintage 1999

                              #15
                              Skil is owned by Robt. Bosch I think, but its their low end stuff along with Vermont American. The Bosch labelled bits are the premium line.
                              Still, it'll be better than a 25 year old used HSS bit and you didn't have to wait any.

                              one thing to be aware of, the Skil bit has a sizable gap between the bit cutting bottom and the bearing (at least in this picture):


                              the Katana bit you linked earlier (for example) has almost no gap.


                              Since there will be virtually a ridge left when making two 3/8" roundovers on the edge of a 3/4" piece of wood, the bearing needs to be at the very center close as possible when making the second side pass or the bearing will sit too low and you have a non-uniform bull nose result. In this respect the Katana is good but the Skil might give you problems.
                              Last edited by LCHIEN; 09-02-2012, 01:39 AM.
                              Loring in Katy, TX USA
                              If your only tool is a hammer, you tend to treat all problems as if they were nails.
                              BT3 FAQ - https://www.sawdustzone.org/forum/di...sked-questions

                              Comment

                              Working...