lap joints on the router table

Collapse
This topic is closed.
X
X
 
  • Time
  • Show
Clear All
new posts
  • tlt
    Established Member
    • Jan 2006
    • 125
    • Tucson, Arizona.
    • Delta 36-682

    lap joints on the router table

    Hi all,

    I recently received a newsletter that shows how to do lap joints on the table saw here:
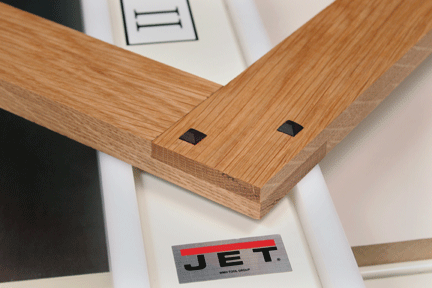
    Corner lap joints aren't as strong as mortise-and-tenons or as quick to assemble as pocket screw joints, but they are a strong and attractive option.


    I don't have a dado setup on my table saw, but would like to try this on the router table. Here's my question: would you route the lap joints from the inside and work your way to the edge (as shown in the tablesaw pics), or would you start on the edge and nibble your way in?

    Thanks for your help,
    --tlt
  • LCHIEN
    Internet Fact Checker
    • Dec 2002
    • 21010
    • Katy, TX, USA.
    • BT3000 vintage 1999

    #2
    it really doesn't matter which way you go in the TS. I've done that joint many times.
    I like to use the step off block they show, I'll do the inside most cut first using the step off block, then go and work my way from the end to the first cut, just because. Doing an inside lap joint, I'll start at the end away from the step off block and work my way to the step-off block - this makes you be careful at the start when you are most careful and stops you automatically at the end when you tend to be on cruise control.

    With a router, you may want to do the end first going in. Why? Because with the router bit the primary cutting is on the side of the bit - cutting from the end in you only cut on one side of the bit lessening the load whereas a cut in the middle of the board would cut on both sides of the bit doubling the first cut load.
    Last edited by LCHIEN; 04-28-2008, 04:53 PM.
    Loring in Katy, TX USA
    If your only tool is a hammer, you tend to treat all problems as if they were nails.
    BT3 FAQ - https://www.sawdustzone.org/forum/di...sked-questions

    Comment

    • Popeye
      Veteran Member
      • Mar 2003
      • 1848
      • Woodbine, Ga
      • Grizzly 1023SL

      #3
      With a router always start from the end and work in. Otherwise you end up with the situation of cutting with the wood between the bit and fence. This is very dangerous other than doing a dado or a groove joint. Pat
      Woodworking is therapy.....some of us need more therapy than others. <ZERO>

      Comment

      • poolhound
        Veteran Member
        • Mar 2006
        • 3195
        • Phoenix, AZ
        • BT3100

        #4
        I would cut a kerf for the shoulder cut first on the TS. I would assume you have multiple to do as it takes 2 laps to make a joint and a one jointed project would be very interesting. Therefore, you may find it easier to gang and clamp a bunch together affix a guide or straight edge and then route out the lap to the shoulder cut using a handheld rather than a table mounted router.
        Jon

        Phoenix AZ - It's a dry heat
        ________________________________

        We all make mistakes and I should know I've made enough of them
        techzibits.com

        Comment

        • pecker
          Established Member
          • Jun 2003
          • 388
          • .

          #5
          Originally posted by poolhound
          I would cut a kerf for the shoulder cut first on the TS. I would assume you have multiple to do as it takes 2 laps to make a joint and a one jointed project would be very interesting. Therefore, you may find it easier to gang and clamp a bunch together affix a guide or straight edge and then route out the lap to the shoulder cut using a handheld rather than a table mounted router.
          Actually, if possible, I would route the lap on a very wide board held against the router table fence. Then cut the board up into the individual pieces. This would be safer than trying to push a long narrow stick across the router bit. And you will only get tearout at the very end, rather than on each individual piece.

          Comment

          • tlt
            Established Member
            • Jan 2006
            • 125
            • Tucson, Arizona.
            • Delta 36-682

            #6
            Thanks to all for the help -- with a bit spinning that fast, I sure don't want to learn the hard way!

            Comment

            • RodKirby
              Veteran Member
              • Dec 2002
              • 3136
              • Melbourne, Victoria, Australia.
              • Mao Shan TSC-10RAS

              #7
              Kirby approach.

              A cleat runs along the front edge of the router table - great for tenons AND for lapjoints. Takes 2 (or more) passes but can be set up VERY precisely...

              Last edited by RodKirby; 12-06-2008, 04:15 PM.
              Downunder ... 1" = 25.4mm

              Comment

              • just started
                Senior Member
                • Mar 2008
                • 642
                • suburban Philly

                #8
                Why not do the whole job on the table saw with the same setup you would use for cutting a tenon cheek?

                Comment

                • Duff
                  Established Member
                  • Apr 2007
                  • 164
                  • San Antonio, TX
                  • Enco 12" RT

                  #9
                  I apologize for temporarily 'jacking' your thread. . .

                  but did anyone notice Rods 2nd picture?

                  IT HAS SAWDUST! ! !
                  Enco 12" RT table saw(with router table currently added to right wing), Central Machinary 6" jointer, Delta 16" (17-900) drill press, Ridgid 14" bandsaw, Jet bench top Mortising machine, Porter Cable 6901 series routers (2) and a wide variety of Ryobi 18v tools.

                  Comment

                  • RodKirby
                    Veteran Member
                    • Dec 2002
                    • 3136
                    • Melbourne, Victoria, Australia.
                    • Mao Shan TSC-10RAS

                    #10
                    Originally posted by Duff
                    but did anyone notice Rods 2nd picture?

                    IT HAS SAWDUST! ! !
                    Just for you
                    Downunder ... 1" = 25.4mm

                    Comment

                    Working...