Taking pictures of pens

Collapse
This topic is closed.
X
X
 
  • Time
  • Show
Clear All
new posts
  • TB Roye
    Veteran Member
    • Jan 2004
    • 2969
    • Sacramento, CA, USA.
    • BT3100

    Taking pictures of pens

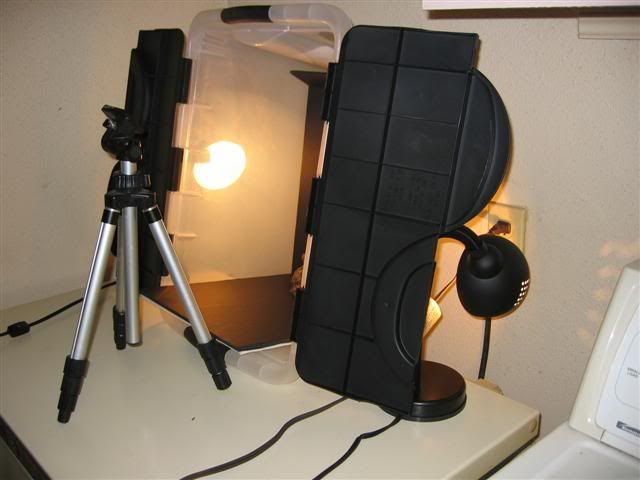
    I have been trying to take pictures of my pens to post. I have a Kodak DX4530 5.0 mega pixel cameral. I am just not happy with pictures to try and post. How close do you get, how much light? do you use a flash? Is it better to take pictures of just 2 or 3 pens at a time? or more? Any sugestions would be appriciated.

    Tom
  • LCHIEN
    Internet Fact Checker
    • Dec 2002
    • 21065
    • Katy, TX, USA.
    • BT3000 vintage 1999

    #2
    I don't have any pictures of pens but I have taken many closeup pics in my hobby of photog.

    My suggestions for taking with your typcial Point and shoot digital camera:

    You will want to take just one or two (side by side) in a pic so you can see the detail

    you should use the macro mode (usually symbol by a small flower icon) and be probably within a foot or closer to the subject.

    on-camera flash will be harsh and maybe not pointed right for closeups. Suggest external multiple lighting if possible, bright as possible to eliminate hand shake/blurring.

    If you can't hold camera still enough to get no blurring, get a small tripod, they're under $20.
    Loring in Katy, TX USA
    If your only tool is a hammer, you tend to treat all problems as if they were nails.
    BT3 FAQ - https://www.sawdustzone.org/forum/di...sked-questions

    Comment

    • JR
      The Full Monte
      • Feb 2004
      • 5633
      • Eugene, OR
      • BT3000

      #3
      +1 on Loring's advice.

      It's hard for me to remember to set the camera for macro mode, and it makes the biggest difference. Any extra light from lamps or overheads will help, too.

      JR
      JR

      Comment

      • LCHIEN
        Internet Fact Checker
        • Dec 2002
        • 21065
        • Katy, TX, USA.
        • BT3000 vintage 1999

        #4
        one of the problems, as you get closer to the subject for closeups, the camera and the photographer start casting shadows on the subject. The photgrapher can stand back, if he has used the tripod to set the framing but you still have to place lighting around the camera to prevent the camera casting shadows.

        With extreme closeups where the field of view is around 1-2 inches you can't hardly even light the subject from the front at all, but for pens where the field of view is around 7-10 inches wide that should not be too bad a problem.

        as for macro focusing, I have found that some cameras literally allow you to get within an inch or two fo the subject for extreme closups while others won't focus well much under 7-8 inches. Most cameras will not focus very closely when using zoom, minimum zoom is required for macro mode (too bad, because that would help with the close-lighting problem I described above).
        Last edited by LCHIEN; 11-16-2007, 12:01 PM.
        Loring in Katy, TX USA
        If your only tool is a hammer, you tend to treat all problems as if they were nails.
        BT3 FAQ - https://www.sawdustzone.org/forum/di...sked-questions

        Comment

        • rja
          Established Member
          • Jul 2004
          • 422
          • New Kensington, Pennsylvania, USA.
          • BT3100-1

          #5
          Make yourself a light tent. I made one out of 1/2" pvc pipe and fittings. If you google for light tent you will get many hits on how to make one. For small stuff like pens you could make a light tent out of a large cardboard box with the sides and front cut out. You will need two fairly powerful lights (I use two 500w halogen work lights) one on each side of the tent. You will also need an old white bed sheet for the "diffuser" and some type of background. Set your camera for macro mode and use an incandescent setting for white balance. This setting will filter out the amber cast from the halogen bulbs. A tripod is a must for perfect photos. The net effect of the light tent is that the bed sheet diffuses the light shining from the sides of the tent so you can get shadow free photography. Do not use the camera's flash as this will reintroduce shadows into your photo.

          Comment

          • TB Roye
            Veteran Member
            • Jan 2004
            • 2969
            • Sacramento, CA, USA.
            • BT3100

            #6
            Thanks guys for all the information. I will give it a try tomorrow. The one thing I love about BT3Central is when you ask a question, you get a good answer, sometime with a little humor thrown in. I can say I have never gotten bad advice for you guys. Only trouble is it cost me money. Lathe, Jointer, Planer, Miter Saw, DP, BS, Routers, bits and on and on. Thanks again

            Tom

            Comment

            • JR
              The Full Monte
              • Feb 2004
              • 5633
              • Eugene, OR
              • BT3000

              #7
              Originally posted by TB Roye
              Only trouble is it cost me money. Lathe, Jointer, Planer, Miter Saw, DP, BS, Routers, bits and on and on. Thanks again
              You are very welcome, sir!
              JR

              Comment

              • leehljp
                Just me
                • Dec 2002
                • 8461
                • Tunica, MS
                • BT3000/3100

                #8
                For good and great pictures of pens, there are many variables. I will list what I have learned and give some comment about each. I am not a professional by any means and will welcome comments, additions, corrections and constructive criticism of my post and list. I want to learn, but will share what I have learned on my own. Variables:
                Light tents, background material and color, pen holder, camera stand, external light source and camera settings.


                1. LIGHT TENTS can be made or bought. They are basically thin white clothed tents or boxes that diffuse the light in all directions, softening the light and whitening it too. A few Googled links:

                http://www.creativepro.com/story/feature/19002.html
                http://www.stevesphotoshop.co.uk/pho...nts_cubes.html
                http://digital-photography-school.co...ve-light-tent/
                http://www.pbase.com/wlhuber/light_box_light_tent
                http://www.ezcube.com/

                Light tents smooth the light out and make the pen appear totally different than out in certain real life moments. This is not a distortion of the facts or misrepresentation. A room's multiple light bulbs or fluorescent tubed bulbs, especially with diffusers - these will cause reflections at many many many different angles and will appear to be scratches that are not really there. (In some cases, a pen may have minute' sanding scratches that show up because they are real, but that is not what I am referring to here.) Tent lighting reduces the multiple reflections and refractions and enhance the picture. By the same token, a good tent light will also show up minute scratches that may not be visible in room light.


                2. BACKGROUND MATERIAL AND COLOR are very important to show a good pen.

                a. Don't use a background that is too busy. It distracts from the pen and often makes it hard to look at very long. A recent photo of a nice looking pen on another forum had the pen displayed on top of small wood shavings of the same color. This works well for showing off a hand plane, but not a pen of the same color. The color similarities and the busy work made it hard to see the full beauty of the pen. It seemed logical and great in person, but as a photo, it was too much.

                b. Same and similar colors are not complimentary as logic would seem to dictate. Too often, I see picts of pens set in a background color similar to the color of the pen. It makes difficult to focus on the pen. A beautiful black pen does not show up well on a black satin or black velvet background; a sliver pen does not show up well on a silver background. White pens are hard to see on a white background.

                c. The opposite of "b" above is that some colors are obviously distractive and prevent the pen from showing up the best. Red backgrounds are the hardest on camera's in my opinion. It distorts the light (in my words) and colors the pen in ways that is not real. Looks good in person but not in photos. White backgrounds at times overpower the camera and pen too, making everything too washed out.

                . . . SIMPLIFYING and RESTATING: Bright red, pure white, same background and pen colors, (and hot and fluorescent colors) busy backgrounds reduce chances for good pictures, - without lots of luck or considerable experience.


                3. PEN HOLDERS, DISPLAYS, ANGLES and LAYOUT:
                Pen holders and props do wonders in presenting the pen. Different angles help catch the light to show the pen at its best.

                I often move a pen around from laying flat and straight across to vertical and angels in between. Then I put the pen on a stand that holds it at a 35° to 55° angle and then move it around. If you do this a few of times, taking several dozen pictures each with several pens, you will soon learn from the experience to recognize what you want in the pen to show up or hide. Digital cameras allow for quick deletes rather than high priced prints. This helped me learn what showed well and what did not. This is where I personally learned that vertically and horizontally placed pens don't show the pen as well as at angles.

                Some people prop their pens on sea shells, or rocks or beautiful piece of wood. I bought several pieces of bamboo stands and holders of chopsticks at a 100 yen shop (dollar store in Japan) and none of them looked great. So experiment here and watch out for getting a prop that is more beautiful, too ugly or too busy.

                . . . LAYING FLAT, Vertical, and at angles in between: Straight across pictures with the pen laying flat and in the horizontal like the lines of this sentence do not show the pen as well as from . . say an upper right corner to lower left corner approach. Chances favor a pen with an angle layout shot. Vertical (up and down) while laying flat on the surface also reduces the 'good to great' shot chances. The ANGLED (while laying flat on the surface) does better. There will be times that you just might want to do it this way. However, shots with the pen on a stand or background prop that elevate one end 25° / 35° or more but less than 75° increase the chances of a good presentation.

                . . . PEN CLIPs: The placing of the pen clip, up, on the side side, down or facing the camera affect. This is less important early on. It is almost always safe to have the clip on the upside, until variations are wanted.

                There are exceptions (for good pictures) to most of the above, but those come by rare chance or experience.


                4. TRIPOD or STAND: I know that "I" want to get the picture of a good pen posted "quickly" so that I can show it off before I start using it or give it away or sell it, - BUT I also know that patience is necessary for a good pict. So, I agonizingly take the time to get out the camera Tripod or stand, light tent and other props. Even with the other props and set ups, they will basically come to naught without the camera stand/tripod. The tripod will improve the chances of a great photo about 10 to 100 fold, even if the camera / lens has a built in image stabilizer.


                5. EXTERNAL LIGHT SOURCE: Use a couple of shop lights with the aluminum hoods - prop them from above and to the side of the light tent. Or you can take a photo outside on a sunny day with the tent set up on a table. I have done this several times, but seem to get better results from a light stand.

                From my experience - "warm" light bulbs distort the color and make things too amber for my preferences. I like cool white and day light type of light bulb colors. I don't know the names of the colors in incandescent bulbs but I can get similar colors here in Japan. Day light, white light and cool white type of bulbs do great.


                6. CAMERA SETTINGS: I like automated camera settings. I am too sporadic in camera use to remember all the setting for different situations, However, lately I have had to keep my Digital Rebel (Japanese version) handbook with my camera to show me the setting for f-stops. Many cameras and mine included will focus on the center of the pen on close-ups and the ends will begin to be out of focus. A great overall shot results, but parts of the pen will be out of focus - a bummer. So I had to learn the f-stop setup and do manual settings for this camera on the close ups. It greatly helped in my picture taking. I don't like having to refer back to the manual, but that is what it takes with a "power" camera.


                I hope this helps without being overwhelming. It might be "overwhelming" at first, but this can be a check list of sorts to begin to weed out the problems one by one in getting good and great pen shots.
                Last edited by leehljp; 11-16-2007, 10:02 PM.
                Hank Lee

                Experience is what you get when you don't get what you wanted!

                Comment

                • gerti
                  Veteran Member
                  • Dec 2003
                  • 2233
                  • Minnetonka, MN, USA.
                  • BT3100 "Frankensaw"

                  #9
                  With some digital cameras the results will actually better with the camera a little farther away and using a light to medium tele-photo setting. Less sensitive to minute distance changes, and better depth of field. This is somewhat counter-intuitive to traditional camera use, and doesn't work with all cameras, but with the ones it works it works well.

                  Comment

                  • Jim Boyd
                    Veteran Member
                    • Dec 2002
                    • 1766
                    • Montgomery, Texas, USA.
                    • Delta Unisaw

                    #10
                    I bought a lidded tub from Walmart along with a couple of inexpensive lamps. A piece of thick corrugated plastic poster board for the back ground.


                    Jim in Texas and Sicko Ryobi Cult Member ©

                    Comment

                    • leehljp
                      Just me
                      • Dec 2002
                      • 8461
                      • Tunica, MS
                      • BT3000/3100

                      #11
                      I HATE spiders!

                      Just kidding, Just kidding!

                      Jim, I don't have your patience! Great pen and Great Patient Work!

                      All I can do is straight lines!


                      Hank Lee

                      Experience is what you get when you don't get what you wanted!

                      Comment

                      Working...