Knobs - easy, fast and cheap

Collapse
This topic is closed.
X
X
 
  • Time
  • Show
Clear All
new posts
  • niki
    Senior Member
    • Nov 2006
    • 566
    • Poland
    • EB PK255

    Knobs - easy, fast and cheap

    Good day

    As you noticed, I'm using many knobs for my jigs and I made them in many methods until one morning, after the 3rd coffee kicked in, I realized that I'm "wasting time and money" for something so simple...that I'm not going to put in the living room...

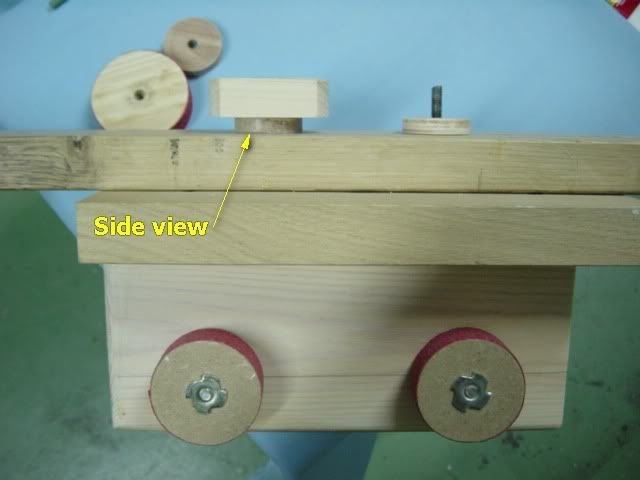
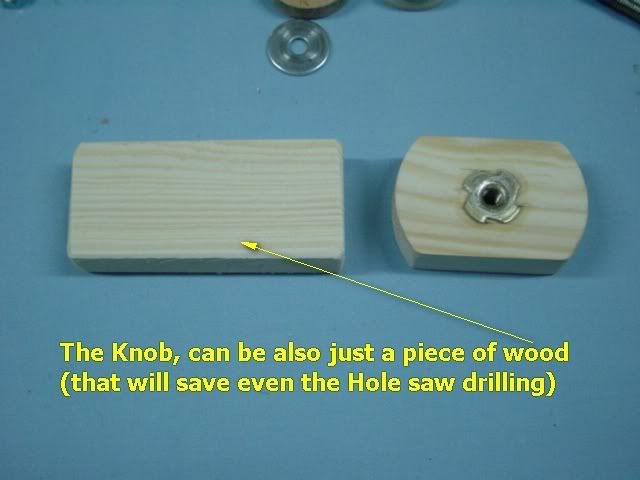
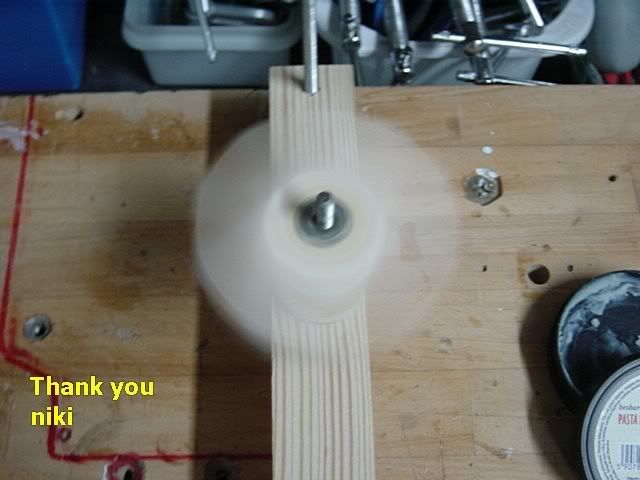
    So I made them simple but, during the process, I thought, "How said that a knob must be round...actually, it's just a lever to turn and tight a nut or bolt"...so I made it even simpler.

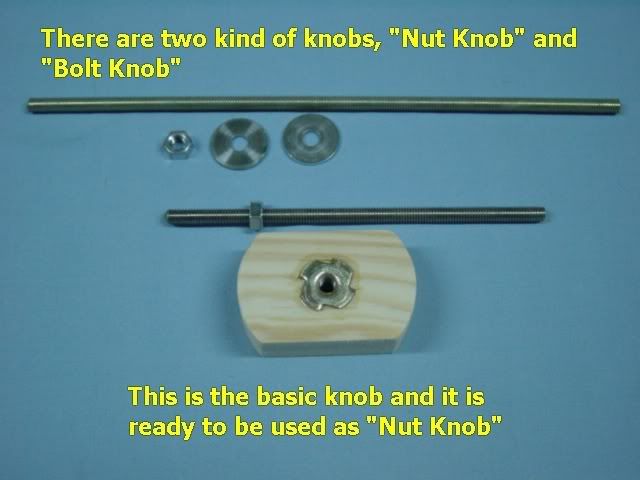
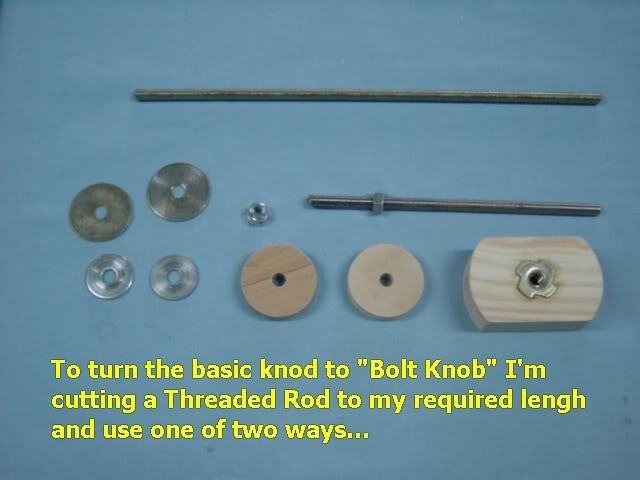
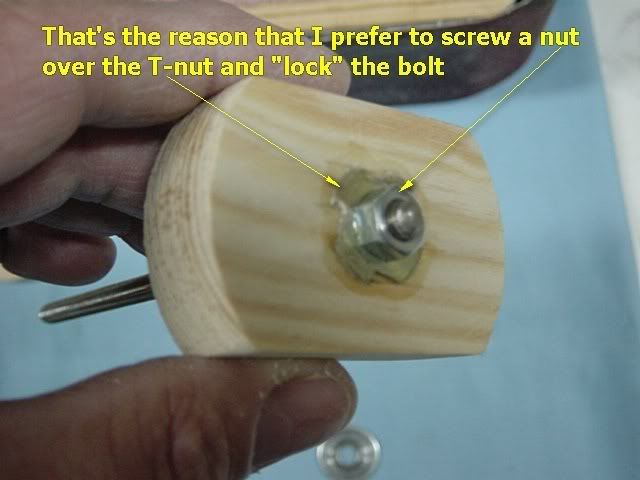
    I stopped using bolts because it's much cheaper to buy Threaded Rod and cut it to the required dimension and from one, I can make many "bolts" and don't have to run to the shop for every bolt length.

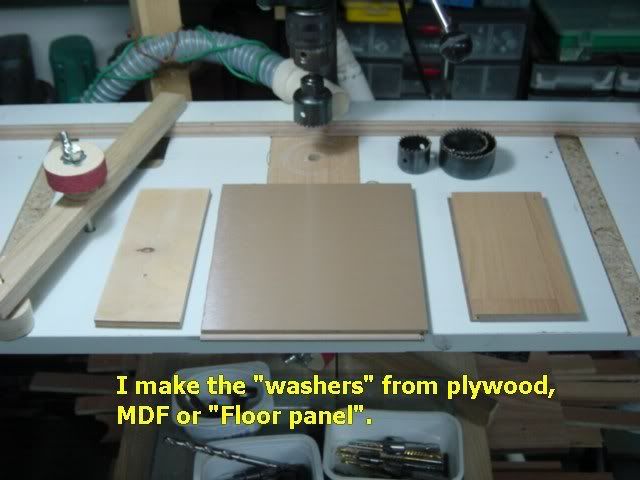
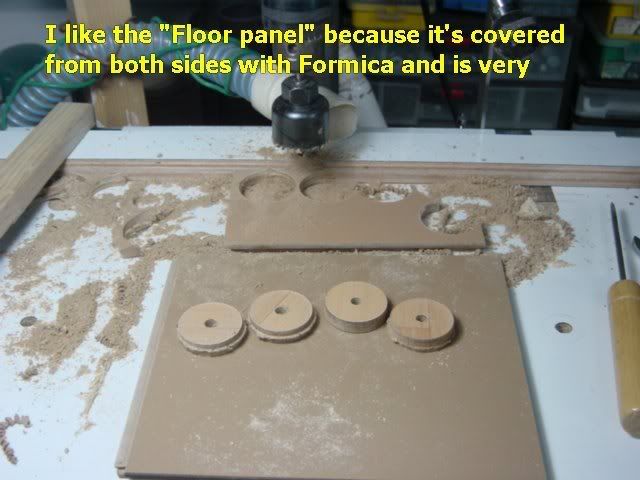
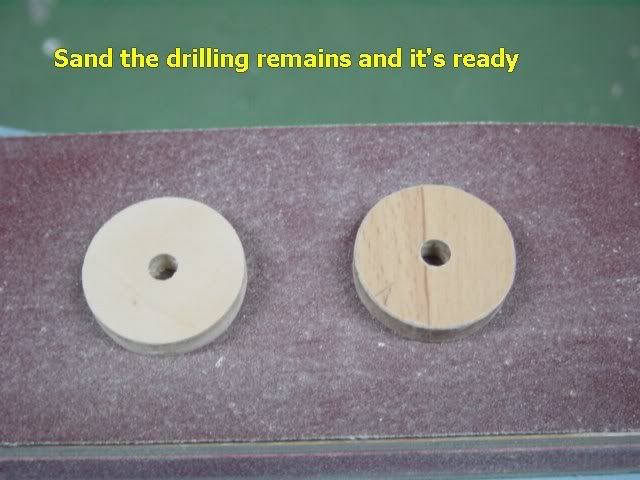
    So, here are my latest knobs (not exactly)...

    Best Regards
    niki


  • Tamarack
    Established Member
    • Oct 2003
    • 199
    • Speedwell, TN USA
    • BT3100

    #2
    Thanks for a great article-very clear and excellent for we "frugal" members!!
    Paul

    Comment

    • LCHIEN
      Internet Fact Checker
      • Dec 2002
      • 21074
      • Katy, TX, USA.
      • BT3000 vintage 1999

      #3
      You can countersink the spot for the T-nut to recess it a bit and make the appearance a little better.
      Loring in Katy, TX USA
      If your only tool is a hammer, you tend to treat all problems as if they were nails.
      BT3 FAQ - https://www.sawdustzone.org/forum/di...sked-questions

      Comment

      • niki
        Senior Member
        • Nov 2006
        • 566
        • Poland
        • EB PK255

        #4
        Thank you so much

        Loring
        I believe that you mean something like in the pics below...yes, it looks better even with the bolt and nut...

        I've shown the easiest and fastest way, the rest, I leave to the imagination...

        Regards
        niki

        Click image for larger version

Name:	01.jpg
Views:	1
Size:	61.8 KB
ID:	781691

        Click image for larger version

Name:	02.jpg
Views:	1
Size:	65.3 KB
ID:	781692

        Comment

        • Anna
          Senior Member
          • Feb 2006
          • 728
          • CA, USA.
          • BT3100

          #5
          Niki, thanks for that great tutorial, as always. I've been saving your tutorials into PDF files for my archives and for future reference. Hope you don't mind.

          Anna

          Comment

          • niki
            Senior Member
            • Nov 2006
            • 566
            • Poland
            • EB PK255

            #6
            Thank you Anna

            Very good idea to save them as PDF. First, you don't have to "search" for them and second, if my Photobucket album disappears...like it happened some one month ago...you have the pics...

            Regards
            niki

            Comment

            • cabinetman
              Gone but not Forgotten RIP
              • Jun 2006
              • 15216
              • So. Florida
              • Delta

              #7
              Niki

              Great idea and simple to do. Just a note about "countersinking" the "T" nut or nut, is to use a forstner bit the size needed and drill just deep enough to seat the nut. Then, the forstner will leave a point in the middle that can be used to center drill for the bolt.

              But, knowing your expertise, that's the way you did them anyway.

              Comment

              • niki
                Senior Member
                • Nov 2006
                • 566
                • Poland
                • EB PK255

                #8
                Thank you Cabinetman

                As you can see, this knob has rounded edges and that means that I cut it with the "Hole Saw" and I already had the 1/4" hole at the center...so, there was no choice but to make the bigger hole with the method of "Drilling large hole over small hole" (I posted it somewhere).

                Your idea is very good when you start from scratch with the rectangular knob

                Best Regards
                niki

                Comment

                Working...