Picture frame project

Collapse
This topic is closed.
X
X
 
  • Time
  • Show
Clear All
new posts
  • FeatherboardBob
    Handtools only
    • Feb 2015
    • 3
    • Central Florida
    • Dewalt DW745

    Picture frame project

    First post, greetings to all.

    I am told by SWMBO'd that I must frame an oil painting she bought without a frame a year or so ago. Of course to justify my "toys" I readily agreed, as if I had any real choice in this matter.

    This painting is mounted on 3/4 inch stock.

    My question is ...has anyone here used the picture framing router bits from MLSC Woodworking Supply? If so, I would be interested in your experience with them. They are offering a special on the three bits and a Merle clamp for $99.

    The frame looks nice in the advertisement. I am concerned with the 3/4 thick frame on this oil painting though. Will have to think about it.

    Cheers
  • capncarl
    Veteran Member
    • Jan 2007
    • 3571
    • Leesburg Georgia USA
    • SawStop CTS

    #2
    Welcome Bob!
    Not to rain on your parade, and you were asking for experience, if it was me I would sell some of my toys and have a picture framer do the job and you take the credit for it! Just joking..... I've have several sets of picture frame and molding bits and have never been pleased with making my own molding with a router. It takes a big one and you will be making a big frame to accomidate a 3/4 stretcher. It's a good challenge with complicated angles, but can be accomplished. I'll leave it at that and the other guys will chime in and tell you how to do it! You didn't tell us what tools you intend on using to build this frame with!
    capncarl

    Comment

    • atgcpaul
      Veteran Member
      • Aug 2003
      • 4055
      • Maryland
      • Grizzly 1023SLX

      #3
      Welcome to the forum, Bob.

      I used the MLCS picture frame door router bit to make doors and drawers for our home office. The corners are reinforced with a biscuit.

      http://www.mlcswoodworking.com/shops...orframe_anchor

      I used a Bosch 1617EVS router in my router table. You will need good feather board pressure to make sure the stock doesn't wander from the bit and give you an uneven cut. I routed the whole profile in several passes. There is A LOT of exposed router bit so you need to be especially careful.

      I cut about 4" of a really good section of molding and screwed 4 sides around it. I then packed that space with Bondo and let it set. After it set, I took the whole thing apart and used spray adhesive to attach some 150grit sandpaper to it. I now had a negative profile that almost exactly matched my molding (except for the thickness of my paper). I used that sanding block on all my molding to get a consistent profile. After that I used my dado stack to cut the groove for the panel, mitered the corners, cut the biscuit slot, and finally glued everything up.

      I routed over 50 feet of molding for this project and the bit was good from start to finish. This was in cherry.

      As CapnCarl said, you sure won't save money doing it this way once you add up all the tool and time costs, but the results sure are gratifying. I will add, though, that to finish off this remodel, we wanted cherry crown molding. For those lengths I decided to buy them pre-milled in long lengths from Wall Lumber. That could be another route to go if you don't feel up to it--which I didn't.

      Paul

      Comment

      • MBG
        Senior Member
        • Apr 2003
        • 945
        • Chicago, Illinois.
        • Craftsman 21829

        #4
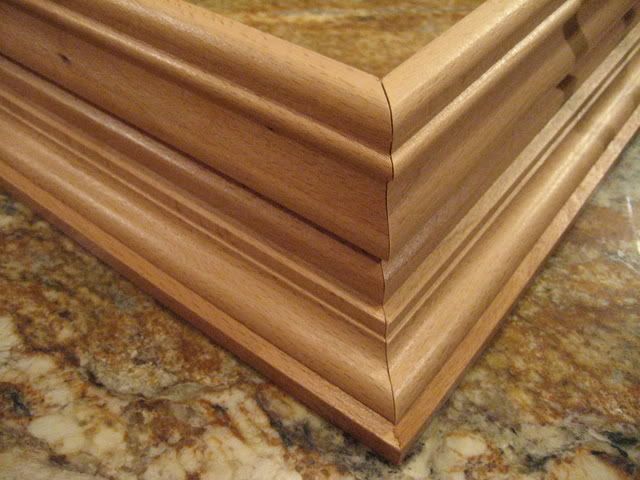
        I bought a set several years ago and have gotten many uses out of it. I even used it for the crown for our kitchen cabinets (combined with a couple other bits):


        Mike


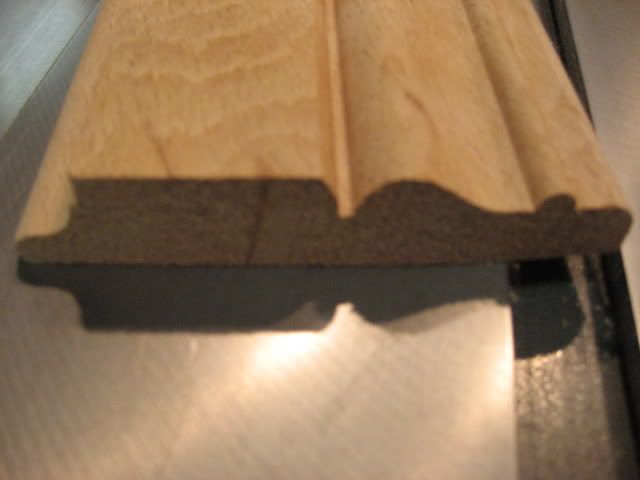
        Added - thought I should add some construction pictures. Note how the crown is three pieces. Also, for safety notice how I cut two parts of the crown on one piece of wood and then ripped it on the TS so as to have a large piece (safer) on the router table:


        Last edited by MBG; 02-14-2015, 11:00 AM.

        Comment

        • leehljp
          Just me
          • Dec 2002
          • 8445
          • Tunica, MS
          • BT3000/3100

          #5
          I am coming off of some meds from a couple of medical procedures, so I may have missed something:
          (I apologize for offering things that you may already know. I am not sure of your level of expertise and it is not meant as condescension at all.)

          Are you aware that using picture framing moulding bits like that basically requires a router table? And from my experience, a basic portable tabletop stand may be too small for doing this, unless it (table) is clamped down well and you have infeed and outfeed support as well as a solidly mounted fence and some featherboards.

          Having said that, a skilled and experienced person "can" do this freehand but it is not advised.

          Will you be routing several short boards or two or three longer boards? Longer boards absolutely require feather boards. It is strongly advised with shorter ones too.

          The pressure needed to make the cuts even and smooth require a fence that is solidly clamped. Smooth feeding is a must. Get some practice boards to get the feel of pressure and get the experience of feed. Don't be disappointed in the first one or two or three.

          Another thing that is very helpful: On the fence, clamp two or three - 1/8 inch thick pieces/layers of plywood onto the fence. These 1/8 inch pieces of ply need to be the height of the fence and the lenght of the fence. Cut out a hole in the layers equal to the opening in the fence for the router bit.

          Next, take the 3 layers off, set the fence to the right height. then set the depth (front to back) for the cut that you want. Now, place the layers of ply on it and clamp them to the fence. (It may only need 2 layers depending on the depth of the bits you are using.)

          MAKE a cut, take a layer of ply off, Make a second cut, remove layer 2, Make another cut and remove layer 3. THEN make the 4th cut. This process makes for smoother cuts. (By the way, run all of the boards through on each layer.) Using this method, a feather board is not necessary.

          One other hint - the feed direction is very important. Push the boards into the cut (From the right to the left) so that it does not grab and project the board like a rifle!


          Once you get the feel, watch out because requests pick up!
          Last edited by leehljp; 02-14-2015, 10:40 AM.
          Hank Lee

          Experience is what you get when you don't get what you wanted!

          Comment

          • AAJIII
            Established Member
            • Jan 2003
            • 306
            • WANAQUE, NJ, USA.
            • Steel City 10" table saw

            #6
            I don't know if this will help, but I found a way to make picture frames without too much fuss. I buy decorative molding, then cut and assemble it. Then I add 3/4 stock in the back of the frame.
            AL JEWELL

            Comment

            • FeatherboardBob
              Handtools only
              • Feb 2015
              • 3
              • Central Florida
              • Dewalt DW745

              #7
              Wow, thanks for all the input.

              I have a 3 1/4 hp router, so I should be ok power wise. However, it is utilized on a bench top router table. Good points and feather boards will be used if I decide to do this.

              I am having second thoughts from my experience level and the fact this oil painting is not really worth a huge amount of effort/energy for a one time thing.

              Now, I had come to a few conclusions in an effort to skirt around some of these issues. First I think the biggest obstacle right up front is the 3/4 stretcher board. I am thinking of remounting the thing myself on a thinner board. Ya, I know ...cheater.

              Second, maybe the ready bought molding angle and the addition of a sufficiently thick rear faceplate added on. Several have raised this point. I am going to check into this before I commit to bits I may not use again....

              As to equipment, I am a weekend warrior dabbling around with a Ryobi miter saw, a Dewalt D745 compact contractor's TS and various routers. My largest is the Triton. And of course there is a drill press.

              The painting is 43 wide... I forget the height offhand, it's not here presently to measure. Anyway, a rectangular painting. I can see the efficiency of running all the cuts at one time before changing profiles....without support it would be very iffy on a small table. SWMBO will have to be consulted as well.

              Comment

              • BadeMillsap
                Senior Member
                • Dec 2005
                • 868
                • Bulverde, Texas, USA.
                • Grizzly G1023SL

                #8
                I am all for DIY stuff ... and getting new tools is one of life's great joys of a woodworker ... so if this is a project you want to do from the bottom to the top power to you carry on ... HOWEVER; ... if you are doing this to satisfy the request in the best possible manner AND without the learning curve ... I will suggest you at least give a look at this link as a consideration either for getting pre-made moldings or frames ... (btw I often make frames from scratch and I use these guys as well ...)

                Framing For Yourself
                "Like an old desperado, I paint the town beige ..." REK
                Bade Millsap
                Bulverde, Texas
                => Bade's Personal Web Log
                => Bade's Lutherie Web Log

                Comment

                • capncarl
                  Veteran Member
                  • Jan 2007
                  • 3571
                  • Leesburg Georgia USA
                  • SawStop CTS

                  #9
                  I'm not sure how much smaller stretched you can mount the oil painting on before it distorts. Kinda like warping plywood.

                  Comment

                  • capncarl
                    Veteran Member
                    • Jan 2007
                    • 3571
                    • Leesburg Georgia USA
                    • SawStop CTS

                    #10
                    After you have spent all your time and money making the picture frame molding, are you familiar with saw blade tearout? This is where the saw blade and router bit tears out splinters of wood when it cuts through the wood. If you have gotten as far as making the molding you really don't want to have to throw it away because on the process the saw ruins your work. It is especially hard to prevent tearout on irregular shapes. I highly recomend researching how to prevent tearout before you start because it will show up with your router cuts as well!
                    capncarl

                    Comment

                    • Pappy
                      The Full Monte
                      • Dec 2002
                      • 10453
                      • San Marcos, TX, USA.
                      • BT3000 (x2)

                      #11
                      My bits I think came from Holbren but they are of comparable quality to the MLCS offerings. I have made several different profiles by using parts of a bit on narrow frames or sometimes combining the pattern bits with round over bits or other 'standard bits. Add some inlay that match the profiles and the possibilities are increased.

                      Click image for larger version

Name:	Mickey Mouse Frame 2.jpg
Views:	2
Size:	124.2 KB
ID:	787110

                      Click image for larger version

Name:	Mickey Mouse Frame.jpg
Views:	2
Size:	204.6 KB
ID:	787111

                      Like Hank said, a router table is essential as will as taking small bites at a time. For final cutting I use a miter sled with stop blocks to make sure the opposing legs are the same and tape over the face side of the cut line to control tear out.
                      Last edited by Pappy; 03-02-2015, 08:05 PM.
                      Don, aka Pappy,

                      Wise men talk because they have something to say,
                      Fools because they have to say something.
                      Plato

                      Comment

                      • JimD
                        Veteran Member
                        • Feb 2003
                        • 4187
                        • Lexington, SC.

                        #12
                        I made enough crown moulding for a large living room and dining room in our house in Pittsburgh. I still have the bit somewhere but haven't used it again. The profile was a bit small but I also found the process somewhat frustrating. Every time you stop pushing the wood through the bit you get a burn mark or a low spot in the profile or both. Maintaining constant motion through the bit isn't easy with longer boards, especially with feather boards. And then you have to sand. I used small rubber sanding profiles wrapped with sandpaper which worked fine but it's a lot of work to make the moulding and then sand it. Mine was painted, clear finish would be even worse to make look good. People who make moulding for a living use power feeders.

                        It isn't my next project but we need a new kitchen. I made a whole kitchen, also in the Pittsburgh house, but they were more traditional cope and stick with raised panel doors, out of oak. My wife likes the mitered style of doors like the MLCS bits are used for. I know I could make them but I'm thinking if I get to make the cabinets we may just buy the doors.

                        Last thought, those bits look like they would work better in a horizontal router table. I didn't have one when I made the crown moulding years ago but have one now and would try that first if I made that moulding.

                        Comment

                        • FeatherboardBob
                          Handtools only
                          • Feb 2015
                          • 3
                          • Central Florida
                          • Dewalt DW745

                          #13
                          Frame all finished....

                          Well, I decided to do a casement type of frame from pine. Simpler design and a contemporary look. Nothing more than a round over bit. Will see if I can link a photo or two of it. Well if I can figure it out I will. No success so far.

                          Anyway, the wife is happy and I have this one behind me now. What a learning curve that was.

                          Comment

                          Working...