Box joint by degrees

Collapse
This topic is closed.
X
X
 
  • Time
  • Show
Clear All
new posts
  • chopnhack
    Veteran Member
    • Oct 2006
    • 3779
    • Florida
    • Ryobi BT3100

    Box joint by degrees

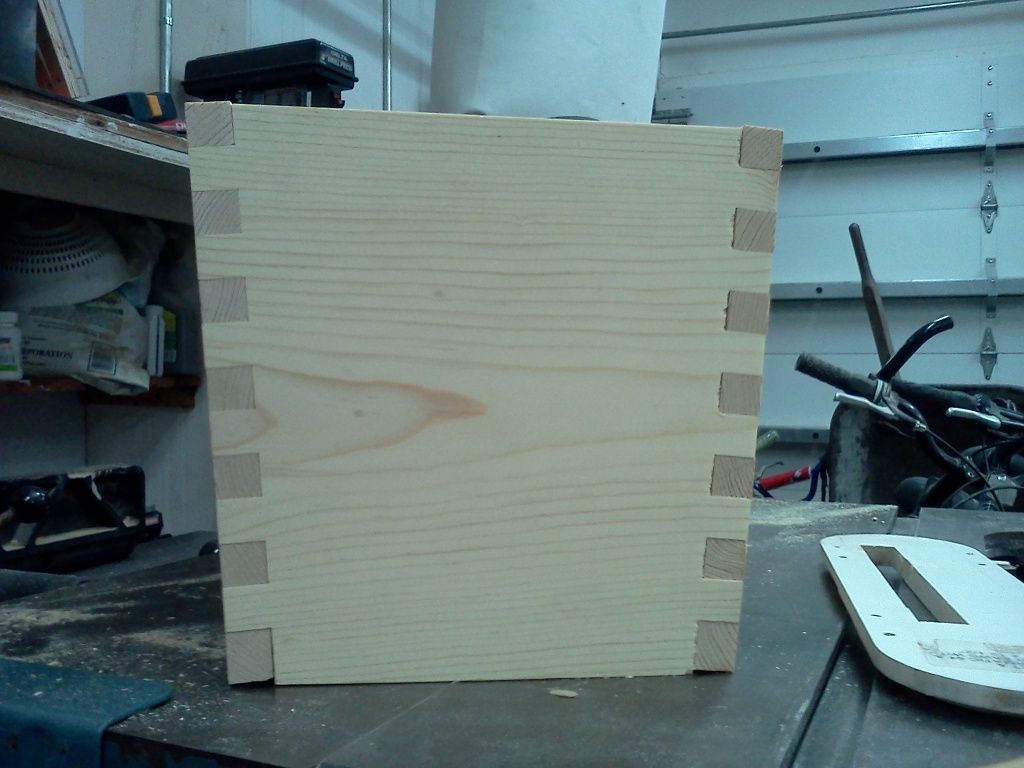
    Today after building a box joint jig I got started on a special request. I won't get into what it is or entertain speculation until after its built, but I have questions about box joints and angled box joints that I pose to the collective.

    Have you ever used a box joint on an angled piece? Should there be an adjustment made before assembly to compensate for the other pieces that will be affected by the angled piece?

    Below is just a dry fit, but I notice that I will have some handplaning to do to get the piece to sit flat as well as on top to be flush. The angle was only 5 degrees and I am sure if it was much more the piece probably would not have come together.

    I think in straight lines, but dream in curves
  • Bill in Buena Park
    Veteran Member
    • Nov 2007
    • 1865
    • Buena Park, CA
    • CM 21829

    #2
    I think your joints look fine, I think its just a matter of planning for extra material on the top and bottom of the side pieces.

    Regardless of the degrees, you are cutting your box joints perpendicular to the edge planes of the trapezoidal end pieces, to which your side pieces will mate, and the side pieces are jointed perpendicular to the plane of the end-grain edge - this should always be a fit.

    Its the top and bottom long-grain edges where you would leave a little extra un-box-jointed material (i.e., start out with stock that's slightly wider than the cut edge of the end pieces), so when you dry fit you could mark a bevel line on the end grain of sides (top and bottom) for bevel cuts at the table saw.
    Bill in Buena Park

    Comment

    • cabinetman
      Gone but not Forgotten RIP
      • Jun 2006
      • 15216
      • So. Florida
      • Delta

      #3
      For a simple answer, the joints following the angle of the ends are registered off the ends. They are perpendicular to the edge. If the joints were machined at an angle, there would be a step differential looking at the end, instead of them following the angle of the end and lining up.

      .

      Comment

      • toolguy1000
        Veteran Member
        • Mar 2009
        • 1142
        • westchester cnty, ny

        #4
        couldn't the edges of the sides of the box be jointed 5* (top and bottom) and the bottom of the 2 ends trimmed to flush up with the jointed bottom pins of the sides?
        there's a solution to every problem.......you just have to be willing to find it.

        Comment

        • chopnhack
          Veteran Member
          • Oct 2006
          • 3779
          • Florida
          • Ryobi BT3100

          #5
          Thanks guys, I had layed this out in sketchup so I thought it should work. I did a test cut anyway. Thanks Bill, your right, I should have left more material on the top, I could have used the ts to finish it out instead of hand planing.

          I think the tops of the long pieces can be planed after glue up, the bottom probably easier on ts.

          Would you guys plane or rip faced with this situation?
          I think in straight lines, but dream in curves

          Comment

          • LCHIEN
            Internet Fact Checker
            • Dec 2002
            • 21037
            • Katy, TX, USA.
            • BT3000 vintage 1999

            #6
            Looks like you should do a 5 °bevel cut on the top and bottom edges of the side piece. which will make them the edges parallel with the top and bottom when installed.
            You them have to start the end fingers so the side of the finger facing the end board is full width of the finger and the outside is narrower (bottom) and vice versa for the top.

            In your test looks, like the bottom finger slot of the ends is wider than the other fingers. Camera illusion or real?
            Loring in Katy, TX USA
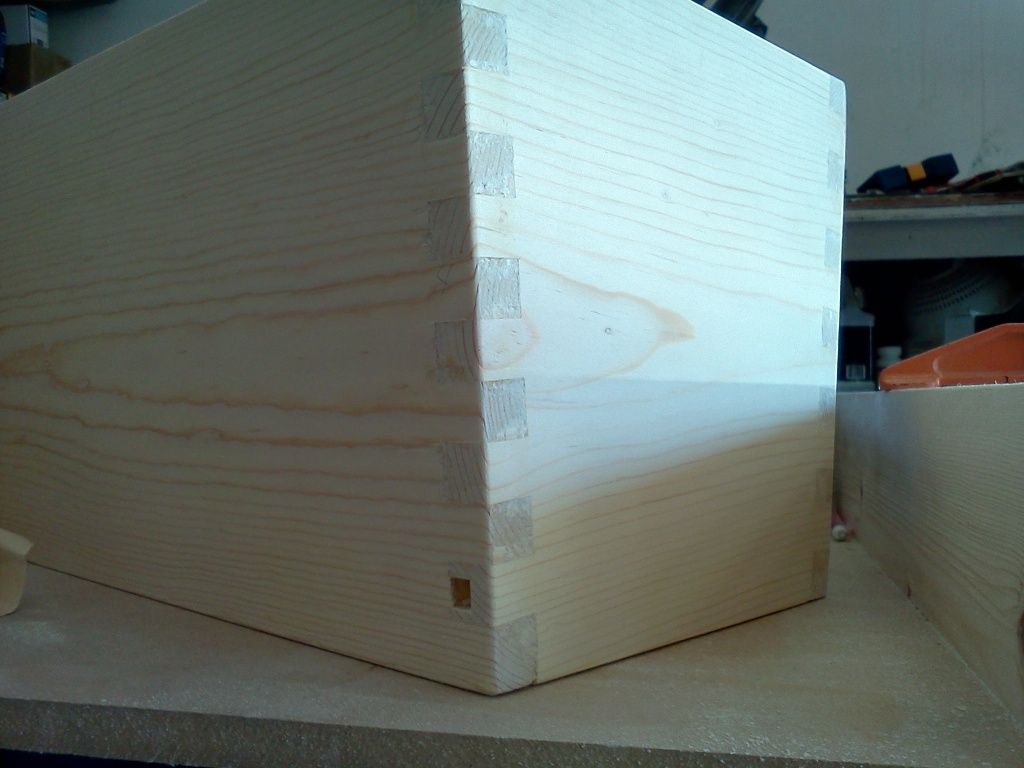
            If your only tool is a hammer, you tend to treat all problems as if they were nails.
            BT3 FAQ - https://www.sawdustzone.org/forum/di...sked-questions

            Comment

            • greenacres2
              Senior Member
              • Dec 2011
              • 633
              • La Porte, IN
              • Ryobi BT3000

              #7
              Also will need to account for the 5 deg on the bottom. In other words, if you're grooving for a 1/4" bottom, the groove will need to be cut at 5 deg so they don't point up.

              I think.

              earl

              Comment

              • Bill in Buena Park
                Veteran Member
                • Nov 2007
                • 1865
                • Buena Park, CA
                • CM 21829

                #8
                Originally posted by LCHIEN
                ...In your test looks, like the bottom finger slot of the ends is wider than the other fingers. Camera illusion or real?
                I see this too - my guess would be that you started cutting your fingers from the top edges of the pieces shown, and the bottom edges were not trimmed to leave 1/4in finger/socket interface. The advantage to this at the moment is that you could trim a little off the bottom of the end piece, and then bevel the bottoms of the side pieces to be flush.

                As Loring said, I'd try the 5deg bevel rip top & bottom of the sides on the TS; you could leave 1/32 over and plane if you're concerned about ripping off too much.
                Bill in Buena Park

                Comment

                • Black wallnut
                  cycling to health
                  • Jan 2003
                  • 4715
                  • Ellensburg, Wa, USA.
                  • BT3k 1999

                  #9
                  I think it matters what jig or method you are using to cut the box joints as to if you should bevel rip the sides first. If you are using a spacer fence attached to your router table then I would not bevel rip but plane after assembly. That said it looks great as a start and I think your final project will turn out just fine.
                  Donate to my Tour de Cure


                  marK in WA and Ryobi Fanatic Association State President ©

                  Head servant of the forum

                  ©

                  Comment

                  • chopnhack
                    Veteran Member
                    • Oct 2006
                    • 3779
                    • Florida
                    • Ryobi BT3100

                    #10
                    Thanks all, I ended up taking the block plane to bevel and it worked out just fine.

                    Loring, I think I get what your saying, the ideal method to account for this variation in the future is to bevel the finger, is that something that can be accomplished with the box joint jig and the t.s. set at a bevel?
                    The end (small pieces) were tapered by 5 degrees, so the mating long boards would have been the pieces that would need the tapering.

                    Being that the wood is only 5/8" thick and soft pine, I opted to put the dado for the bottom higher up from the bottom of the piece. I still need to make plugs since I didn't take the time to do a stopped dado.

                    As woodworkers, I am sure you can appreciate the cathedral grain running around the corner ;-)

                    [IMG][/IMG]
                    I think in straight lines, but dream in curves

                    Comment

                    • Bill in Buena Park
                      Veteran Member
                      • Nov 2007
                      • 1865
                      • Buena Park, CA
                      • CM 21829

                      #11
                      Looks great C&H. What kind of finish are you planning to use, if any?
                      Bill in Buena Park

                      Comment

                      • chopnhack
                        Veteran Member
                        • Oct 2006
                        • 3779
                        • Florida
                        • Ryobi BT3100

                        #12
                        That depends on the rest of the project... stay tuned!
                        I think in straight lines, but dream in curves

                        Comment

                        Working...