

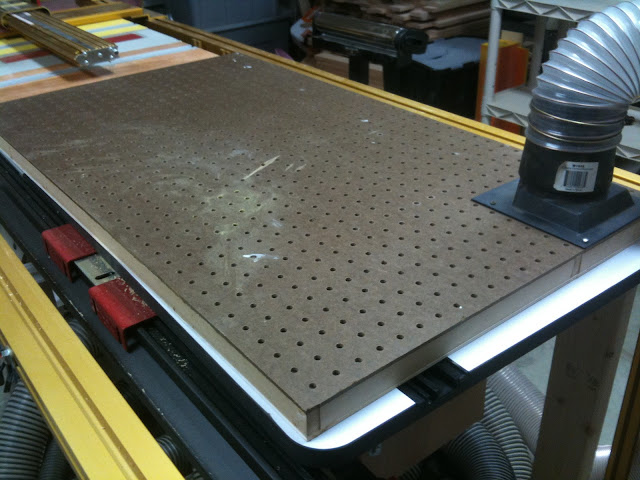
Just completed my down, err, updraft torsion box. THis was mostly to practice for the mobile saw base. Luckily I realized before it was too late I need to allow for airflow, so the ribs are staggered here and there (think Star Wars when Luke goes in to kill the Death Star).
I made one long air channel that snakes its way from the far corner over to where the hose connects.
I was worried the dust collector would be so strong it would make the box self-implode or something, but actually the holes are so big in the hardboard that I am going to have to plug a few. There is strong airflow for about a foot after where the hose connects.
Bottom is 1/4 ply, top is 3/8 hardboard and sides and ribs are 1/2 MDF 1 inch wide (so the box is almost 1-1/2 inches thick). Spacing is about 6.5 inches, but keep in mind not every rib touches both the top and bottom.
The box is amazingly rigid (about 40x22 inches - could even make a sweet extension table for the table saw).
The mobile base is next this weekend. Hope I can cut my 96 inch strips straight.
 LCHIEN
 Loring in Katy, TX USA
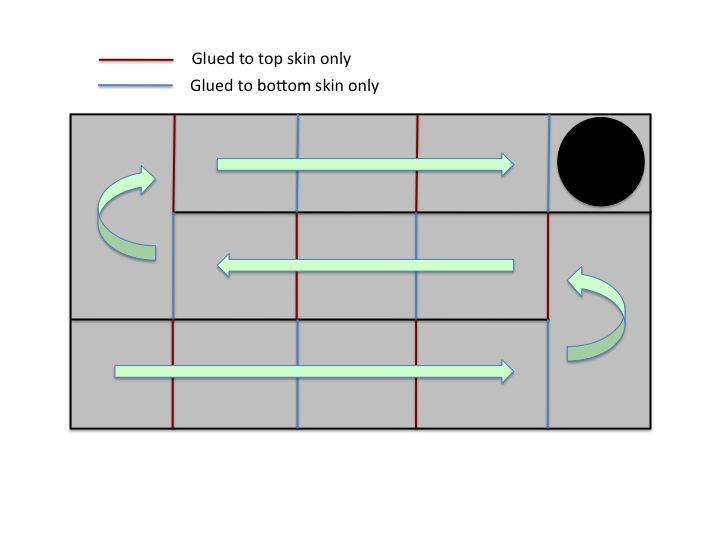
Comment