New house, new shop, and new tools

Collapse
This topic is closed.
X
X
 
  • Time
  • Show
Clear All
new posts
  • dsellinger
    Forum Newbie
    • Jun 2006
    • 61
    • NW WA
    • bt3000

    #1

    New house, new shop, and new tools

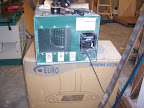
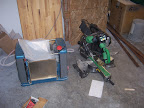
    Well it's been a long couple of months, but we moved into the 95% complete house last weekend and I finally unpacked and mostly assembled the jointer and dust collector last night. The shop area is full of house construction related junk still, and has no storage or work benches but that can all be sorted in the future.

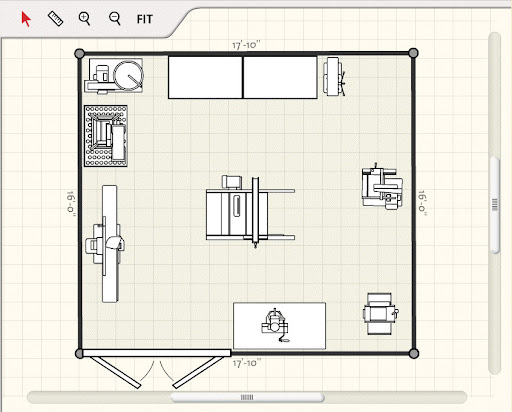
    The room is small, only 17x16, but everything is or will be mobile so I can spread out into the garage if needed. I have four 220v 20A circuits run into the area, and one 220V 30A in the center of the room (in floor) case I ever get a giant table saw (SawStop woo! Right now I have a Ridgid contractor that is not on site, my BT3k blew up ripping 2x4's).

    Anyway, lots of work to do still to make it a usable space and a few more tools to get/move here from my 2 other temporary work shops. (router stuff, hand tools, clamps, etc.)
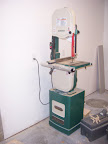
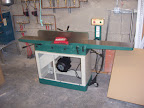
    Of course it doesn’t count unless there are pictures.. So here is all my new green, and a little orange)


    House and shop pictures can also be seen here.
    http://picasaweb.google.com/dsellinger

    And any tips on arrangement of the space, tool position and dust collection piping are greatly appreciated.
  • dsellinger
    Forum Newbie
    • Jun 2006
    • 61
    • NW WA
    • bt3000

    #2
    This is what I have so far

    Comment

    • Pappy
      The Full Monte
      • Dec 2002
      • 10481
      • San Marcos, TX, USA.
      • BT3000 (x2)

      #3
      Looks like a good beginning. Post more pics when it all set up.
      Don, aka Pappy,

      Wise men talk because they have something to say,
      Fools because they have to say something.
      Plato

      Comment

      • Thom2
        Resident BT3Central Research Ass.
        • Jan 2003
        • 1786
        • Stevens, PA, USA.
        • Craftsman 22124

        #4
        Nice collection you've got going there

        My shop is far from a perfect layout, but this is the initial workflow pattern that I see when using rough cut lumber in my shop.
        1. RAS - chop to rough length
        2. BS - rip to jointer width (in my case 6")
        3. jointer - face and square an edge
        4. planer - second face
        5. TS - rip second edge
        Taking those things into consideration, here's a quick layout I did based on the patterns I see in my shop.

        Click image for larger version

Name:	untitled.JPG
Views:	1
Size:	22.5 KB
ID:	781740

        This assumes the BS and Planer are mobile, the BS would actually be stored against the front wall for normal use. The planer could be stored anywhere. What I was trying to show is a layout that would bring rough cut lumber in the door and a nice workflow to get it to s4s. You've got the opportunity to deal with these issues right from the get-go rather than having to fight it later.
        If it ain't broke.. don't fix it!!!... but you can always 'hop it up'
        **one and only purchaser of a BT3C official thong**

        Comment

        • LarryG
          The Full Monte
          • May 2004
          • 6693
          • Off The Back
          • Powermatic PM2000, BT3100-1

          #5
          Here's my arrangement. Bigger than your space (22x24 building, essentially a two-car garage) but some of the tool relationships may prove helpful.


          The layout was in part dictated by the presence of three steel pipe columns down the center of the shop, between the two garage bays. However, just this past weekend I was standing in the shop idly looking around, and realized I'm not sure I would have ... could have ... done things a whole lot differently even if the columns hadn't been there. Then again, I'd like to have had the opportunity to find out. I spent many, many hours with our CAD software working out this arrangement, and it may be that I got so locked into the presence and placement of the columns that I can't see the forest for the trees. One thing they do is complicate the handling of long stock, messing up the logical work flow that Thom talks about. OTOH, they did provide a convenient place to run my dust collection drops.

          The positioning of the cabinet saw with one end against the wall is working out especially well. Each bay of the shop is about 11' wide, because of the columns, but even so with this arrangement I can crosscut to the middle of a full 4x8 sheet. We hear people talk about the table saw as "the centerpiece of the shop," and it sometimes literally is (as in Thom's layout), but if you have a narrow space it can be positioned as I have it and still work quite well.

          The only tools on wheels are the band saw (13) and thickness planer (16), but the planer is the only one of the two that I actually roll around very far. The band saw is basically just pivoted around more or less where it sits, in order to provide more infeed room for either it, the planer, or the jointer (14).

          BTW, the miter saw bench (17) does not exist yet. This drawing shows what I will have whenever I finally get the thing built.

          Lastly, you can see several pictures of my dust collection system here.
          Last edited by LarryG; 09-19-2007, 07:18 AM.
          Larry

          Comment

          • Thom2
            Resident BT3Central Research Ass.
            • Jan 2003
            • 1786
            • Stevens, PA, USA.
            • Craftsman 22124

            #6
            Here's 2 examples of my shop, things really aren't quite as tight as they appear in the plan, but it gets the gist across

            This is the stored and normal layout that I work around:

            Click image for larger version

Name:	shopstored2.jpg
Views:	1
Size:	22.7 KB
ID:	781741

            This is the layout I end up using when first starting out with rough cut:

            Click image for larger version

Name:	shops4s2.jpg
Views:	1
Size:	24.2 KB
ID:	781742

            RAS = Radial Arm Saw
            TC = Tool Chest/cabinet
            WB = Workbench
            GB = Grinder Bench
            LS = Lumber Storage
            AC = Air compressor
            RT = Router table


            If working with long stock, the jointer normally has to be moved to use the RAS and BS. Most times I don't bring the planer out to position until all of the jointing is done and the jointer can be put away (planer is a Ridgid and actually gets mounted to a workmate for use). Any which way I look at it tho', it's a PITA as the workflow always seems to be going the wrong direction.

            I'd love to have the opportunity (which you do 
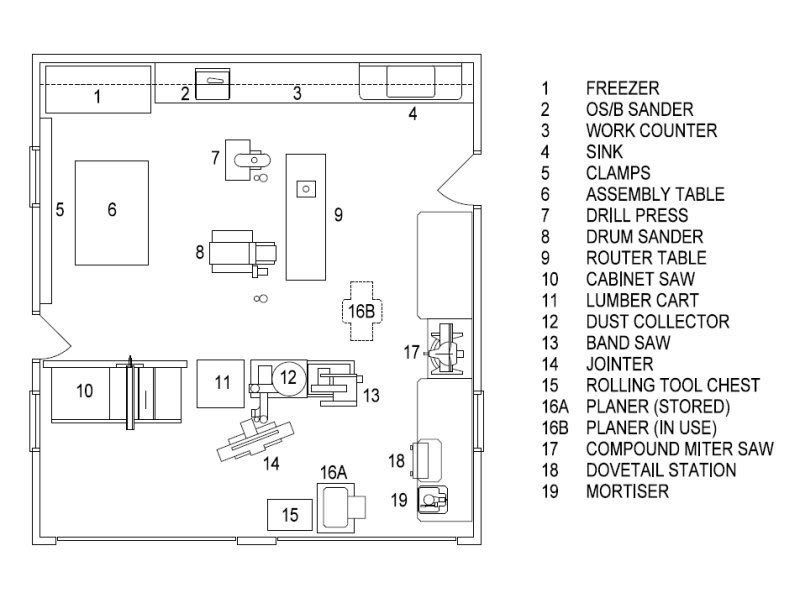
) to avoid the pitfalls I currently deal with.

            Of course if I didn't have 20 gallons of crap in a 5 gallon shop, I might stand a better chance dealing with the space I have
            If it ain't broke.. don't fix it!!!... but you can always 'hop it up'
            **one and only purchaser of a BT3C official thong**

            Comment

            Working...