
Just a quickie. It's been a busy week so haven't had much time to work on it.
Last week, I finished milling (and remilling) the drawer parts.
From the original Maloof picture, you can't tell what kind of drawer joinery
Sam used. However, having been on the WWers tour of his house several
years ago, I know it wasn't dovetails. I snuck a peek at the drawers of one
his sideboards and discovered he had wood sides attached to a rabbetted
front. No fancy locking joint or anything. The sides were attached with either
screws covered with a decorative plug or with just a wood dowel.
Having done this before with wood dowels, this time I wanted to use the
Miller dowel system. However, my Woodcraft was out of the smaller 1/4" ones
and I couldn't wait to have it delivered. Using screws and plugs requires more
steps but it gets the job done.
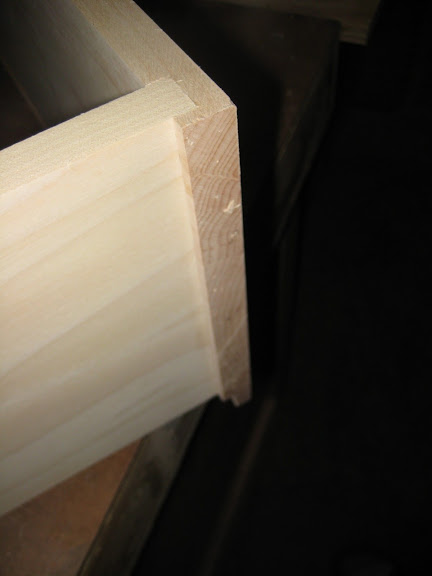
I cut rabbets on the ends of the front with a dado stack set to the thickness
of my sides. Very important to use a backer board to prevent blowout on
the edge.

The backs are glued into dadoes in the sides. The back is 3/4" shorter than
the sides so the bottom can slide in from the back. The sides are maple. The
backs are poplar. All poplar would have been easier but I had a lot of maple to
use up.
The drawers are assembled with glue and screws. I set up a fence on my
drill press so the 1/4" hole was drilled the correct distance from the end. After
the fronts were glued and clamped on, I used a cordless drill to drill a pilot hole
for the screw. I need to make some 1/4" plugs, glue them in, and fine tune
the fit of the drawer with a hand plane. This is why I wish my sides were
poplar and not maple.

All the drawers slid into place and some mineral spirits wiped on to show off
the grain. I made sure the grain flowed from left to right.

I can see the finish line. Need to do a lot of sanding this weekend.
Paul
Last week, I finished milling (and remilling) the drawer parts.
From the original Maloof picture, you can't tell what kind of drawer joinery
Sam used. However, having been on the WWers tour of his house several
years ago, I know it wasn't dovetails. I snuck a peek at the drawers of one
his sideboards and discovered he had wood sides attached to a rabbetted
front. No fancy locking joint or anything. The sides were attached with either
screws covered with a decorative plug or with just a wood dowel.
Having done this before with wood dowels, this time I wanted to use the
Miller dowel system. However, my Woodcraft was out of the smaller 1/4" ones
and I couldn't wait to have it delivered. Using screws and plugs requires more
steps but it gets the job done.
I cut rabbets on the ends of the front with a dado stack set to the thickness
of my sides. Very important to use a backer board to prevent blowout on
the edge.
The backs are glued into dadoes in the sides. The back is 3/4" shorter than
the sides so the bottom can slide in from the back. The sides are maple. The
backs are poplar. All poplar would have been easier but I had a lot of maple to
use up.
The drawers are assembled with glue and screws. I set up a fence on my
drill press so the 1/4" hole was drilled the correct distance from the end. After
the fronts were glued and clamped on, I used a cordless drill to drill a pilot hole
for the screw. I need to make some 1/4" plugs, glue them in, and fine tune
the fit of the drawer with a hand plane. This is why I wish my sides were
poplar and not maple.
All the drawers slid into place and some mineral spirits wiped on to show off
the grain. I made sure the grain flowed from left to right.
I can see the finish line. Need to do a lot of sanding this weekend.
Paul


Comment