Quickie Patio Table

Collapse
This topic is closed.
X
X
 
  • Time
  • Show
Clear All
new posts
  • cabinetman
    Gone but not Forgotten RIP
    • Jun 2006
    • 15216
    • So. Florida
    • Delta

    Quickie Patio Table

    A little background. LOML is definitely a tool babe. Over the last 18 years, she has helped me in the shop, and on installations. She picked up on doing inlays during a project that had about 53 of them. So, she likes woodworking and finds it a relaxing escape.

    Many months ago one of her friends had asked for my advice on maintenance to a patio table that was unfinished Teak. She brought home a picture of it. Up to that point we had been using one of those cheapo $29 round plastic tables. It had served us well but IMO was destined for the heap. While we were talking about the table she mentioned that she likes the look of the grain following the perimeter, and would like to build one as a backyard project. Something she could work on for a couple of hours a day when she got home from work.

    Like I said this was many months ago. Well time passed, and she lost interest and kept asking if I would help her out. That means, I had to make it if it would ever get done. So, this project is a perfect example of a very rough, simple, inexpensive table with only about $30 in wood that can be made on your patio with a minimum of tools and time.

    The lumber is #2 PT SYP 2x4's right off the stack. They weren't dimensioned for exact widths or thickness. A CMS and a ROS were the only tools used. I used a folding table made up from a folding leg kit and an old door, a couple of sawhorses, 4 bar clamps, and TB III. That's it. The time involved was a couple of evenings after work. This was a quick project, not out to win any awards, but sure beats the heck out of a plastic table.

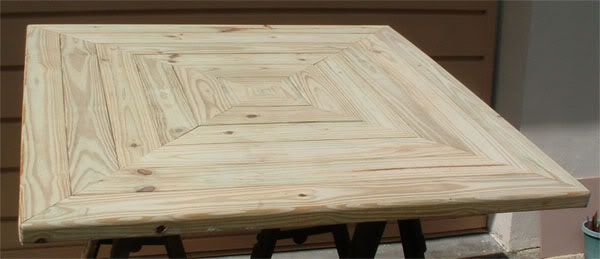
    This first picture is the 42" square top after the final glue up.
    .

    .
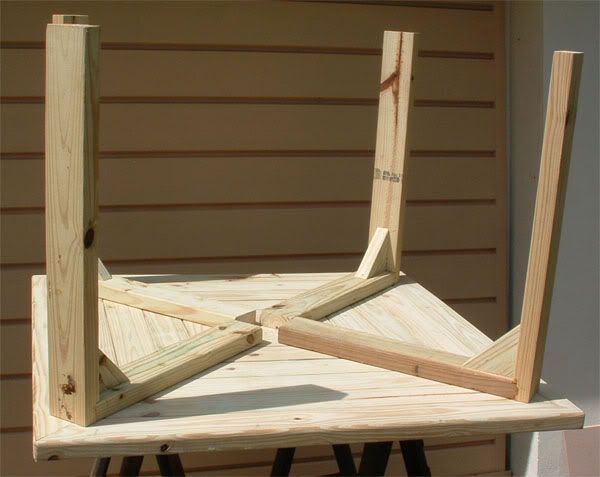
    This one shows the leg assemblies.
    .

    .
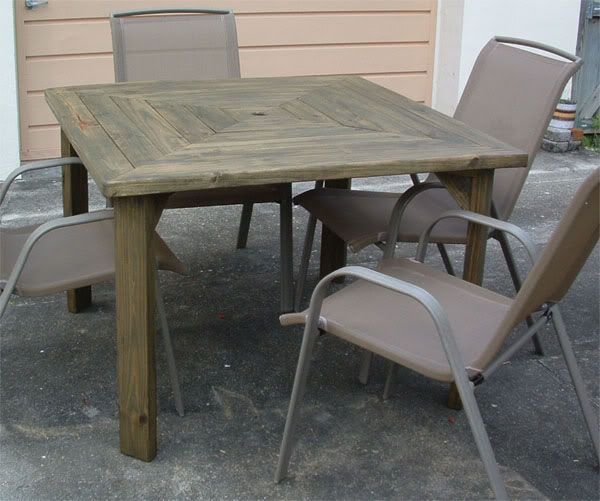
    And finally, the table standing after staining. Wife picked out the color, so I'm off the hook.
    .

    .

    .
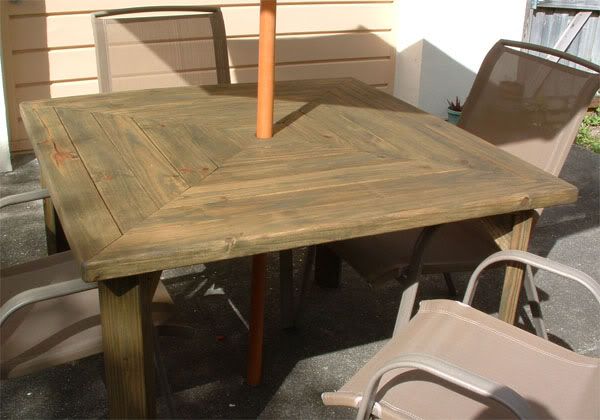
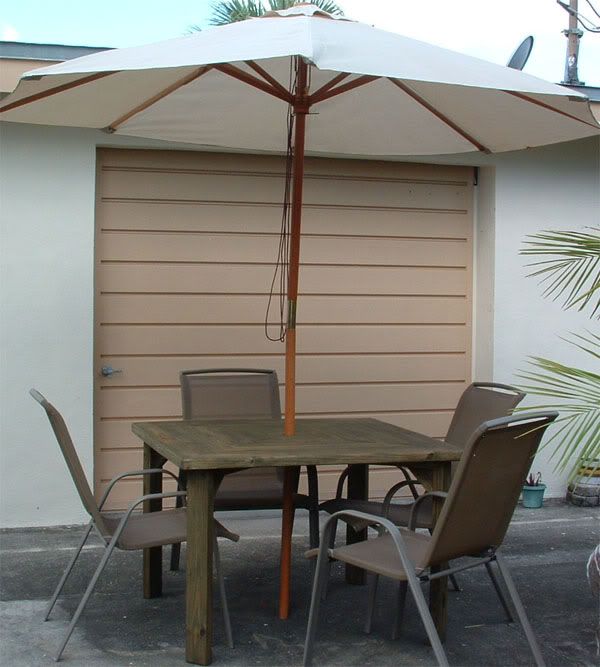
    And here it is with the umbrella, all ready to do some serious sitting.
    .

    .
  • radhak
    Veteran Member
    • Apr 2006
    • 3061
    • Miramar, FL
    • Right Tilt 3HP Unisaw

    #2
    I like it! Enough to want to copy it! Nicely done!!

    How'd you glue it : build up each of the 4 triangles then put them together, or work inside to out, a complete perimeter a time? And did you need to provide any dowels or something to add strength?

    Btw, don't tell the LOYL, but I liked the pre-finish look more - shows that even the grain of SYP can be attractive...
    It is the mark of an educated mind to be able to entertain a thought without accepting it.
    - Aristotle

    Comment

    • cabinetman
      Gone but not Forgotten RIP
      • Jun 2006
      • 15216
      • So. Florida
      • Delta

      #3
      Originally posted by radhak
      I like it! Enough to want to copy it! Nicely done!!

      How'd you glue it : build up each of the 4 triangles then put them together, or work inside to out, a complete perimeter a time? And did you need to provide any dowels or something to add strength?

      Btw, don't tell the LOYL, but I liked the pre-finish look more - shows that even the grain of SYP can be attractive...

      Thanks for the compliment. I started with the center out. Four pieces that were 45'd. Glued next perimeter all four pieces, etc, until all the perimeters were glued (clamps in two directions). The edges and the miters are glued. In addition, the leg returns under the top are screwed to each side of the miters on all the pieces.

      Strength wise I think it should hold up well. Time will tell. I'll tell ya this, it's a heavy sucker. While working on it, and turning it over, I lost grip and a leg caught the back of my arm and tore off the skin about 3"x 4". So, I can say, I put my blood into this one.

      Actually, I hesitated on using a stain, and like you I liked the natural look. It will likely lighten up in time. But, there's that SWMBO thing.
      .

      Comment

      • Richard in Smithville
        Veteran Member
        • Oct 2006
        • 3014
        • On the TARDIS
        • BT 3100

        #4
        Nice table. Enough that I'm hiding the picture from LOML
        From the "deep south" part of Canada

        Richard in Smithville

        http://richardspensandthings.blogspot.com/

        Comment

        • Ed62
          The Full Monte
          • Oct 2006
          • 6021
          • NW Indiana
          • BT3K

          #5
          Very nice. I think a lot of people might want to steal your design.

          Ed
          Do you know about kickback? Ray has a good writeup here... https://www.sawdustzone.org/articles...mare-explained

          For a kickback demonstration video http://www.metacafe.com/watch/910584...demonstration/

          Comment

          • billwmeyer
            Veteran Member
            • Feb 2003
            • 1858
            • Weir, Ks, USA.
            • BT3000

            #6
            Looks great! Consider the design stolen.

            Bill
            "I just dropped in to see what condition my condition was in."-Kenny Rogers

            Comment

            • kevincan
              Established Member
              • Oct 2006
              • 181
              • Central Illinois
              • Craftsman 21829

              #7
              Thanks for the great idea. Are the legs removable? I have always stored my outside tables in the garage in the winter time. If the legs come off it is real easy to lean the table against a wall out of the way.

              Comment

              • Pappy
                The Full Monte
                • Dec 2002
                • 10453
                • San Marcos, TX, USA.
                • BT3000 (x2)

                #8
                Simple, effective and eye pleasing. If you had laid on a clear coat instead of the stain it might have looked even better, but you might not have!
                Don, aka Pappy,

                Wise men talk because they have something to say,
                Fools because they have to say something.
                Plato

                Comment

                • cgallery
                  Veteran Member
                  • Sep 2004
                  • 4503
                  • Milwaukee, WI
                  • BT3K

                  #9
                  That is a very neat design, Cabinetman.

                  What kind of joint is between the legs, the cleats on the bottom of the top, and the angle braces?

                  BTW, one of the things I like about the table is that you maintain maximum legroom by avoiding an apron. Very nice.

                  Comment

                  • chopnhack
                    Veteran Member
                    • Oct 2006
                    • 3779
                    • Florida
                    • Ryobi BT3100

                    #10
                    Well done, C-man!
                    I think in straight lines, but dream in curves

                    Comment

                    • cabinetman
                      Gone but not Forgotten RIP
                      • Jun 2006
                      • 15216
                      • So. Florida
                      • Delta

                      #11
                      Originally posted by cgallery
                      That is a very neat design, Cabinetman.

                      What kind of joint is between the legs, the cleats on the bottom of the top, and the angle braces?

                      BTW, one of the things I like about the table is that you maintain maximum legroom by avoiding an apron. Very nice.

                      The legs are rabbeted 3/8" to accept the cleats and the leg is glued, clamped and screwed (from the top of the cleat at an angle into the leg. The angle braces are glued and screwed to both the leg and the cleat.
                      .

                      Comment

                      • Norm in Fujino
                        Senior Member
                        • Dec 2002
                        • 534
                        • Fujino-machi, Kanagawa-ken, Japan.
                        • Ryobi BT-3000

                        #12
                        Nicely done! My only concern is how the glue joints/seams hold up once it's exposed to rain and standing water--or are you planning to pull it under cover when not in use? I built a deck cabinet a few years ago whose edge-joined top had some leakage problems.
                        ==========
                        ". . . and only the stump, or fishy part of him remained."
                        Green Gables: A Contemplative Companion to Fujino Township

                        Comment

                        • cabinetman
                          Gone but not Forgotten RIP
                          • Jun 2006
                          • 15216
                          • So. Florida
                          • Delta

                          #13
                          Originally posted by kevincan
                          Thanks for the great idea. Are the legs removable? I have always stored my outside tables in the garage in the winter time. If the legs come off it is real easy to lean the table against a wall out of the way.

                          The legs can be made to be removable by using threaded inserts instead of screws. If you're planning to dismantle and store I would suggest fabricating the top differently. I would plane and straightedge each piece to be uniform to each other. In doing the edges I would take off at least 1/4" or more from each edge to result in square edges mating. I would also use a full length spline on each perimeter glue up.
                          .

                          Comment

                          Working...