Rip Fence Alignment.

Collapse
This topic is closed.
X
X
 
  • Time
  • Show
Clear All
new posts
  • Neal
    Established Member
    • Apr 2012
    • 181
    • Williamstown, WV (Mid Ohio Valley)
    • Ryobi BT3000

    Rip Fence Alignment.

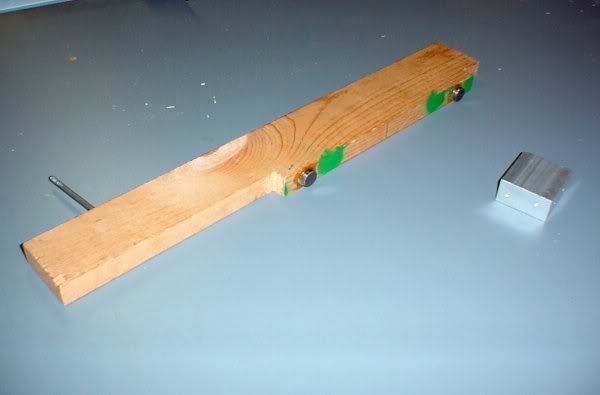
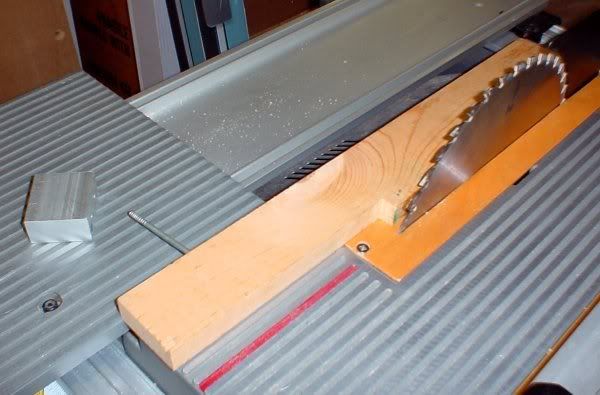
    The other day, I was ripping down some plywood to use as spacers for a maintenance project. The measurements didn't have to be precise, so I wasn't really focusing on accuracy. I happened to notice when setting up the saw the two screws on the rip fence had worked loose.

    Without really thinking or checking the fence for parallel, I just grabbed my allen wrench and screwed them down tight. I noticed during the cuts, that the workpiece was difficult to push through the end of the fence, pinching off if you will.

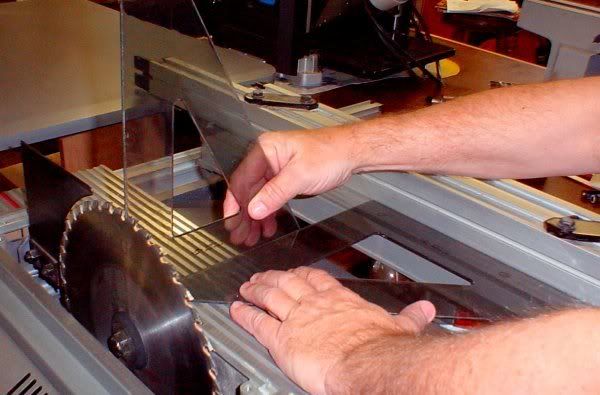
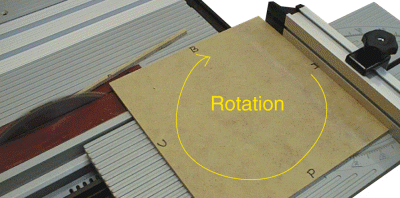
    A few nights later, I decided to check the alignment of the rip fence, the miter table, the blade, and the miter slots.

    The miter table "zero stop" tab needed adjusted, and fixed that. The table runs at 90* to the blade according to my square.

    The stop for the blade angle at 90* needed adjusted, so I corrected that.

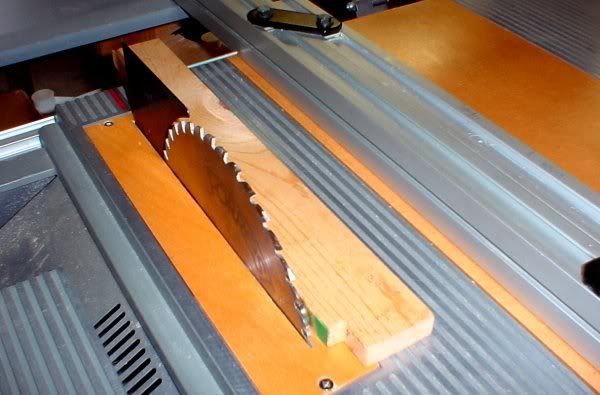
    The miter slot table needed a slight adjustment. (Side story, I was trying to attach a pair of vice grips on the nut securing the miter slot table, and didn't pay attention closely enough and when I stood up, I raked my cheek across the end of the SMT....Ouch. Nice little gash in my face!). Using a caliper, I got that to within .005 inches of square which was good enough for me. Especially since I have yet to use it for anything.

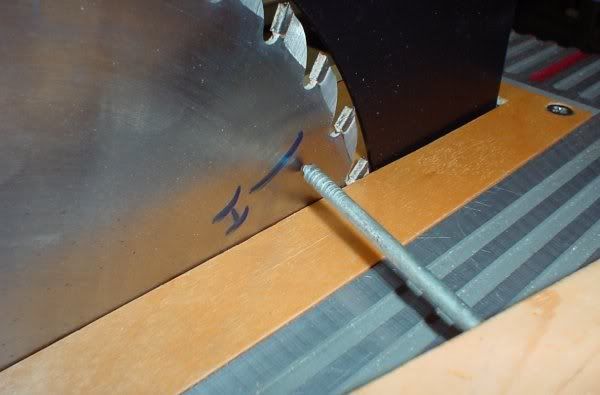
    Now the rip fence. I got it parallel, to within .002-.005" of the blade. My question is this: do you set your fence to be a little wider at the rear of the blade than at the front of the blade to reduce the binding of the workpiece? Or do you get it to as close to parallel as possible?

    I haven't had the opportunity to run anything through yet to see how it feels when ripping, but I was curious as to the forum member's opinions.

    Thanks!
  • tfischer
    Veteran Member
    • Jul 2003
    • 2343
    • Plymouth (Minneapolis), MN, USA.
    • BT3100

    #2
    I've set mine just a smidge wider at the rear, but virtually parallel.

    Which reminds me that I really should re-tune my saw, it's been awhile. It seems to be cutting accurately but it never hurts to check.

    Back about 10 years ago here someone came up with a method where you used a jig with a protuding nail and magnets that attached to the blade to do many of these checks. Does anyone remember this and have a pointer to the document? I have had said jig hanging from the side of my saw for the past decade, but it's been awhile and I've forgotten how to actually use it

    Comment

    • bigstick509
      Veteran Member
      • Dec 2004
      • 1227
      • Macomb, MI, USA.
      • BT3100

      #3
      Originally posted by tfischer
      I've set mine just a smidge wider at the rear, but virtually parallel.

      Which reminds me that I really should re-tune my saw, it's been awhile. It seems to be cutting accurately but it never hurts to check.

      Back about 10 years ago here someone came up with a method where you used a jig with a protuding nail and magnets that attached to the blade to do many of these checks. Does anyone remember this and have a pointer to the document? I have had said jig hanging from the side of my saw for the past decade, but it's been awhile and I've forgotten how to actually use it
      Do a search on member Lonnie in Orlando post started by same. I'm sure its in his history. All of his posts where very helpful when I was starting up.

      Mike

      "It's not the things you don't know that will hurt you, it's the things you think you know that ain't so." - Mark Twain

      Comment

      • cwsmith
        Veteran Member
        • Dec 2005
        • 2742
        • NY Southern Tier, USA.
        • BT3100-1

        #4
        I set mine parallel. I've read where some do set it with a slight difference, but I really could never understand the reasoning behind that.

        A lot has been written about the challenges of measuring, adjusting, and the need to often recheck the fence to maintain whatever "parallelism" you might want.

        For me, I like to keep things as simple as possible. I simply raise the blade to a height where I can place a parallel straight edge against the right side of the blade, and then move my fence to the opposite side of the straight edge and check that it's properly touching when I lock the fence down.

        Not sure if there are any negatives to be found with this method, but it works for me. Simple to adjust and simple to check.

        CWS
        Think it Through Before You Do!

        Comment

        • cray-
          Forum Newbie
          • Nov 2013
          • 31
          • Perth, AUS

          #5
          The methods I read about using a screw into a square cut block of wood suggest marking a single tooth on the blade and rotating the blade from the back to the front of the slot to check alignment. I guess this is supposed to account for a warped blade?

          Your method with the square against the blade is so obviously simple, I'll have to try it and compare results.
          Michael

          Comment

          • bigstick509
            Veteran Member
            • Dec 2004
            • 1227
            • Macomb, MI, USA.
            • BT3100

            #6
            This is the place to ask questions about the Ryobi BT3 series table saws. Please limit the posts to this topic only.

            Mike

            "It's not the things you don't know that will hurt you, it's the things you think you know that ain't so." - Mark Twain

            Comment

            • tfischer
              Veteran Member
              • Jul 2003
              • 2343
              • Plymouth (Minneapolis), MN, USA.
              • BT3100

              #7
              That's it! I just found it myself and came back here to post the link but you already did. This is a great article and method and I need to double-check my alignment with it again. My saw has always been really good at keeping it's settings, even though it's on a mobile base (Herculift 2)

              EDIT: I just did a quick double-check with my jig. Rip fence and SMT were dead on, even though it's been several years since I've done any alignment. Love my saw!
              Last edited by tfischer; 05-01-2014, 09:55 PM.

              Comment

              • bigstick509
                Veteran Member
                • Dec 2004
                • 1227
                • Macomb, MI, USA.
                • BT3100

                #8
                The PDF file of the dimensioned layout is missing from the link, I'll dig up my hard copy and post. Very easy to build, scrap pieces of wood and a few magnets.

                Mike

                "It's not the things you don't know that will hurt you, it's the things you think you know that ain't so." - Mark Twain

                Comment

                • bigstick509
                  Veteran Member
                  • Dec 2004
                  • 1227
                  • Macomb, MI, USA.
                  • BT3100

                  #9
                  Here is the dimensioned layout.

                  Mike

                  "It's not the things you don't know that will hurt you, it's the things you think you know that ain't so." - Mark Twain

                  Comment

                  • tfischer
                    Veteran Member
                    • Jul 2003
                    • 2343
                    • Plymouth (Minneapolis), MN, USA.
                    • BT3100

                    #10
                    Note that if you have a miter slot accessory between your saw and the SMT, you'll probably want to make it a little wider.

                    Comment

                    • cwsmith
                      Veteran Member
                      • Dec 2005
                      • 2742
                      • NY Southern Tier, USA.
                      • BT3100-1

                      #11
                      No disrespect offered, but what does the "table slot alignment tool" do that a simple parallel piece of stock, straight edge, etc. won't?

                      Maybe I'm just not getting it, but except for the magnets there appears to be little difference in the function. As for a parallel with magnets, one could simply use any one of a number of levels on the market that have magnetic bases.

                      What am I missing here?

                      CWS
                      Think it Through Before You Do!

                      Comment

                      • tfischer
                        Veteran Member
                        • Jul 2003
                        • 2343
                        • Plymouth (Minneapolis), MN, USA.
                        • BT3100

                        #12
                        Originally posted by cwsmith
                        No disrespect offered, but what does the "table slot alignment tool" do that a simple parallel piece of stock, straight edge, etc. won't?

                        Maybe I'm just not getting it, but except for the magnets there appears to be little difference in the function. As for a parallel with magnets, one could simply use any one of a number of levels on the market that have magnetic bases.

                        What am I missing here?

                        CWS
                        It magnifies any misadjustment by at least a factor of two, since it operates as a lever, and you're measuring about a foot on each side of the blade. If you get this jig so that it is only the tiniest bit off, then at the blade your fence will be virtually dead on. (And if you get this jig dead on, your blade will be as perfect as you're going to get it).

                        Even thousands of an inch are a really big deal when it comes to getting the fence straight.

                        Comment

                        • bigstick509
                          Veteran Member
                          • Dec 2004
                          • 1227
                          • Macomb, MI, USA.
                          • BT3100

                          #13
                          QUOTE=cwsmith;529788]No disrespect offered, but what does the "table slot alignment tool" do that a simple parallel piece of stock, straight edge, etc. won't?

                          Maybe I'm just not getting it, but except for the magnets there appears to be little difference in the function. As for a parallel with magnets, one could simply use any one of a number of levels on the market that have magnetic bases.

                          What am I missing here?

                          CWS[/QUOTE]

                          I have got the complete writeup saved to one of the external hard drive's. It was a second generation artical updating the first thread by Lonnie. Should not be to hard to find. I'll post when I come up with it.

                          Mike

                          "It's not the things you don't know that will hurt you, it's the things you think you know that ain't so." - Mark Twain

                          Comment

                          • Lonnie in Orlando
                            Senior Member
                            • May 2003
                            • 649
                            • Orlando, FL, USA.
                            • BT3000

                            #14
                            Hi Guys -

                            I haven't been on the forum much lately ... I bought a '55 MGTF-1500 that is taking up space, time, and money that is(was) used by my woodworking shop. The car has a wood frame beneith the body panels, so I guess it counts as woodworking.

                            Thanks for resurrecting my No-Measure alignment thread. I see that it has lost some of the attachments. So I reposted it below.

                            Note - there are a lot of good ways to adjust a BT3K or any other table saw. This is the one that I found is best for me. Any method that achieves the intended result is just as good.

                            I set my rip fence to be parallel to the blade. I rip on both sides of the fence (bevels, size of workstock, etc.), so a setting that will allow extra space on the outfeed of one side of the fence could bind the stock on the other side of the fence. The No-Measure tool is easy for me to use for initial setting plus is a fast way to check that the fence is still in alignment.

                            TIP: When you determine which direction the rip fence needs to move to get into alignment, and before you loosen the adjusting bolts ...
                            Lock the rip fence and clamp the front "T" of the rip fence to the front rail. Then slip a piece of typing paper under the rail and tape it to the table. Mark two lines on the paper using the rip fence as a straight edge. Loosen the locking handle (The "T" will continue to be held in position by the clamps). Now you will be able to easily tell how much you move the fence before tightening the adjusting bolts. Otherwise, the process is like herding cats, there are too many parts that can move.


                            The miter fence and sliding miter table are the most important settings on the saw. If they are not spot-on, then you will never be able to make square corners on your workpiece. I feel that the No-Measure adjusting tool for adusting the SMT and the 5-cut method for adjusting the miter fence produce the most accurate results.

                            Here is a repost of my No-Measure Alignment Method:

                            +++++++++

                            Some of you have asked for my “No-Measure” method of aligning the BT3K. Links to the posts on the Ryobi forum and on BT3 Central are broken. This is a modified copy of my original post.

                            "Everyone has his favorite way of tuning up the BT3.

                            I've been using this method of aligning the rip fence and SMT on my BT3000 for years. I recognized from the first that the saw could not be tuned up accurately using a bent framing square and a grease pencil. I believe this is about the most accurate way to align the BT3x00. And it's a fast way to double-check alignment before starting a project."

                            - Lonnie

                            ===

                            ALIGNMENT GAUGE

                            Make a simple alignment gauge out of 1-by stock, a nail, and two common magnets (not rare earth mags - too strong). Measurements and materials do not need to be exact. Make it wider if you have miter slots installed.


                            A .pdf diagram is attached to this post.


                            This is the alignment gauge I made in 1996 when I bought the saw. It's banged up and splattered with paint, but it works, so I have no reason to make a new "pretty" one.

                            Set the blade to 90 degrees before adjusting the SMT and rip fence.

                            FIND THE HIGH SPOT ON THE BLADE

                            You can reduce error caused by wobble/run-out in the blade by placing the nail point of the alignment gauge against the side of the blade and rotating the blade slowly by hand to find the high and low spots. Mark them.

                            Rotate the blade so the high point is at the top when you use the alignment gauge. Then rotate the blade so the high point is at the bottom and check alignment again. Use the average if necessary.

                            Rotate the blade so the high point is at the front or rear when you adjust the blade to 90deg or 45deg to the table.


                            ADJUST THE BLADE TO 90 DEGREES AND 45 DEGREES

                            Raise the blade up almost all the way. Rotate it so the high spot is toward the front or the back of the table.

                            Lay a drafting triangle on the saw table with the 90-degree corner and one edge against the rip fence. Stand another triangle up vertically with one edge against the first triangle and another edge against the blade. This will insure the vertical triangle is perpendicular to the blade.


                            Check for gaps at the blade and adjust the blade stops and indicator as needed. You may need to remark the 45 degree line when the 0 degree mark is true, or vice versa.

                            Use the same blade position (high spot toward front or rear of table) if you use a machinists square to set the 90deg and 45deg stops.

                            RIP FENCE ALIGNMENT

                            Raise the blade up almost all the way. Rotate the blade so the high point is at the top. Lay the alignment gauge on the table with the magnets against the right side of the blade. Move the fence very near the nail and lock it.


                            Flip the board so the nail is near the other end of the fence. The gap should be equal. Adjust the fence as needed.


                            The extended arm of the gauge magnifies the alignment over two times. An error of 1/64" at the tip of the nail is actually less than 1/128" at the blade.

                            You can use a feeler gauge to get the fence aligned perfectly. Before you get close enough to use the feeler gauge, press the nail into the fence so one of the magnets releases from the blade. It will sound like a code key. You can tell by the feel and the sound when you are close to alignment.

                            SMT BASE ALIGNMENT

                            Raise the blade up almost all the way. Rotate the blade so the high point is at the top. Lay the alignment gauge on the saw table with the magnets against the left side of the blade.

                            Place an object that has a vertical corner and weighs 3 or 4 oz. on the SMT. I use an aluminum cube about 2" X 2" X 1". For this discussion, I'll call the object a "cube." Set the cube about 4" from the outfeed edge of the SMT and positioned diagonally so a vertical corner points toward the blade. Move the SMT so that the vertical corner brushes against the nail on the alignment gauge. The corner of the cube will now be exactly in line with the tip of the nail.

                            Flip the alignment gauge and slide the SMT and cube the other direction past the nail. The gap at this end should be equal to the gap at the other end. Adjust the SMT Base as needed.

                            (Although it looks like it is, the alignment gauge is not resting on the SMT.)

                            SLIDING MITER TABLE AND MITER FENCE ALIGNMENT

                            I have revised my original method of setting the miter fence to 0-deg (90deg to the blade). The “Five-Cut” method that Phil Bumbalough describes on his “Bench Mark” web site is perfect. Here is the link …


                            Make large adjustments by repositioning the SMT on the SMT Base. Fine tune to 0-deg with the cam on the quick stop, as Phil describes.

                            Note: If the link to Phil's site is broken, then Google "Five Cut Method." It is a common way to square the miter fence.

                            ===

                            The whole process takes forever to describe, but only a couple of minutes to execute.

                            Let’s hope that we can keep our BT3K’s running true for a long time.

                            - Lonnie

                            +++++++++
                            Attached Files
                            OLD STUFF ... houses, furniture, cars, wine ... I love it all

                            Comment

                            • bigstick509
                              Veteran Member
                              • Dec 2004
                              • 1227
                              • Macomb, MI, USA.
                              • BT3100

                              #15
                              Here is the updated post.
                              This is the place to ask questions about the Ryobi BT3 series table saws. Please limit the posts to this topic only.

                              Sorry for the post, didn't look or expect Lonnie would post.
                              Last edited by bigstick509; 05-03-2014, 05:57 PM.

                              Mike

                              "It's not the things you don't know that will hurt you, it's the things you think you know that ain't so." - Mark Twain

                              Comment

                              Working...