Extended rails and mobile cabinet issues

Collapse
This topic is closed.
X
X
 
  • Time
  • Show
Clear All
new posts
  • jnesmith
    Senior Member
    • Jan 2003
    • 892
    • Tallahassee, FL, USA.

    Extended rails and mobile cabinet issues

    Hey again:

    As I've mentioned, I am going to add a 1/2 set of rails to my saw. I am also going to build a mobile cabinet/base. it will be a torsion box base, with a short cabinet on the left on which the saw body will sit, and a taller cabinet to the right. To the right of the blade I will have: 1) a miter slot table; 2) an extra main table, 3) the router table, 4) then a narrow auxiliary table for a miter slot and t-track. I'm stuck on a couple of issues.

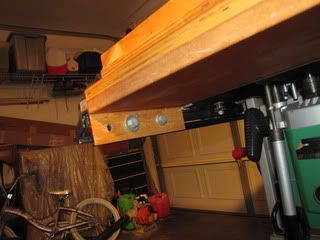
    1. How to attach the rails to the taller cabinet, or otherwise support the right side of the rails. I thought about t-nuts and bolts through the upper front of the taller cabinet. However, the hardware connecting the old rails and new half-rails will not allow me to slide the rails over the t-nuts on the saw body and the t-nuts on the new cabinet. I could go ahead and put the t-nuts in the slot on the inside face of the new rails (after sliding the rails over the t-nuts on the saw). However, getting them to align with the bolts through the cabinet may be difficult.

    Any suggestions? I've read through the old mobile base articles, but didn't find any discussion of this issue.

    2. Whether the extra main table mentioned above should be a stand alone piece attached to the rails, as my current aux. tables are. Or, whether the top of the taller cabinet should serve as the extra main table. The latter seems like a cleaner approach, but I am worried about getting the top dead-level with the saw top and other tables. A separate table could more easily be leveled.

    Any thoughts on that?

    Thanks again.

    John
    John
  • conwaygolfer
    Established Member
    • Jun 2008
    • 371
    • Conway, SC.
    • BT3000

    #2
    I am not sure what the problem is but I extended my rails with a full set off a 3100series. I simply used a 1/4 bolt installed at the very end of the extension. Of course it goes thru the upper cabinet wall and into the inside of the rail at the right end. The fence still goes to the far right edge with this setup. I joined the 2 rails using the conventional bar and tee nuts just before the taller cabinet. If you don't have room with your configuration, you could always cut out a small section in the taller cabinet in order to get to the tee nuts, etc..
    Hope this helps.

    Conwaygolfer

    Comment

    • pelligrini
      Veteran Member
      • Apr 2007
      • 4217
      • Fort Worth, TX
      • Craftsman 21829

      #3
      I'd be more inclined to make a separate infill table that will attach to the rails than make the cabinet top as the table. I think any adjustments in alignment would be easier and you wouldn't have to redo your cabinet if you change your design later.

      I don't know how deep your cabinet is going to be, but I would attach and support my rails from the bottom slots. With some T-Bolts attached to some brackets or through the cabinet top. You could make them height adjustable for alignment fairly easily.

      How are you doing your rail connections? I bought a set of half rails from another member here who had made some hardwood inserts, secured with a couple countersunk screws. I found the inserts to be more rigid than the Ryobi plate connectors. They also didn't have the connecting plates getting in the way. I still use a plate on the bottom of the rails as my saw is on the craftsman foldable stand.
      Erik

      Comment

      • jnesmith
        Senior Member
        • Jan 2003
        • 892
        • Tallahassee, FL, USA.

        #4
        Erik:

        Tell me more about the "inserts" please. Are they essentially plugs that fit into the inside of each rail section?

        How long are they?

        Are they milled up to match the odd shape of the rail openings, or are is the profile just a square or rectangle that fits snugly into the largest part of the rail opening?

        Thanks
        John

        Comment

        • pelligrini
          Veteran Member
          • Apr 2007
          • 4217
          • Fort Worth, TX
          • Craftsman 21829

          #5
          The previous maker shaped them to fit tightly inside the rail extrusion. If I remember correctly, they extend about 6-8" to either side of the joint, maybe longer. I think they are hard maple. The shape of the rear connector fit the whole extrusion. The front connector wasn't milled to fit the entire rail shape. You can see where it stopped in this photo.

          That image is from this thread: http://www.bt3central.com/showthread.php?t=45948

          There's two counter sunk screws in the top rail slot into the connector, one on each rail. I still used plate connectors on the bottom. I had to shim inside to get a tight fit on my OEM rails as the 21829 rails are a slightly thinner extrusion than the silver BT3000 half rails I used. It makes a pretty solid connection. I've had them on there for a few years now. The only support is at the connection at the main saw table and an adjustable leg on the right end that I fashioned out of a roller stand leg. I had to make that end support mainly to keep the saw from tipping on the wheels of the gravity rise stand when I applied any downforce on the right end. With the support leg out of the way I can move the saw around by pushing down on the extensions. I try not to do it all that often, but sometimes it's easier. The rails are still straight after all this time.
          Erik

          Comment

          • Black wallnut
            cycling to health
            • Jan 2003
            • 4715
            • Ellensburg, Wa, USA.
            • BT3k 1999

            #6
            Although mine is two rails wide you could do the same thing. With careful measuring build your cabinet full height with a shelf to mount the saw. the extension rails will then mount directly to the cabinet. 5/16" bolts and either T-nut.com t nuts or the Ryobi supplied ones attached to the back of the rails. The front ones I am able to reach blindly with a regular combo wrench. The rear ones with a 24" 3/8" drive extension and socket and ratchet. I made my fixed table 3/8" narrower front to back and used a spacer to ensure clearance for the inside back of the rip fence. If you need a closeup pic just ask.

            The above pic shows my saw cart from the back during construction. before installing the back. the base is a torsion box.
            Donate to my Tour de Cure


            marK in WA and Ryobi Fanatic Association State President ©

            Head servant of the forum

            ©

            Comment

            • JimD
              Veteran Member
              • Feb 2003
              • 4187
              • Lexington, SC.

              #7
              My base is in the old plans section and entitled "Spruce and Sandeply". I put 1/8 flat stock on the bottom and inside slot of the rails which has threads tapped in it for knobs with studs. The studs go through the cabinet (3/4 plywood) and into the flat stock. This clamps the rails to the cabinet. If I want to slide the rails, like to tilt the saw up for cleaning and lubrication, I just loosen the knobs and slide the rails. The flat stock bridges the joint between the original and extension rails. Rails also don't have to be the same. I have a BT3100 and my extension rails are BT3000 (because that was the wide rail kit I got from HD). Doesn't matter, slots are in the same place. The flat stock aligns the rails nicely and the connection is very secure. It also doesn't cost a lot to do although I had to trim down some of the flat stock which was a pain. You can get 1 inch readily and 1 1/8 and 1 1/4 is available but it seems like one of the slots was inbetween standard sizes and I had to trim 1/16 or so off. Each piece of flat stock is 12 inches or so long - so it extends 6 or more inches on both sides of the joint.

              On the inside I am really clamping to the extension table, not the base. I think a bigger extenstion top doing more things is better than multiple little tables. I have one for a miter slot, plus the aluminum one it came with and then a wide one made of melamine particle board that also has a router table built in. The saw would probably work better without the two small tables and just one large one on the right with a miter slot in it on one edge and the router table functionality on the other end.

              Jim

              Comment

              • jnesmith
                Senior Member
                • Jan 2003
                • 892
                • Tallahassee, FL, USA.

                #8
                Thanks for the help everyone. I'm rethinking my approach.
                John

                Comment

                • jnesmith
                  Senior Member
                  • Jan 2003
                  • 892
                  • Tallahassee, FL, USA.

                  #9
                  Originally posted by pelligrini
                  I'd be more inclined to make a separate infill table that will attach to the rails than make the cabinet top as the table. I think any adjustments in alignment would be easier and you wouldn't have to redo your cabinet if you change your design later.
                  I am still leaning this way. However, another potential problem occurred to me. I was assuming I would attach the new tabletop with T-nuts/bolts to the inside of the rails. (Like one of my current tables shown below)

                  How will I access the bolts, with the new table sitting above the new cabinet? I guess I could cut access holes in the top of the cabinet, but reaching the back ones would be a bit of work. Also, my gut says there's a better way.

                  Any suggestions?

                  John

                  Comment

                  • Black wallnut
                    cycling to health
                    • Jan 2003
                    • 4715
                    • Ellensburg, Wa, USA.
                    • BT3k 1999

                    #10
                    As already mentioned above you could use 3/8" square drive ratchet, extensions and a socket.
                    Donate to my Tour de Cure


                    marK in WA and Ryobi Fanatic Association State President ©

                    Head servant of the forum

                    ©

                    Comment

                    • jnesmith
                      Senior Member
                      • Jan 2003
                      • 892
                      • Tallahassee, FL, USA.

                      #11
                      Originally posted by Black wallnut
                      As already mentioned above you could use 3/8" square drive ratchet, extensions and a socket.
                      How does that solve the problem? I think one of us is not following the other. (And it is probably me) I'm talking about a separate table top fastened to the rails in the manner shown in my picture. The cabinet will be below that. The top of the cabinet will be at the same height as the bottom of the rails.

                      To the left of this table top will be a MST, then the main saw body table. To the right will be the accessory table. I'm not following how a socket extension solves the problem. But I do appreciate you replying.

                      P.S.
                      John

                      Comment

                      • Black wallnut
                        cycling to health
                        • Jan 2003
                        • 4715
                        • Ellensburg, Wa, USA.
                        • BT3k 1999

                        #12
                        Originally posted by jnesmith
                        How does that solve the problem? I think one of us is not following the other. (And it is probably me) I'm talking about a separate table top fastened to the rails in the manner shown in my picture. The cabinet will be below that. The top of the cabinet will be at the same height as the bottom of the rails.

                        To the left of this table top will be a MST, then the main saw body table. To the right will be the accessory table. I'm not following how a socket extension solves the problem. But I do appreciate you replying.

                        P.S.
                        Uhhh missed that part, now it is much more clear. Access holes in the top of your cabinet that is below would be one way. If the end is open then an extension(s) and a u-joint + Socket or u-joint socket might be possible. However you asked for a better way IMHO careful planning and using the new cabinet top as your wide table is a better way.
                        Donate to my Tour de Cure


                        marK in WA and Ryobi Fanatic Association State President ©

                        Head servant of the forum

                        ©

                        Comment

                        • JimD
                          Veteran Member
                          • Feb 2003
                          • 4187
                          • Lexington, SC.

                          #13
                          My rails attach from below so it is easy to reach them. My tables attach from the inside groove and must be loosened to move the rails. My base has drawers all the way up, however, so I just pull a drawer to access the knobs to loosen the attachment.

                          Jim

                          Comment

                          Working...