-
-
Congrats Jeffrey. You're gonna love the saw. I bought my first Uni in the early seventies, and used it for 25 years. A little tip on the Biesemeyer. Treat the index indicator with care, and be gentle with the adjustment screws. Also in tightening the fence down, I adjust with very little pressure. The cam action doesn't need to be cranked down hard. I didn't buy their table, but rather made my own. I've made a castered base and wing table with casters, so the whole shebang can be moved.
.Leave a comment:
-
Mine has the shorter rails so it does not have the support legs like yours so the frame was not the issue. I thought it looked like a Cadillac with cheap hub caps. (OK, I'm a tool snob.) But not enough to make me fit in at Woodnet.net Last edited by Scottydont; 07-26-2007, 10:16 AM.
Leave a comment:
-
I bought the Delta, quick-release sliitter to go with the Shark - talk to Lee you may not need it. You can see I have the 4" port on top. My other saw had the 2-1/2". To tell the truth - I think the 2-1/2" is better. The 4" hose is much heavier than 2-1/2" which tries to push the Shark to one side or the other and it's almost too much suction on top - I ended up putting a gate on mine.
MikeLeave a comment:
-
It is the Delta base. I removed the flipper. I added 6-swivel double locking casters. Makes it very easy to move around. Although, sometimes I think about putting 2-fixed casters on to tame it a bit. I have found that once I wheel it out the casters are 90 deg to the load applied to the saw and I don't really have to lock the casters down. I do lock them when routing. I'm used to it now, but, the casters added about 3" to the height of the table.
I rigidly attached the cabinet to the rails, cast extension, and base. I shimmed it at the base. It makes for a very stiff assembly. The extension top is very flat since I put shims between the cabinet and top before fastening them together (I forced it to be flat).Leave a comment:
-
Actually I had the Jigsaw out with metal cutting blades planning to open the hole for the DC for 6". I was pleasantly surpised to find it was already a large opening. No problem drill rails.
Looks like you have a Shard guard there. How do you like it? I took the blade guard off last night to make some rabbets and I definately don't want to have to do that everytime! That screw is bound to end up taking a ride through my cyclone!Leave a comment:
-
No problem. I basically used a piano hinge and drilled/screwed it to the rear rail (I know - you may not want to drill into your new puppy yet). I used shim stock to adjust the height of the table and used parts of a Sears roller stand that they had for $10 a few months back for table support. When I roll my saw out I put my Wixey angle gauge on the cast saw top and set to zero - then move it the to out feed table and adjust the leg height:
http://img.photobucket.com/albums/v2...G_0732_2_1.jpg
http://img.photobucket.com/albums/v2...G_0733_3_1.jpg
http://img.photobucket.com/albums/v2...G_0734_4_1.jpg
http://img.photobucket.com/albums/v2...G_0735_5_1.jpg
http://img.photobucket.com/albums/v2...G_0736_6_1.jpgLeave a comment:
-
I got the non-X5 version, and it was a pain getting everything set up properly. My extension table wasn't very flat, but i was able to get it to flatten out a bit when bolting it to the rails. The cast iron wing had to be replaced, as well as one of the hand wheels. Now that it is together it is a pleasure to use though.
Mike,
How does the mobile base lock down? Is the the Delta base? The cabinet looks like it would cover where the flip lever belongs. Is the cabinet fully supported on the base or does it have its own wheels?Leave a comment:
-
Leave a comment:
-
Thats pretty funny. My big X5 Delta lable on the front is not flat either! They did take the paper off the back of this one though because I pushed it back and it stuck for a few seconds. If I ever find time I may deal with it.
Thanks for the photos. I am tight on space right now so that may help.Leave a comment:
-
Jeffery - nice saw. I bought the same saw about a year ago. I had the same problem with the pads, even the bars they attached to had all the paint chipping off. I called CS and the sent me 2 or 3 replacements but I epoxied the original back on, like you did, and it hasn't given me a problem since. I'll bet they never cleaned the steel before applying the paint or pad. One other problem I had with my saw was cosmetic. The big X5 Delta label didn't fit tight against the cabinet. I drilled out the rivets and found they didn't remove the paper from the double-sided tape before they applied it. Other than these two minor problems it's been flawless.
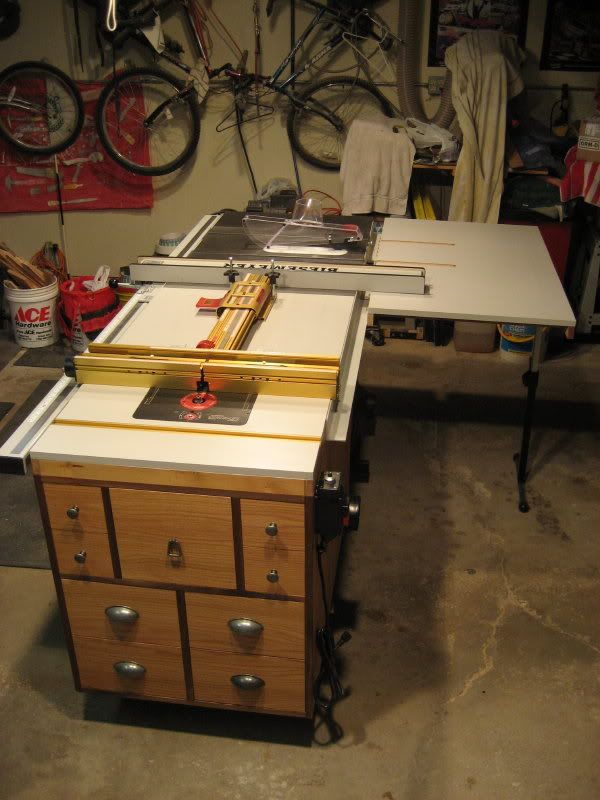
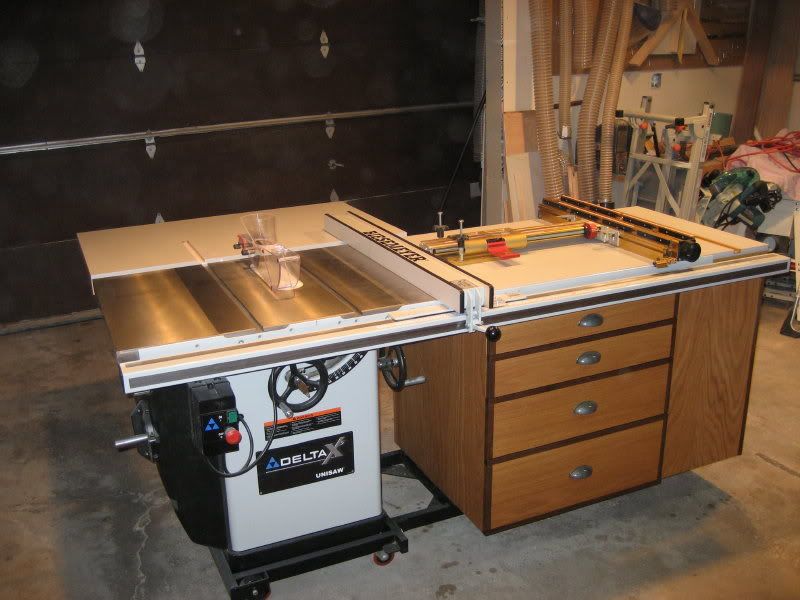
As far as the wing table. It took me three tables to get a flat one. I only had to send one back to CS so I made a folding out feed table with one. I also put my router in the wing - that's why I was so concerned about the flatness. I reinforced the underside of the extension table to make it more robust too.
Looks like you are tight on space like me. I included a couple of pics of how I used the area under the wing for storage:
(click to enlarge)
Have fun,
MikeLeave a comment:




Leave a comment: