Quick and Easy Soldering Iron Holder

Collapse
This topic is closed.
X
X
 
  • Time
  • Show
Clear All
new posts
  • tstombaugh
    Forum Newbie
    • Dec 2008
    • 13
    • South of Louisville
    • Ryobi BT3100

    Quick and Easy Soldering Iron Holder

    Wanting to rebuild my 18V battery pack for my cordless drill , I found I had misplaced the holder for my soldering iron.

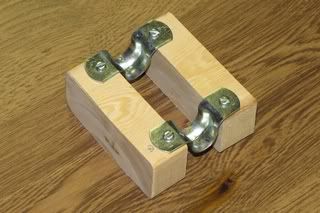
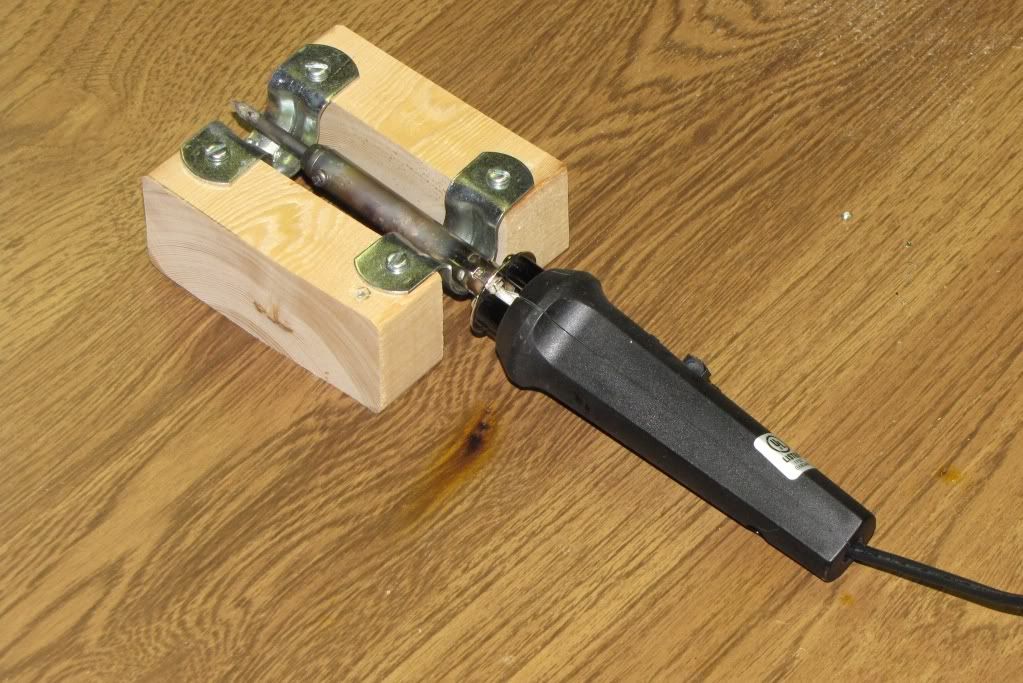
    To get started on my battery pack project, I made a holder from a piece of scrap 2 x 4, pipe clamps and screws. I found the holder to be very stable
    and very easy to use and I favor this one over the one that came with
    the soldering iron.

    Material List

    (2) 2 X 4 X 1" long approx.
    (2) 1/2" metal pipe clamps
    (4) Screws

    Pictures of the holder can be found in the URLs listed below, (I have not
    yet figured out how to upload pictures from my PC to this site. I am using
    Windows 7 Home Edition 64 bit.)


    Store your photos and videos online with secure storage from Photobucket. Available on iOS, Android and desktop. Securely backup your memories and sign up today!


    Store your photos and videos online with secure storage from Photobucket. Available on iOS, Android and desktop. Securely backup your memories and sign up today!


    Store your photos and videos online with secure storage from Photobucket. Available on iOS, Android and desktop. Securely backup your memories and sign up today!


    Thanks
    Tom
  • Tom Slick
    Veteran Member
    • May 2005
    • 2913
    • Paso Robles, Calif, USA.
    • sears BT3 clone

    #2
    definitely quick and easy!

    To post pics just cut and paste the code that's in the "IMG code" box in the "Share this image" box on the left hand side of the screen on your photobucket page.
    Opportunity is missed by most people because it is dressed in overalls and looks like work. - Thomas Edison

    Comment

    • Richard in Smithville
      Veteran Member
      • Oct 2006
      • 3014
      • On the TARDIS
      • BT 3100

      #3
      Good deal in a pinch.


      I was going to walk you through how to post a picture but Tom beat me to it

      I took the liberty of posting one of your pic's though( it's too nice not to share)

      Note to everyone...This is not my picture...it belongs to Tom.

      From the "deep south" part of Canada

      Richard in Smithville

      http://richardspensandthings.blogspot.com/

      Comment

      • Ed62
        The Full Monte
        • Oct 2006
        • 6022
        • NW Indiana
        • BT3K

        #4
        Simple to make, and it does the job. Good work.

        Ed
        Do you know about kickback? Ray has a good writeup here... https://www.sawdustzone.org/articles...mare-explained

        For a kickback demonstration video http://www.metacafe.com/watch/910584...demonstration/

        Comment

        • leehljp
          Just me
          • Dec 2002
          • 8442
          • Tunica, MS
          • BT3000/3100

          #5
          Agreed! Good, very useful and simple! This is gonna get copied! Thanks for sharing the idea.
          Hank Lee

          Experience is what you get when you don't get what you wanted!

          Comment

          • tstombaugh
            Forum Newbie
            • Dec 2008
            • 13
            • South of Louisville
            • Ryobi BT3100

            #6
            Originally posted by Tom Slick
            definitely quick and easy!

            To post pics just cut and paste the code that's in the "IMG code" box in the "Share this image" box on the left hand side of the screen on your photobucket page.
            Tom,
            Thanks for the info on how to upload pictures from photobucket.

            Tom Stombaugh

            Comment

            • Rich P
              Established Member
              • Apr 2003
              • 390
              • Foresthill, CA, USA.
              • Powermatic 66 (1966 vintage)

              #7
              Sure wish you had posted this last year when I was working on 6 leaded glass windows plus and entry door! Great work.

              BTW, Photobucket also allows for a clickable thumbnail which some may find easier to navigate...

              Don't ever ask a barber if you need a haircut.

              Comment

              • 4estgump
                Established Member
                • Nov 2006
                • 123
                • Lawrenceburg, Kentucky
                • Ryobi BT3000

                #8
                Cool holder. You will get a lot of use out of that. Good job.
                4est

                Comment

                • cabinetman
                  Gone but not Forgotten RIP
                  • Jun 2006
                  • 15218
                  • So. Florida
                  • Delta

                  #9
                  Very clever idea. Inexpensive and effective. I need to make something for my soldering "gun". The hot end doesn't really present a problem, but I like the idea of a dedicated "holder". Same holds true for my "hot glue gun", which does present a problem with dripping.
                  .

                  Comment

                  • sparkeyjames
                    Veteran Member
                    • Jan 2007
                    • 1087
                    • Redford MI.
                    • Craftsman 21829

                    #10
                    I couldn't find mine at one point and used a wire clothes hanger to make a soldering iron holder. Then bent it back to a to it's original use when I was done.
                    Last edited by sparkeyjames; 10-23-2010, 03:35 PM.

                    Comment

                    Working...