

 Tweet
Tweet
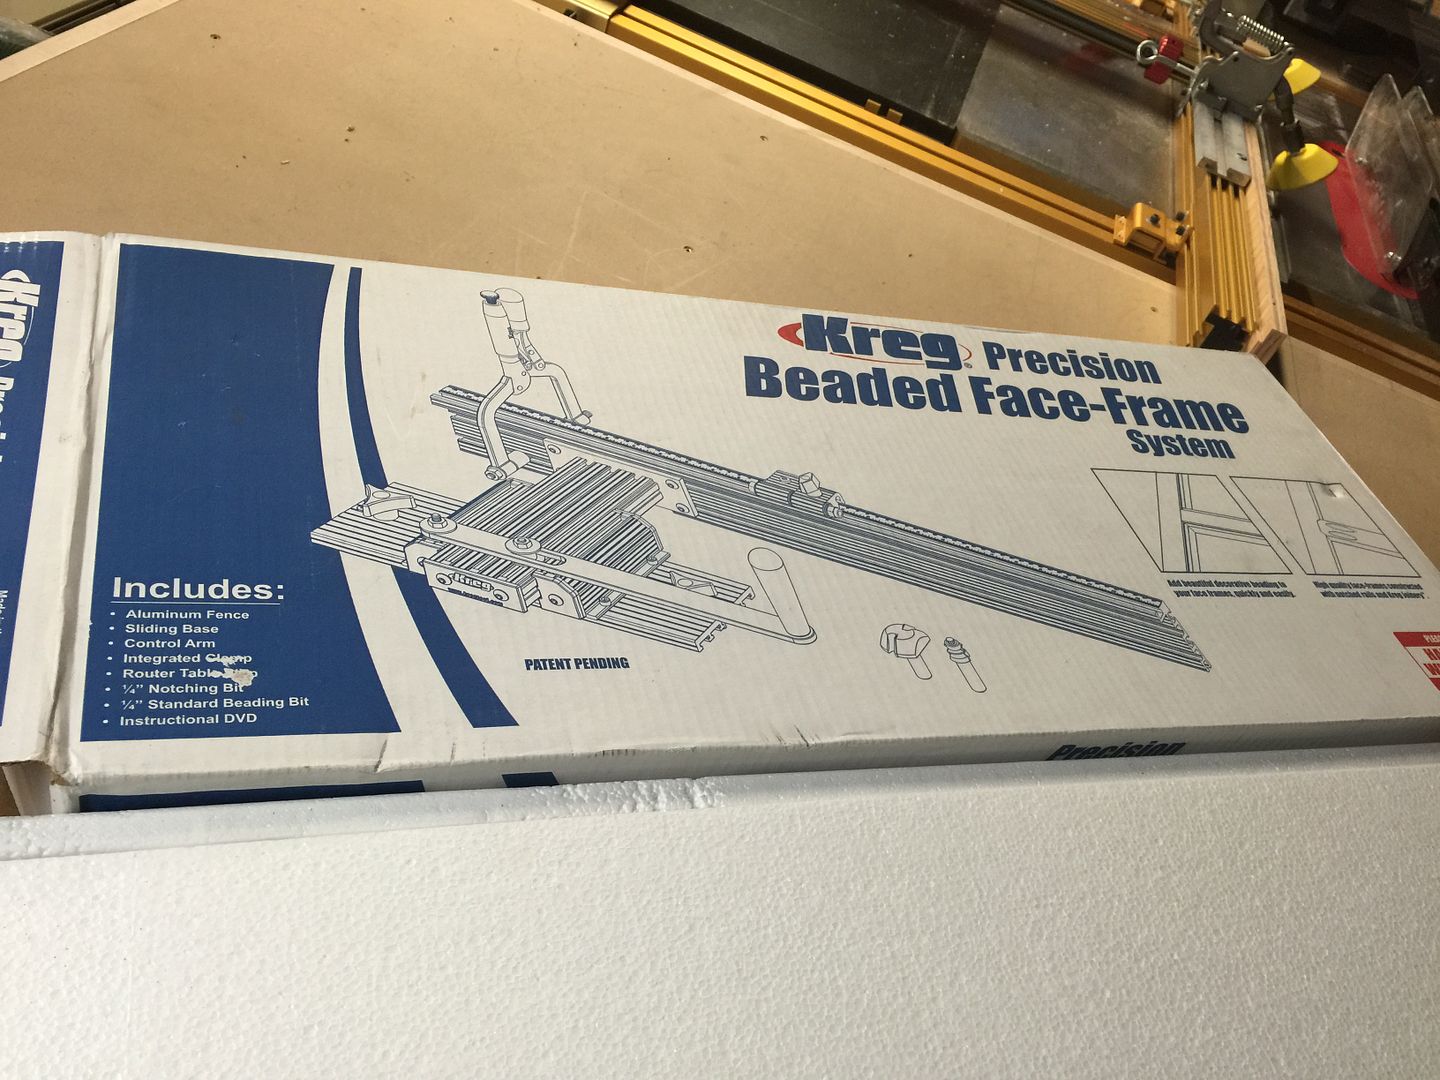
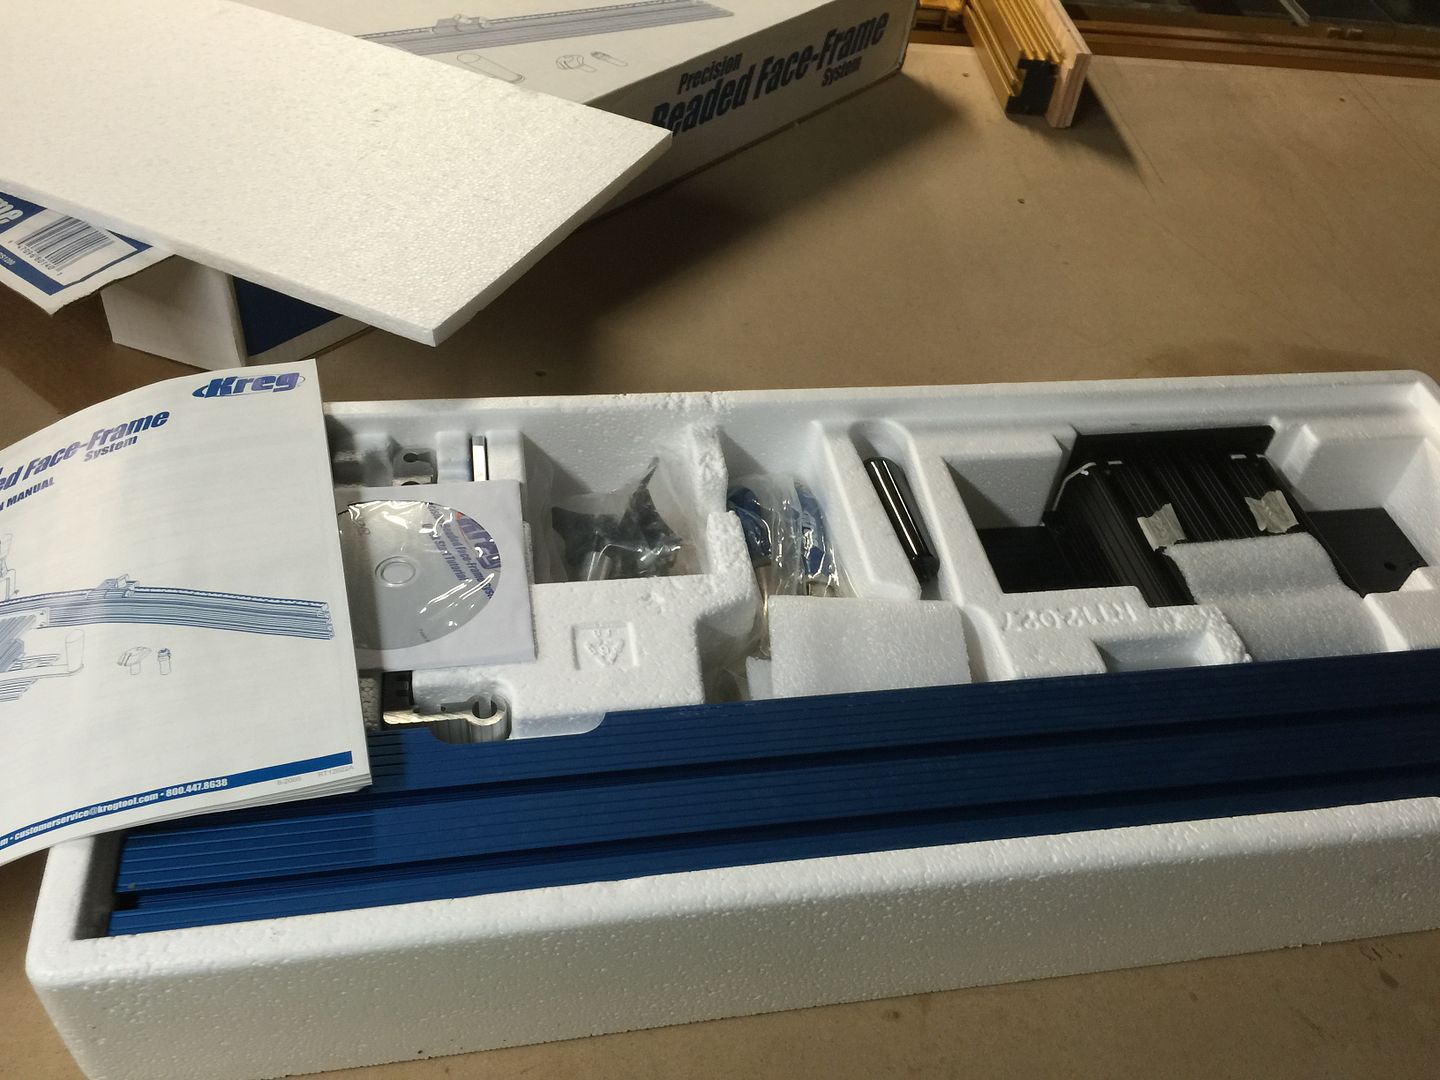
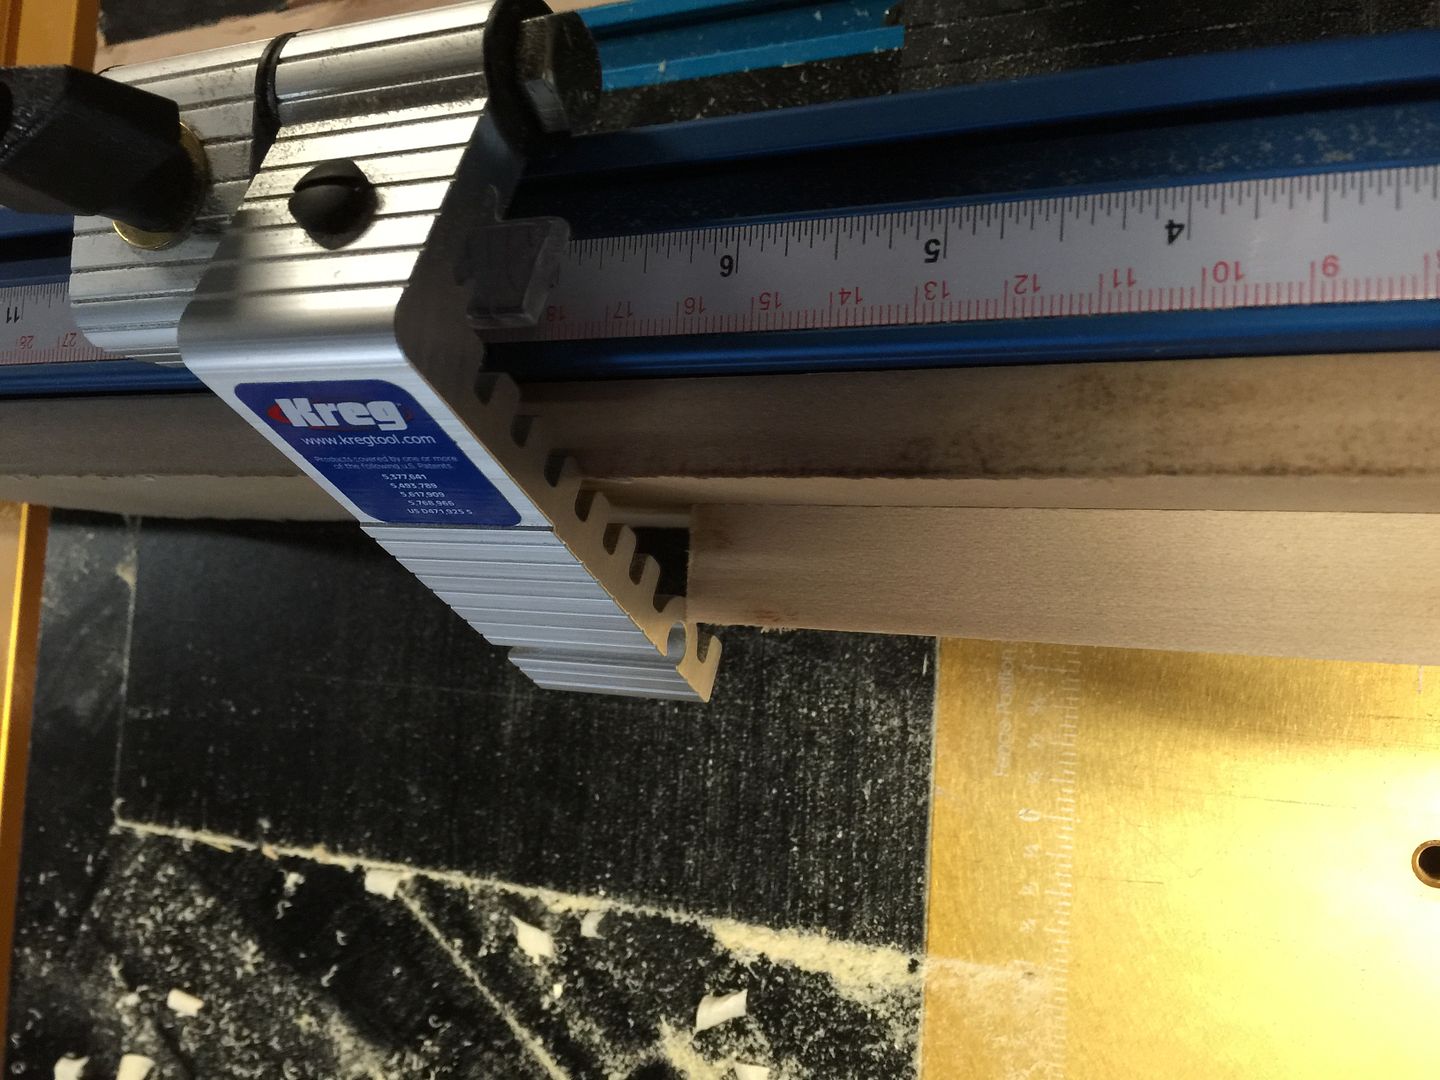
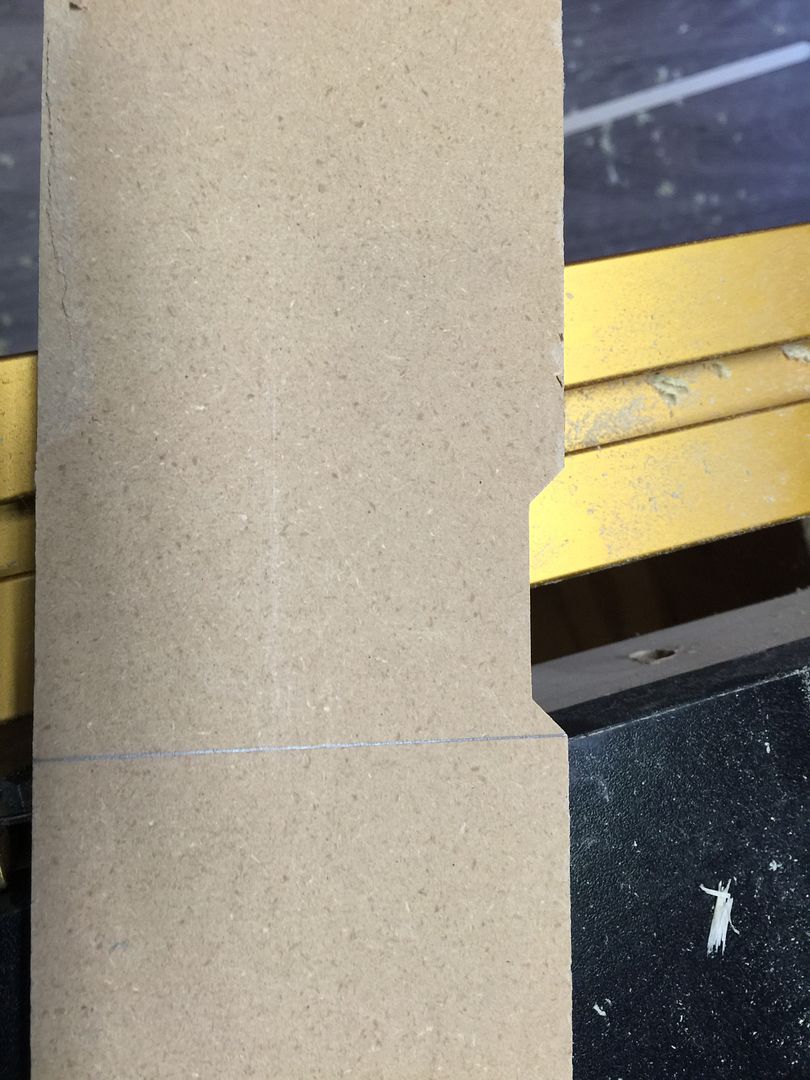
I picked up the Kreg Beaded face frame system a while back but haven't gotten around to using it till now. I'll be building a set of kitchen cabinets soon and I wanted to test it out on some scrap poplar. I know there are much less expensive ways to get beaded face frames but the price was right and I couldn't resist trying it out. Overall the jig was great. It was easy to setup and easy to use. It comes with a 1/4" x 1-1/2" notching bit and a 1/4" bead bit. It comes with both a DVD and manual. I'm lazy so I just looked at the DVD for instructions but the manual does have more examples than the one shown on the DVD. You do an initial calibration with the jig using the included alignment pin and after that move the stop to the necessary position, clamp the piece down and run it through the notching bit. After all the rails and stiles are notched you run them through the bead bit. Because the pieces were notched, the ends of the beads are at 45 degrees and when the rails and stiles are mated, the beads form a 90 degree corner. They suggest using pocket holes to join the rails and stiles together which is what I did in my example. Although in the future I think I will add loose tenons first to help with alignment. I had a couple of pieces shift when I attached the pocket hole screws and so they are slightly proud.
One thing I wish they would have thought of was somehow being able to use a backer board. Maybe make consumable pieces that go on the jig itself. You can put your own backer board but it doesn't allow the stop guide to fold down completely. I made it work because the stop came down enough to make contact the board but it wasn't ideal.

Another benefit of the backer board is once you made the initial pass you can draw lines on the edge where the bit makes contact and use that as refrence.
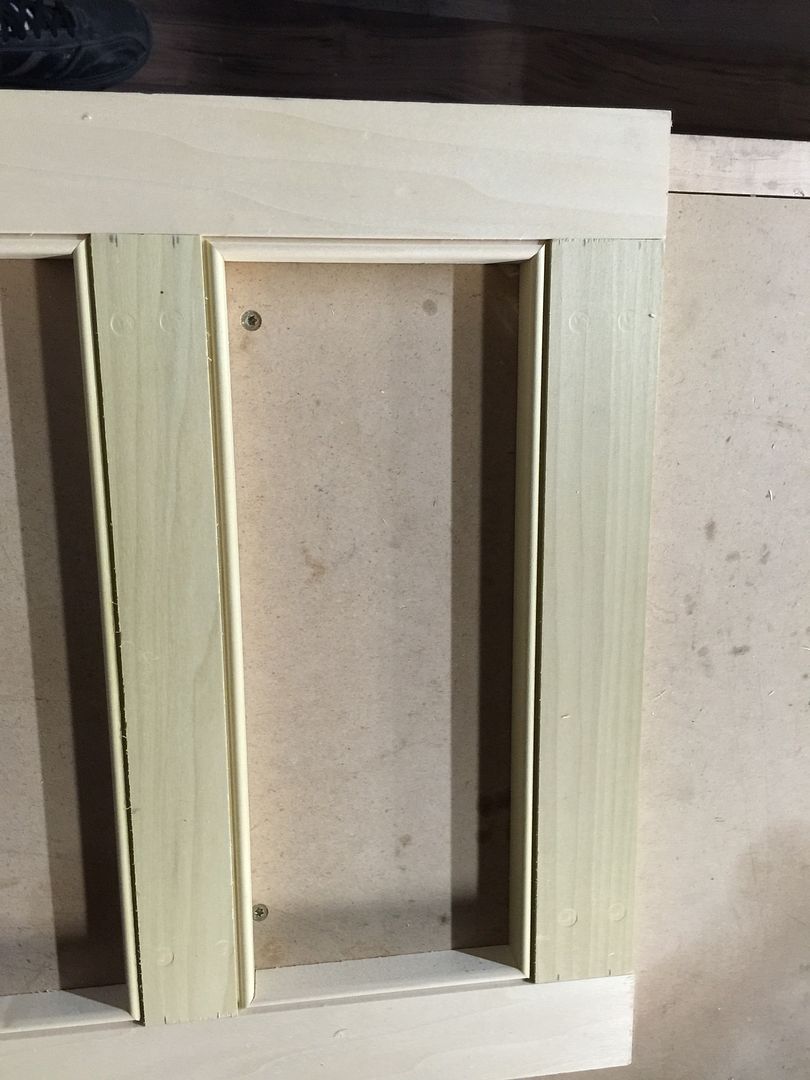
End result. The little divots are from the pc pocket hole machine. Poplar dents quite easily.

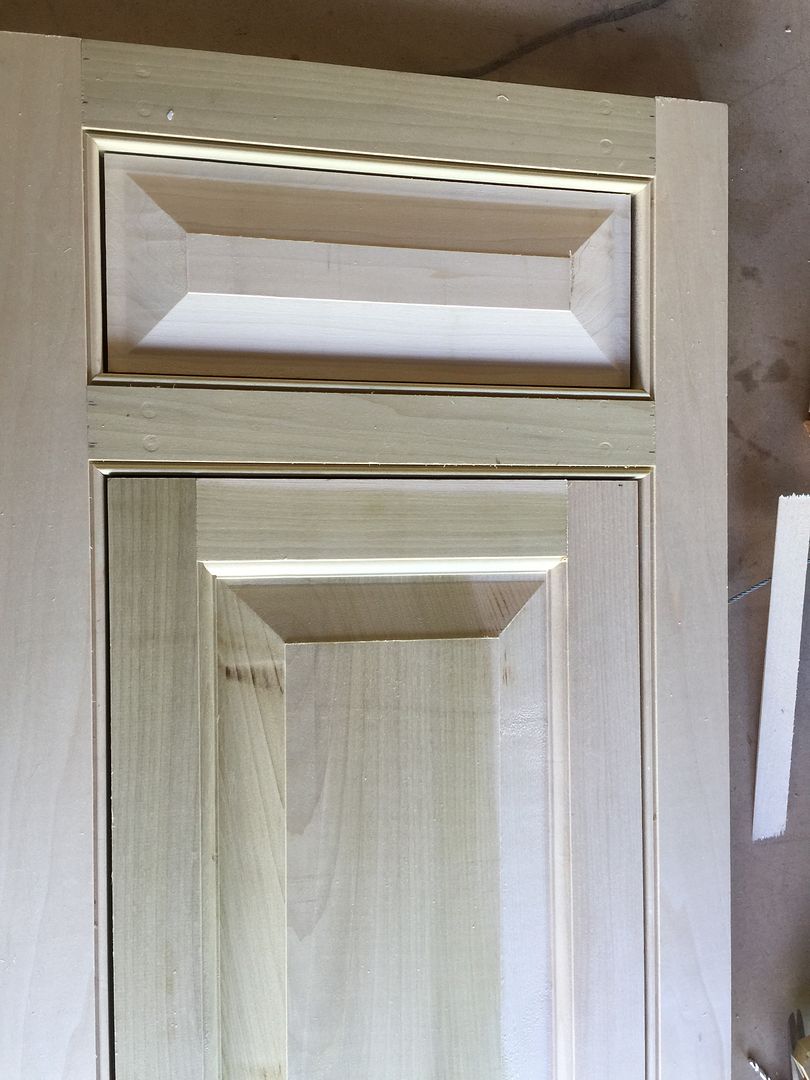
Sample with door.


One thing I wish they would have thought of was somehow being able to use a backer board. Maybe make consumable pieces that go on the jig itself. You can put your own backer board but it doesn't allow the stop guide to fold down completely. I made it work because the stop came down enough to make contact the board but it wasn't ideal.


Another benefit of the backer board is once you made the initial pass you can draw lines on the edge where the bit makes contact and use that as refrence.

End result. The little divots are from the pc pocket hole machine. Poplar dents quite easily.


Sample with door.


 twistsol
Comment