Replacing stair treads and risers?

Collapse
This topic is closed.
X
X
 
  • Time
  • Show
Clear All
new posts
  • Woodshark
    Established Member
    • May 2006
    • 158
    • Atlanta

    Replacing stair treads and risers?

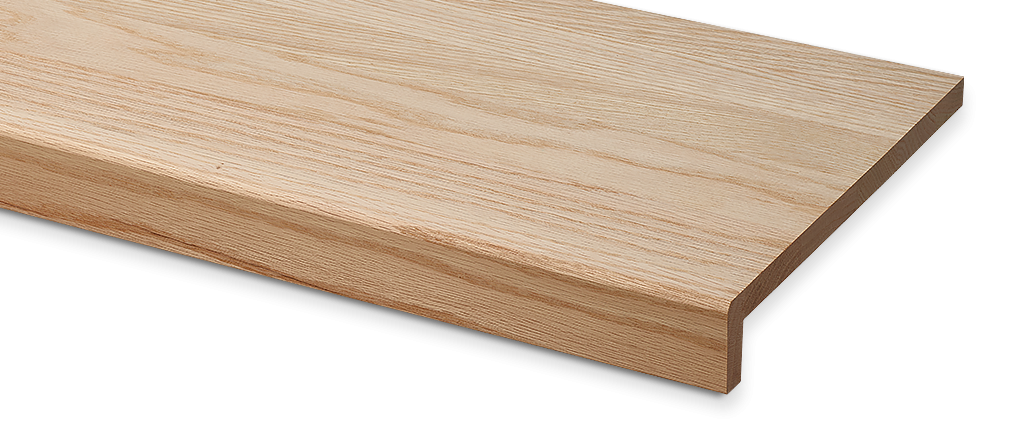
    How hard is replacing stair treads and risers?

    My home is about 20 years old. When we moved in the basement was unfinished and the stairs were just paint grade pine. Many years later the downstairs is now finished but the stairs are still the same painted pine steps. I would like to install some new oak treads with white risers.

    I know I can do this but I’ve never done steps before. Any hints or tips?
    sigpic
  • chopnhack
    Veteran Member
    • Oct 2006
    • 3779
    • Florida
    • Ryobi BT3100

    #2
    Look up your local codes and make sure you adhere to them to prevent future problems. If you search this site, I believe other members have had some discussions about this, their posts may help you some. HTH
    I think in straight lines, but dream in curves

    Comment

    • toolguy1000
      Veteran Member
      • Mar 2009
      • 1142
      • westchester cnty, ny

      #3
      working on that now. i built walls and rooms around the existing stairs. in retrospect, i'd have rebuilt the stairs to. however, it's tool late for that. so i'm retrofitting the existing paint grade material open stringer stairs to look like a closed stringer oak tread and painted trim staircase. i'm using this product:


      it's a 5/8" solid wood product with an integrated scotia molding purchased @ lowes. HD has a similar product that includes a riser overlay, but the product is a veneer oak over mdf or plywood.

      i'm using 3/4" and 1/2" mdf for trim and 1/4" birch plywood for the riser overlays. the hardest part of the project will be fitting the riser and tread overlays for any angular inconsistencies at the edges and corners. my plan is to finish the treads before installation with 2 coats of wood floor grade polyurethane, then install them and finish with 3 coats of the same polyurethane thinned to a wiping consistency so the finish looks nice and air bubbles and dust nibs are minimized. lastly, paint all trim once the poly is completely dry. the platform at the base of the stairs will, like the basement floor, be carpeted. the pics are presented in no particular order.
      Attached Files
      there's a solution to every problem.......you just have to be willing to find it.

      Comment

      • toolguy1000
        Veteran Member
        • Mar 2009
        • 1142
        • westchester cnty, ny

        #4
        here's one more pic that should demonstrate how the closed stringer look is being achieved.


        another 2-3 weeks part time and all should be done.
        there's a solution to every problem.......you just have to be willing to find it.

        Comment

        • Woodshark
          Established Member
          • May 2006
          • 158
          • Atlanta

          #5
          From the photos it looked like you had to cut off the bull-nosed end of the existing painted steps. Since you've done it, do you think it was easier to cut off the edge then add the RetroTread or would have removing and replacing the entire tread been just about the same work?
          sigpic

          Comment

          • All Thumbs
            Established Member
            • Oct 2009
            • 322
            • Penn Hills, PA
            • BT3K/Saw-Stop

            #6
            Originally posted by toolguy1000
            the hardest part of the project will be fitting the riser and tread overlays for any angular inconsistencies at the edges and corners.
            You know how to do that, right?

            With a piece of scrap a couple feet long, and about the width of the tread or riser you're installing, push it into the corner as snug as it will go (any deviation from 90 at the wall will show up as a gap at the front/back or top/bottom here).

            Now scribe a line using the wall or stretcher as your guide, and take the scrap over to the miter saw. Adjust the saw so the blade cuts perfectly to your scribed line. Test your piece of scrap to make sure the cut fits perfectly (no gaps). [After you have done one or two, you won't need to keep testing.]

            Finally, once you're convinced the scrap fits nicely, use the perfectly adjusted miter saw to cut the real tread or riser.

            Goes pretty fast once you get the hang of it.

            Comment

            • JimD
              Veteran Member
              • Feb 2003
              • 4187
              • Lexington, SC.

              #7
              I've done two of these stair cases, one in my former house (in Pittsburgh PA) and another in the home I am in now. For my current house, the treads were not construction lumber, they were southern yellow pine but shaped exactly like an oak tread. I sanded them smooth and pickled them. The cabinets in the basement (where this staircase leads you) are white melamine with pickled pine doors. So it fits, at least to me.

              The other staircase was the first to second floor staircase in our Pittsburgh PA house. The carpet in the upstairs hallway got to looking terrible so I bought some Launstein flooring and put it in the hallway upstairs. Then I got to thinking about the staircase. I cut the construction lumber treads down flush with the riser, put the 3/8 solid oak flooring over the tread, and put a bullnose molding piece I made with a groove on the back to fit the molding on. I cut a groove in the stringers on both ends so I could slide the flooring into the stringer a little to hide the joint. It was laborous but the cost was pretty reasonable. I also made up an oak cove molding I put between the riser and bottom of each tread (to help hide that joint).

              The risers in both cases were the rough constrution plywood spackled and painted.

              The Pittsburgh PA staircase helped sell the house. I also added an oak post and handrail.

              Jim

              Comment

              • toolguy1000
                Veteran Member
                • Mar 2009
                • 1142
                • westchester cnty, ny

                #8
                Originally posted by Woodshark
                From the photos it looked like you had to cut off the bull-nosed end of the existing painted steps. Since you've done it, do you think it was easier to cut off the edge then add the RetroTread or would have removing and replacing the entire tread been just about the same work?
                yes, had i thought about it before i built a non-structural wall on the stair treads. that rendered the existing stair treads captive. i didn't want to try to flush cut them where the wall sat atop each tread and risk damaging the walls. removing the bullnose edging was realatively easy with a jig saw and a multi tool.
                Last edited by toolguy1000; 02-27-2012, 04:18 PM.
                there's a solution to every problem.......you just have to be willing to find it.

                Comment

                • toolguy1000
                  Veteran Member
                  • Mar 2009
                  • 1142
                  • westchester cnty, ny

                  #9
                  Originally posted by All Thumbs
                  You know how to do that, right?

                  With a piece of scrap a couple feet long, and about the width of the tread or riser you're installing, push it into the corner as snug as it will go (any deviation from 90 at the wall will show up as a gap at the front/back or top/bottom here).

                  Now scribe a line using the wall or stretcher as your guide, and take the scrap over to the miter saw. Adjust the saw so the blade cuts perfectly to your scribed line. Test your piece of scrap to make sure the cut fits perfectly (no gaps). [After you have done one or two, you won't need to keep testing.]

                  Finally, once you're convinced the scrap fits nicely, use the perfectly adjusted miter saw to cut the real tread or riser.

                  Goes pretty fast once you get the hang of it. although they use an aluminum edged jig to establish the size of each tread and riser
                  that's exactly how the manufacturer's instructions say to do it, although they use an aluminum edged jig to establish the size of each tread and riser.
                  there's a solution to every problem.......you just have to be willing to find it.

                  Comment

                  • Woodshark
                    Established Member
                    • May 2006
                    • 158
                    • Atlanta

                    #10
                    Well I prefinished the oak stair treads and a 1/4" sheet of oak ply for overlaying the risers. I thought that I could easily remove the existing pine treads but whoever installed them 20 years ago used about a 1/2 tube of construction adhesive per tread. Looks like I will have to rip out both the tread and the 2x base and rebuild from there. Hope I don't damage the stringers in the process.
                    sigpic

                    Comment

                    • mpc
                      Senior Member
                      • Feb 2005
                      • 978
                      • Cypress, CA, USA.
                      • BT3000 orig 13amp model

                      #11
                      Can you just make cuts barely deeper than the treads - slice them into rectangular chunks that'll remove individually? That'll be less stress on whatever is underneath them giving you less repair work to do later. And you'll then be able to slip a wide putty knife between the tread bottoms and the support structure to cut through the glue that way. Harbor Freight sells a 3-pack of drywall knives that are dirt cheap and make great sacrificial knives; I used one to slice behind glued-on wainscoting and the drywall with fairly good results. I used a file to put a bit of a cutting edge on it to help. It withstood repeated hammering just fine.

                      mpc

                      Comment

                      • Woodshark
                        Established Member
                        • May 2006
                        • 158
                        • Atlanta

                        #12
                        Thanks for the tip. I will give that a try. I need to go to Harbor Freight and pick up a cheap reciprocating saw anyway.
                        sigpic

                        Comment

                        • Woodshark
                          Established Member
                          • May 2006
                          • 158
                          • Atlanta

                          #13
                          Update on the stairs. Harbor Freight to the rescue.

                          I removed the painted pine treads today. They were held down with a whole lot of construction adhesive and way too many nails. I was afraid of damaging the stringers so I removed the upper tread, not the 2x10 base tread. Since they were glued and nailed the only way to get them up was to cut the treads almost all the way through with a circular saw and then pry them off in pieces with a hammer and crowbar. It was tough going and took about four hours for twelve steps. I was left with the base 2x10 material with a lot of leftover construction adhesive residue still on them.


                          My first thought was to use an angle grinder and grind down the high spots. After thinking about it a while I remembered I bought one of the HF multi-tools a few months ago for around $25 or so. Since it came with a scraper blade I thought it was worth a try.
                          If your wondering if they work. YES! WORTH EVERY CENT!!!
                          It cut thought that 20-year-old dried hard as rock stuff like it was nothing. I was amazed. With the scraper blade I was able to remove a crap load of construction adhesive off all the steps in less than an hour.

                          Tomorrow I’m going to tackle the new treads and risers. I pre-finished them over the weekend so hopefully it will make it a little easier.
                          sigpic

                          Comment

                          Working...